– 44 –
XML File
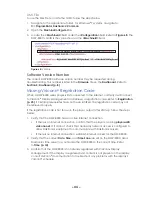
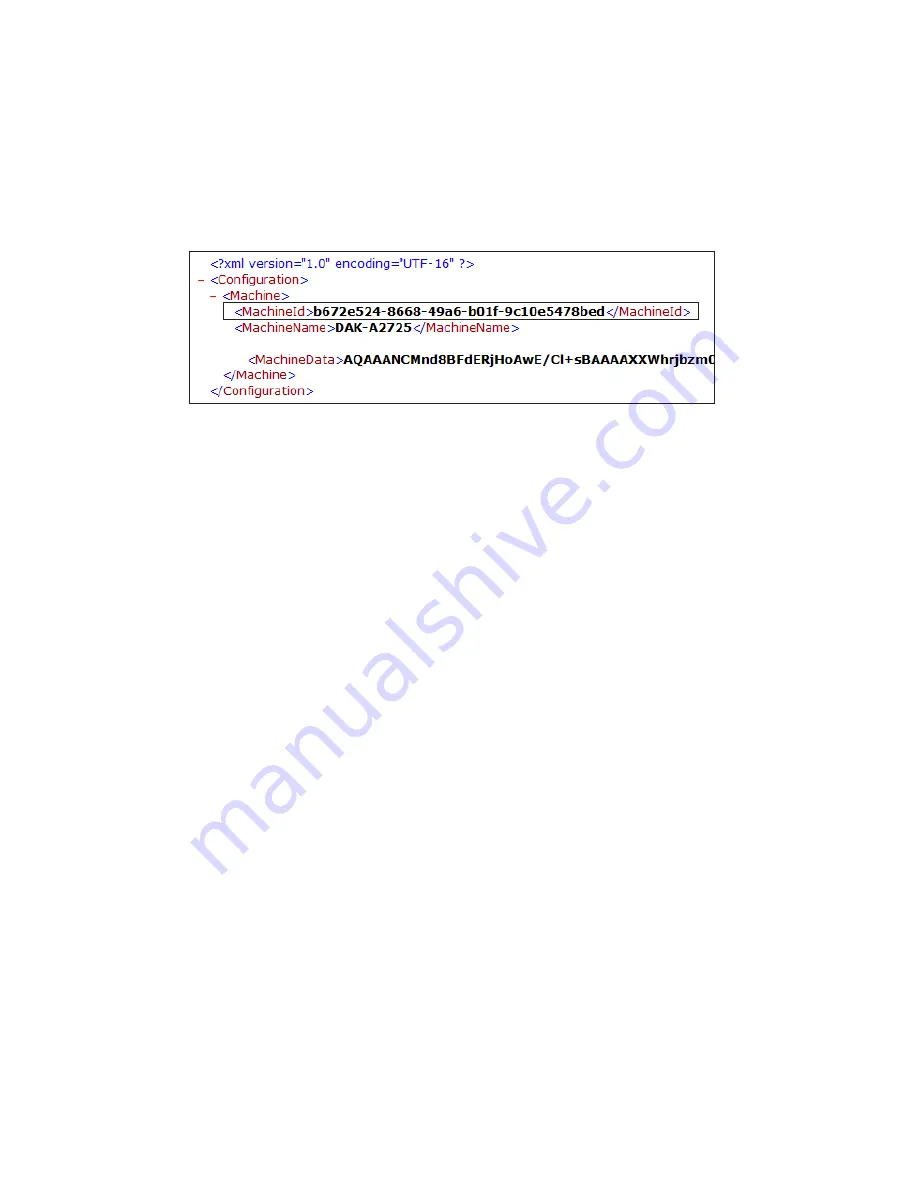
To use the XML file to locate the GUID, follow the steps below:
1. Navigate to the appropriate folder. For Windows
®
7 systems, navigate to:
C:\ProgramData\Daktronics\Common
2. Open the
MachineConfig.xml
file.
3. Locate the
<MachineId>
field under the
<Configuration>
. The
DMP-8000’s GUID is the value shown in the
<MachineId>
field.
Figure 68:
XML File
Software Version Number
The current DMP-8000 software version number may be requested during
troubleshooting. This number is listed in the
Firmware
tile on the
Dashboard
. Refer to
.
Missing Visiconn
®
Registration Code
When a DMP-8000 series player is first connected to the internet, normally it will connect
to Visiconn
®
Display Management and retrieve a registration code. Refer to
. If certain prerequisites have not been satisfied, the registration code may not
be retrieved properly.
If the registration code is not shown in the player output after start up, follow the steps
below:
1. Verify that the DMP-8000 has an active internet connection.
•
If there is an internet connection, confirm that the player can ping
playerws20.
visiconn.net
. If it cannot, check that necessary network access is configured to
allow Daktronics equipment to communicate with Daktronics servers.
• If there is no internet connection, establish internet access for the DMP-8000.
2. Verify that the correct
Date
,
Time,
and
Time Zone
are set on the DMP-8000. Use a
Daktronics time server to synchronize the DMP-8000 to the correct time. Refer
.
3.
Confirm that the DMP-8000 is not already registered with Visiconn
®
Display
Management. If the display is registered and content is not present on the display,
consult Visiconn
®
documentation to troubleshoot any problems with the display’s
Visiconn
®
schedule.
Summary of Contents for DMP-8000 Series
Page 52: ...48 This page intentionally left blank...
Page 54: ...50 This page intentionally left blank...
Page 56: ......
Page 62: ...This page intentionally left blank...


