DMP-8122 Installation Quick Guide
DD4945520
Rev 04
16 March 2023
201 Daktronics Drive Brookings, SD 57006
www.daktronics.com/support
800.325.8766
Page 2 of 7
3.
Follow steps 2-9 from the
DMP-8122 Setup
section to complete setup.
Rack Mounting
1.
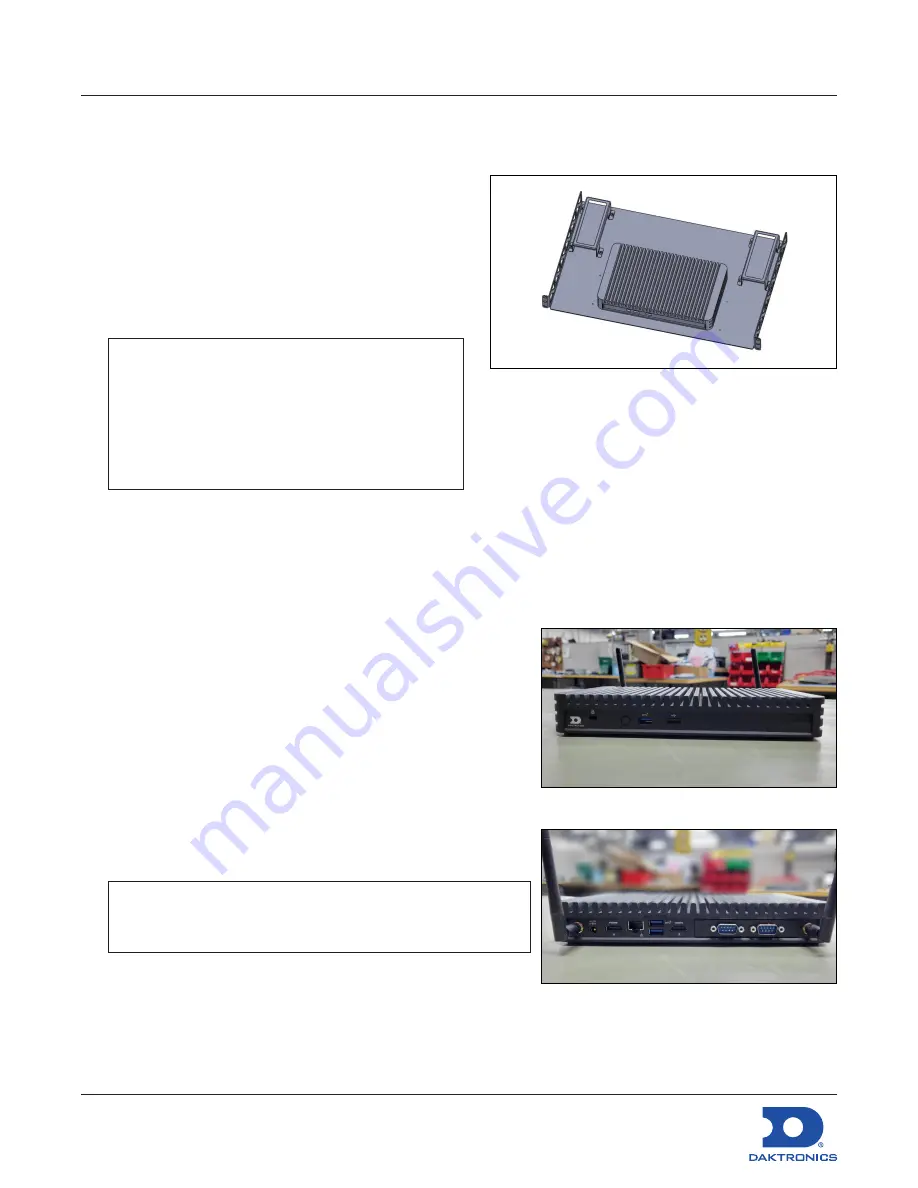
Locate the player rack shelf.
2.
Attach the player to the rack shelf using the
two direct screw mounts
and screws. Refer to
Figure 3
.
3.
Remove the four screws securing the power
block bracket. Refer to
Figure 3
.
4.
Place the power block inside the bracket.
Note:
Check that the orientation of the power
block has the power cord coming out
the back of the rack.
Note:
It is recommended to use the right
power supply bracket, though either
can be used.
5.
Reattach the power block bracket to the rack shelf. Refer to
Figure 3
.
6.
Secure the rack shelf to the rack.
7.
Follow
Steps 5
and
6
from the
DMP-8122 Setup
section to reconnect power.
DMP-8122 Setup
1.
Unbox components and ensure all are present. Refer to
Figure 1
.
2.
Screw each antenna into the DMP-8122. Refer to
Figure 4
and
5
.
3.
Plug the HDMI cable into
HDMI port (A)
on the DMP-8122.
Refer to
Figure 5
.
4.
Plug the other end into an available HDMI port on the
display.
5.
Plug the second HDMI cable into
HDMI port (B)
on the
DMP-8122. Refer to
Figure 5
.
6.
Plug the other end into HDMI 1 port on the display.
Note:
Identify which HDMI ports are used on the display
as it might be necessary to switch the display to
the proper input for the unit function.
7.
Plug first Serial cable to DB9 [Comm Port] connector on
the player slot 1 (left) and RS232 connector on the display
if using Display Control. Refer to
Figure 5
.
8.
Connect Display 1
RS232 Out
to Display 2
RS232 In
using 3.5 mm cable. Refer to
System Riser
Drawings & General Diagrams
for detail of displays connected in series.
Figure 3:
DMP-8122 Rack
Figure 4:
DMP-8122 (Front)
Figure 5:
DMP-8122 (Back)


