Troubleshooting
16
Replacing a Driver
If the driver status indicators are not working correctly, the driver may need replacement.
1�
Open the front panel as described in
Component Locations and Access (p.14)
.
2�
Remove the metal cover of the driver enclosure by lifting it up, then back and down
to expose the driver components.
3�
Disconnect all plugs from the driver by squeezing the locking tabs together and
pulling the connectors free. It may be helpful to label the cables or take a picture to
know which plug goes to which jack when connecting the replacement driver.
4�
Remove the nuts securing the driver to the inside of the enclosure.
5�
Carefully lift the driver from the display and place it on a clean, flat surface.
6�
Position a new driver over the screws and tighten the nuts.
7�
Reconnect all plugs to their mating jacks on the driver. The connectors are keyed
and will attach in one way only. Do not force the connections.
8�
Ensure the new driver is set to the correct address. This will be the same address of the
old driver being replaced. Refer to
Setting the Driver Address (p.16)
.
9�
Put the metal cover back on the enclosure, securely close the front panel, and then
power up and test the display to verify the issue has been resolved.
Setting the Driver Address
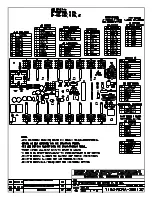
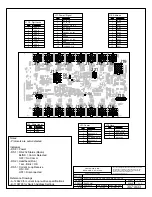
Reference Drawings:
Address Table; Rotary Switches H and L ........................................................
DWG-1198765
Since the same LED drivers can be used for many display models, each driver must be set
to receive the correct signal input, or address, for the model being used.
• For 16-column “Gyrus” drivers, addresses
are set through the S2 (L) and S3 (H) rotary
switches on the driver (Figure 7) using a small
flathead screwdriver. The displays in this
manual will always be set to
Address 2
, where
H = 0 and L = 2.
• For older 16-column drivers built prior to April
2015, addresses are set through the S1 dip
switch on the driver using a pen or small,
pointed object. The displays in this manual will
always be set to
Address 2
, where switch 2 is
set to ON (up).
Replacing Batteries
As the batteries age, they may lose capacity to sufficiently operate the display, even
on a full charge. When replacement becomes necessary, use the same brand of
battery as the original equipment. Similar batteries may be used as long as they meet
the specifications for the display. If a different brand must be used, be sure that the
terminals are oriented the same as in the original to ensure a proper connection. Refer to
for part numbers of batteries and fuses.
Mounting brackets hold the batteries in place at the bottom of the display. The bracket
is designed to hold batteries measuring 7" high, 6.5" wide, and 5" deep (178 mm, 165 mm,
127 mm). The bracket is not designed to support a battery of different dimensions.
H
L
Figure 7:
Driver Address Dials
Summary of Contents for P1753
Page 4: ...This page intentionally left blank...
Page 26: ...This page intentionally left blank...
Page 28: ......
Page 38: ...This page intentionally left blank...


