background image

Troubleshooting

23

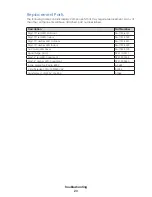
Replacement Parts

The following table contains display components that may require replacement. Many of 

the other components will have attached part number labels.

Description

Part Number

Digit, 10" red LED, Outdoor

0A-1192-6121

Digit, 10" red LED, Indoor

0A-1192-5122

Digit, 10" amber LED, Outdoor

0A-1192-5221

Digit, 10" amber LED, Indoor

0A-1192-5222

16-Column LED Driver

0A-1782-0100

Signal Surge Card

0P-1110-0011

Digit, 5” red LED, 7-segment

0P-1192-1259

Digit, 5” amber LED, 7-segment

0P-1192-0260

Surge protector, 3 pole, 650 V

A-1489

Circuit Breaker, 15A, 120/240 VAC

S-1035

Transformer, 115/230 V @ 6.25 A

T-1066

Summary of Contents for SW-2001

Page 1: ...ATICS TRACK LED SCOREBOARDS DISPLAY MANUAL P1153 DD3043167 Rev 03 24 February 2021 Models SW 2101 SW 2216 SW 2008 SW 2106 SW 2118 SW 2009 SW 2108 SW 2220 SW 3104 SW 2110 SW 2001 SW 3108 SW 2116 SW 2002 SW 3118 SW 2118 SW 2003 SW 2120 SW 2004 SW 2206 SW 2005 SW 2208 SW 2006 SW 2210 SW 2007 ...

Page 2: ...he limits for a Class A digital device pursuant to part 15 of the FCC Rules These limits are designed to provide reasonable protection against harmful interference when the equipment is operated in a commercial environment This equipment generates uses and can radiate radio frequency energy and if not installed and used in accordance with the instruction manual may cause harmful interference to ra...

Page 3: ...board Power 8 Grounding 8 Power Connection 8 Outdoor Scoreboard Power 9 Grounding 9 Installation with Ground and Neutral Conductors Provided 9 Installation with Only a Neutral Conductor Provided 10 Lightning Protection 10 Installing Load Centers 10 Connection 10 Power On Self Test POST 11 Indoor Signal Connection 12 Outdoor Signal Connection 12 Wireless Signal Connection 13 Internal Cable Routing ...

Page 4: ...arts 23 5 Daktronics Exchange and Repair Return Programs 24 Exchange Program 24 Repair Return Program 25 Daktronics Warranty Limitation of Liability 25 A Mechanical Drawings 27 B Electrical Drawings 51 C Daktronics Warranty Limitation of Liability 79 ...

Page 5: ...quipment or allow it to get wet Specifications Label Power specifications as well as serial and model number information can be found on an ID label similar to the one shown in Figure 1 DAKTRONICS 201 DAKTRONICS DR BROOKINGS SD PHONE 800 325 8766 SUITABLE FOR SERVICING ONLY WHEN DE ENERGIZED PUET FAIRE L OBJET D UN ENTRETIEN UNIQUEMENT S IL EST HORS TENSION LL 4284957 THIS DEVICE COMPLIES WITH PAR...

Page 6: ...nclude control room layout and schematic Final Assembly Drawings describe internal component locations and detailed product appearance with part numbers and quantities Project specific information takes precedence over any other general information found in this manual Ensure all applicable material has been gathered before beginning the installation Contact a Daktronics sales coordinator or proje...

Page 7: ...e at www daktronics com manuals OmniSport 2000 Timing Console Operation Manual ED 13312 It is also possible for these displays to be controlled via third party timing consoles such as those produced by Omega and Colorado Timing Systems CTS In these cases refer to the documentation provided by the manufacturer Product Safety Approval Daktronics outdoor displays are ETL listed and tested to CSA stan...

Page 8: ...om the information provided in this manual or installations designed and installed by others Installing Caption Modules Reference Drawings Caption Layout 6 Lane Multi Sport Systems DWG 130319 Caption Layout 8 Lane Multi Sport Systems DWG 130321 Caption Layout 10 Lane Multi Sport Systems DWG 130801 Caption Module Detail DWG 130840 Note Attach the caption module to the digit module before attaching ...

Page 9: ...features carrying handles and may not need to be wall mounted However it may be mounted to a floor stand for greater stability Refer to DWG 253540 Vertical Wall Mounting Indoor or Outdoor Reference Drawings Vertical Wall Mount DWG 130545 Use this method when the overall display has modules mounted on top of one another 1 Before attaching the digit module to the wall attach the caption module to th...

Page 10: ...unt the lowest module first and then add modules working upward 5 Starting with the bottom right module insert the screw heads on the end brackets of the left side of the cabinet into the keyholes on the mating bracket of the right side of the left column cabinet and press down on the right side until both cabinets are flush and level horizontally Refer to DWG 129907 6 Once the right column cabine...

Page 11: ... the holes in each bracket and threading them into the captivated nuts on the back of the module 2 With the brackets attached position the module against the beam and secure it with the 1 2 13 x 15 threaded rods lock washers and nuts provided The rods do not go through the beam but pass along either side no drilling is required The square nuts go inside the bracket while the lock washers and hex n...

Page 12: ...cally grounded Only qualified individuals may perform electrical work including verification of ground resistance Daktronics is not responsible for improper grounding or damage incurred as a result of improper grounding Grounding methods must meet the provisions of all applicable local and national codes Inspect and verify all grounding methods meet the provisions of all applicable local and natio...

Page 13: ...luding but not limited to displays control equipment and connected peripheral equipment must be electrically grounded Only qualified individuals may perform electrical work including verification of ground resistance Daktronics is not responsible for improper grounding or damage incurred as a result of improper grounding Grounding methods must meet the provisions of all applicable local and nation...

Page 14: ...coreboard The harsher environment and outdoor electrical hookup requirements mandate the use of this component Refer to DWG 129998 along with the instructions below to mount the load center in the display during installation 1 Remove the lower left panels from the lowest digit module in the display and remove the nuts from the three screws already installed in the cabinet 2 If the load center cove...

Page 15: ...rol console is powered off or not connected If the control console is connected and powered on the self test does not run and data from the control console appears on the display after a few seconds Each self test pattern will vary depending on the model the number of drivers and types of digits Figure 6 shows an example of the LED bar test pattern that each digit performs Figure 6 Digit Segment P...

Page 16: ...the OmniSport 2000 console If using a Shot Clock Start Stop Switch part 0A 1196 0031 connect it to the J9 jack on the OmniSport 2000 console Outdoor Signal Connection Route copper signal cable through the conduit knockout on the rear of the display to the signal surge arrestor card Figure 7 located in the load center At the SIGNAL IN terminal block connect red signal wire to positive and black sig...

Page 17: ...le Routing DWG 130679 Horizontal or side by side modules require installation of a power signal interconnect cable Only one interconnect cable is needed for each installation Refer to DWG 130679 Connect the modules by running the interconnect cable from the driver of the bottom left module to the driver of the bottom right module There are knockouts in the ends of the modules through which the cab...

Page 18: ... 0 Line 9 or 9 and 10 49 H 3 L 1 Line 10 50 H 3 L 2 Home Guest 1 Guest 2 Guest 3 31 H 1 L F Event Heat Lengths Record Time 32 H 2 L 0 Omega OSM6 or Scan O Vision Function Address Line 1 or 1 and 2 1 H 0 L 1 Line 2 or 2 and 3 2 H 0 L 2 Line 3 or 3 and 4 3 H 0 L 3 Line 4 or 4 and 5 4 H 0 L 4 Line 5 or 5 and 6 5 H 0 L 5 Line 6 or 6 and 7 6 H 0 L 6 Line 7 or 7 and 8 7 H 0 L 7 Line 8 or 8 and 9 8 H 0 L...

Page 19: ...0 10 H 0 L A 0A Lengths Record Time 11 H 0 L B 0B Event Heat 0C Home Guest 13 H 0 L D 0D 1 Line Timing Display 15 H 0 L F 0F Home Guest 1 20 H 1 L 4 14 Guest 2 Guest 3 15 Time of Day 22 H 1 L 6 16 Line 1 MS w Horn 41 H 2 L 9 01 Line 2 MS w Horn 42 H 2 L A 02 Line 3 MS w Horn 43 H 2 L B 03 Line 4 MS w Horn 44 H 2 L C 04 Line 5 MS w Horn 45 H 2 L D 05 Line 6 MS w Horn 46 H 2 L E 06 Line 7 MS w Horn ...

Page 20: ...s Line 1 or 1 and 2 1 H 0 L 1 Line 2 or 2 and 3 2 H 0 L 2 Line 3 or 3 and 4 3 H 0 L 3 Line 4 or 4 and 5 4 H 0 L 4 Line 5 or 5 and 6 5 H 0 L 5 Line 6 or 6 and 7 6 H 0 L 6 Line 7 or 7 and 8 7 H 0 L 7 Line 8 or 8 and 9 8 H 0 L 8 Line 9 or 9 and 10 9 H 0 L 9 Line 10 10 H 0 L A Event Heat 11 H 0 L B Omega Quantum Function Address Line 1 or 1 and 2 1 H 0 L 1 Line 2 or 2 and 3 2 H 0 L 2 Line 3 or 3 and 4...

Page 21: ...cessary Display digits do not light but console works No wired signal from control console Check that the display is receiving 120 or 240 VAC power Check that the red DS5 LED on the driver lights up when sending commands from the console See LED Drivers p 20 No radio signal from control console Verify that both the console and display antennas are securely tightened and in a vertical position Keep...

Page 22: ...LEDs do not light or they blink Bad connection Verify the connector on the back of the digit circuit board is secure Bad digit or driver Exchange the digit or driver with a working one of the same part to verify the problem Replace if necessary See Replacing Digits p 19 or LED Drivers p 20 Display works but some digits do not light Bad digit or driver see solution above Incorrect sport code see so...

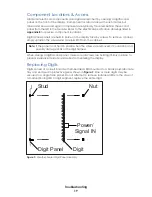
Page 23: ...nd carefully lift it from the cabinet Note If the panel is not held in place when the screws are removed it could drop and possibly damage LEDs or the digit harness When closing a digit access panel make sure all screws are holding it firmly in place to prevent excessive moisture and debris from entering the display Replacing Digits Digits consist of a circuit board with embedded LEDs mounted to a...

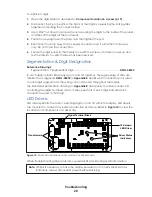
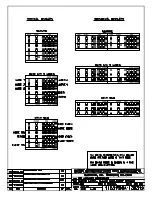
Page 24: ... drawings in Appendix B also specify the driver connectors controlling the digits Numbers shown in the upper half of each digit indicate which connector is wired to that digit LED Drivers LED drivers perform the task of switching digits on and off within the display LED drivers are mounted to a driver tray inside a protective enclosure Refer to Figure 10 to view the location and components of a dr...

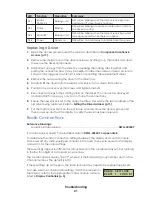
Page 25: ...n the nuts 7 Reconnect all plugs to their mating jacks on the driver The connectors are keyed and will attach in one way only Do not force the connections 8 Ensure the new driver is set to the correct address This will be the same address of the old driver being replaced Refer to Setting the Driver Address p 13 9 Put the metal cover back on the enclosure securely close the access panel and then po...

Page 26: ...eave FUNC set to 1 Refer to Figure 12 6 Screw the cover back on and securely close the access panel 7 Enter the correct sport code and new radio settings into the console to test the radio control Refer to the appropriate control console manual listed in Display Controllers p 3 For more information refer to the Gen VI Radio Installation Manual DD2362277 available online at www daktronics com manua...

Page 27: ...igit 10 red LED Outdoor 0A 1192 6121 Digit 10 red LED Indoor 0A 1192 5122 Digit 10 amber LED Outdoor 0A 1192 5221 Digit 10 amber LED Indoor 0A 1192 5222 16 Column LED Driver 0A 1782 0100 Signal Surge Card 0P 1110 0011 Digit 5 red LED 7 segment 0P 1192 1259 Digit 5 amber LED 7 segment 0P 1192 0260 Surge protector 3 pole 650 V A 1489 Circuit Breaker 15A 120 240 VAC S 1035 Transformer 115 230 V 6 25 ...

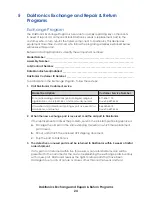
Page 28: ..._____ To participate in the Exchange Program follow these steps 1 Call Daktronics Customer Service Market Description Customer Service Number Schools including community junior colleges religious organizations municipal clubs and community centers 877 605 1115 Fax 605 697 4444 Universities and professional sporting events live events for auditoriums and arenas 866 343 6018 Fax 605 697 4444 2 When ...

Page 29: ...nt damage during shipment Electronic components such as printed circuit boards should be placed in an antistatic bag before boxing Daktronics does not recommend using packing peanuts when shipping 4 Enclose name address phone number the case number a clear description of symptoms 5 Ship to Daktronics Customer Service Case 201 Daktronics Drive Dock E Brookings SD 57006 Daktronics Warranty Limitatio...

Page 30: ...This page intentionally left blank ...

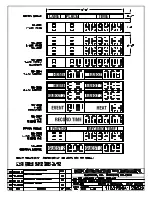
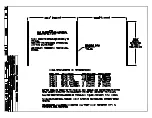
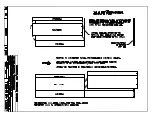
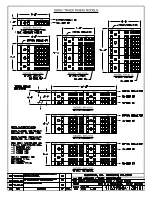
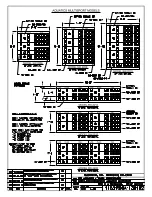
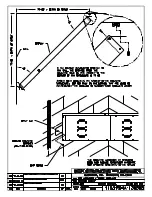
Page 31: ...Aquatics Multisport DWG 130102 Caption Layout 6 Lane Multi Sport Systems DWG 130319 Caption Layout 8 Lane Multi Sport Systems DWG 130321 Corner Mount DWG 130508 Vertical Wall Mount DWG 130545 Caption Layout 10 Lane Multi Sport Systems DWG 130801 Caption Module Detail DWG 130840 Beam Mounting Procedure DWG 194664 Beam Mounting Side View DWG 194671 Mechanical Specifications 1 Line Digit Module DWG 1...

Page 32: ...This page intentionally left blank ...

Page 33: ......

Page 34: ......

Page 35: ......

Page 36: ......

Page 37: ......

Page 38: ......

Page 39: ......

Page 40: ......

Page 41: ......

Page 42: ......

Page 43: ......

Page 44: ......

Page 45: ......

Page 46: ......

Page 47: ......

Page 48: ......

Page 49: ......

Page 50: ......

Page 51: ......

Page 52: ......

Page 53: ......

Page 54: ...This page intentionally left blank ...

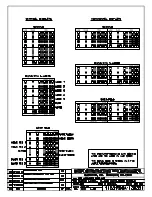
Page 55: ...pec SW 2004 13 14 11 12 DWG 130054 Elec Spec SW 2006 13 14 11 12 DWG 130284 Elec Spec SW 2007 13 14 11 12 DWG 130286 Elec Spec SW 2008 13 14 11 12 DWG 130309 Elec Spec SW 2002 13 14 11 12 DWG 130312 Elec Spec SW 2005 13 14 11 12 DWG 130316 Electrical Hookup Indoor Display 120 V DWG 130661 Electrical Hookup Indoor Display 230 V DWG 130676 Internal Cable Routing DWG 130679 Riser Diagram with CTS Tim...

Page 56: ...This page intentionally left blank ...

Page 57: ......

Page 58: ......

Page 59: ... WITHOUT THE EXPRESSED WRITTEN CONSENT OF DAKTRONICS INC COPYRIGHT 2012 DAKTRONICS INC DAKTRONICS INC BH DRAWN DATE SHEET JOB NO REV EQUIPMENT LAYOUT 50M SWIM COURSE 1 INDECK HBONER 10 SEP 99 P1109 R 10 B NONE JWARNE 121329 02 DATE REV BY 02 28 FEB 12 JJL UPDATED PART NUMBERS PER REDLINES UPDATED BOARDER AND TITLE BLOCK ...

Page 60: ......

Page 61: ......

Page 62: ...OPRIETARY DO NOT REPRODUCE BY ANY MEANS WITHOUT THE EXPRESS WRITTEN CONSENT OF DAKTRONICS INC COPYRIGHT 2015 DAKTRONICS INC DAKTRONICS INC AV DRAWN DATE SHEET JOB NO REV LED AQUATICS SCOREBOARD ELECTRICAL HOOKUP OUTDOOR DISPLAY A VANBEMMEL 24 MAR 00 P1153 R 10 A 1 10 AVB 129998 03 ...

Page 63: ......

Page 64: ......

Page 65: ......

Page 66: ......

Page 67: ......

Page 68: ......

Page 69: ......

Page 70: ...RIETARY DO NOT REPRODUCE BY ANY MEANS WITHOUT THE EXPRESS WRITTEN CONSENT OF DAKTRONICS INC COPYRIGHT 2015 DAKTRONICS INC DAKTRONICS INC AV DRAWN DATE SHEET JOB NO REV LED AQUATICS SCOREBOARD ELECTRICAL HOOKUP INDOOR DISPLAY 120V A VANBEMMEL 10 APR 00 P1153 R 10 A 1 10 AVB 130661 03 ...

Page 71: ...RIETARY DO NOT REPRODUCE BY ANY MEANS WITHOUT THE EXPRESS WRITTEN CONSENT OF DAKTRONICS INC COPYRIGHT 2015 DAKTRONICS INC DAKTRONICS INC AV DRAWN DATE SHEET JOB NO REV LED AQUATICS SCOREBOARD ELECTRICAL HOOKUP INDOOR DISPLAY 230V A VANBEMMEL 10 APR 00 P1153 R 10 A 1 10 AVB 130676 03 ...

Page 72: ...AH LED AQUATICS SCOREBOARD INTERNAL CABLE ROUTING A VANBEMMEL 11 APR 00 P1153 R 10 A 1 20 130679 03 ...

Page 73: ...E EXISTING COLORADO J BOX 1 4 MONO JACK WITH DAKTRONICS 0A 1009 0038 STEREO J BOX 0A 1240 0038 DAKTRONICS 1 4 STERO TO STEREO CABLE W 1236 DAKTRONICS 1 4 STERO TO STERO CABLE 0A 1009 0038 0A 1009 0038 WIRED TO PLUG INTO CTS TIMER WIRED TO PLUG INTO DAKTRONICS J BOX FOR FIXED DIGIT SCBD 0A 1009 0038 120VAC OR 240VAC 120VAC OR 240VAC CTS TIMER WIRED WITH DAKTRONICS SIGNAL CABLE CTS TIMER WIRED USING...

Page 74: ......

Page 75: ......

Page 76: ...NS AND STARTING EQUIPMENT 04 15 SEPT 09 CME ADDED RADIO TO HYTEK OPTION 05 19 AUG 11 KZB UPDATED CABLES FROM RADIOS 07 02 AUG 13 CME CHANGED RADIO S TO CONNEXLINK PRO AND UPDATED CABLES BETWEEN HY TEK AND OMNISPORT AH OMNISPORT 2000 SYSTEM RISER FB TRACK SCBD W OMNI2K TRACK SIDE MMILLER 08 APR 03 P1240 R 01 A NONE MMILLER 186535 08 08 23 MAR 15 HBB ADDED SL NOTE AND OMNI PART NUMBER TO HELP CLEAN ...

Page 77: ......

Page 78: ...DATE REV BY DATE REV BY HORN 2 3 4 1 DATE REV BY 03 3 MAR 15 KCS UPDATED WITH GYRUS AND ADAPTOR HARNESS VIEWS ...

Page 79: ...AN BLU ORN RED J43 1 2 4 TB31 1 2 3 P42 2 3 4 1 TAN RELAY SW IN SW OUT J18 HORN SEG AQUATICS DRIVER ENCLOSURE 11 11 12 12 DRIVER LED 4 WHT 8 6 T1 1 2 SECONDARY 16V AC BRN 10 WHT 6 5 2 1 T2 P17 WHT TAN BRN BLK PNK RED 4 4 SIG OUT 16V AC IN 16V AC IN 5 6 7 8 9 9 8 7 6 5 10 10 SIG IN SIG IN SIG OUT 1 2 3 3 2 1 J17 BRN 10 8 5 4 3 4 2 1 TAN PNK ORN BLU BLU ORN PNK 1 2 3 4 J42 P51 J51 LS1 HORN P50 J50 1...

Page 80: ...AN BLU ORN RED J43 1 2 4 TB31 1 2 3 P42 2 3 4 1 TAN RELAY SW IN SW OUT J18 HORN SEG AQUATICS DRIVER ENCLOSURE 11 11 12 12 DRIVER LED 4 WHT 8 6 T1 1 2 SECONDARY 16V AC BRN 10 WHT 6 5 2 1 T2 P17 WHT TAN BRN BLK PNK RED 4 4 SIG OUT 16V AC IN 16V AC IN 5 6 7 8 9 9 8 7 6 5 10 10 SIG IN SIG IN SIG OUT 1 2 3 3 2 1 J17 BRN 10 8 5 4 3 4 2 1 TAN PNK ORN BLU BLU ORN PNK 1 2 3 4 J42 P51 J51 LS1 HORN P50 J50 1...

Page 81: ...IF IT IS REQUIRED SEE ASSEMBLY PACKET AND DRAWINGS FOR ALL PART NUMBERS AND COMPONENT LOCATION P50 LS1 DS 1040 HORN C1 C 1122 1 2 3 4 J51 5 RED BLK GRN WHT BLK GRN YEL 1 2 3 4 1 2 P42 J43 J18 HORN JACK DRIVER TRAY ASSY SEE BOM FOR PART DRIVER A1 SET ADDRESS PER POWER ADDRESS DOCUMENT 1 2 P43 1 2 3 4 J50 P18 1 2 3 4 HORN HARNESS INSERT PIN INTO PLUG CONNECT TO DRIVER WHT BLK 1 2 3 4 P51 5 RED BLK G...

Page 82: ...This page intentionally left blank ...

Page 83: ...Daktronics Warranty Limitation of Liability 79 C Daktronics Warranty Limitation of Liability This section includes the Daktronics Warranty Limitation of Liability statement SL 02374 ...

Page 84: ...This page intentionally left blank ...

Page 85: ...ty per Incoterms 2020 otherwise End User shall pay transportation charges to return the Equipment back to the End User and such Equipment shall be shipped Ex Works Daktronics designated facility per Incoterms 2020 All returns must be pre approved by Daktronics before shipment Daktronics shall not be obligated to pay freight for any unapproved return End User shall pay any upgraded or expedited tra...

Page 86: ... Daktronics or M paint or refinishing the Equipment or furnishing material for this purpose 3 Limitation of Liability A Daktronics shall be under no obligation to furnish continued service under this Warranty if alterations are made to the Equipment without the prior written approval of Daktronics B It is specifically agreed that the price of the Equipment is based upon the following limitation of...

Page 87: ...ration of this warranty Alternatively an Extended Service Agreement may be purchased in conjunction with this Warranty for extended additional services For further information contact Daktronics Customer Service at 1 800 DAKTRONics 1 800 325 8766 Additional Terms applicable to sales outside of the United States The following additional terms apply only where the installation site of the Equipment ...

Page 88: ...This page intentionally left blank ...

Reviews: