ASSEMBLY INSTRUCTIONS
Item No: TR90473
Tools Required for Assembly:
Allen Wrench, Wrench (provided)
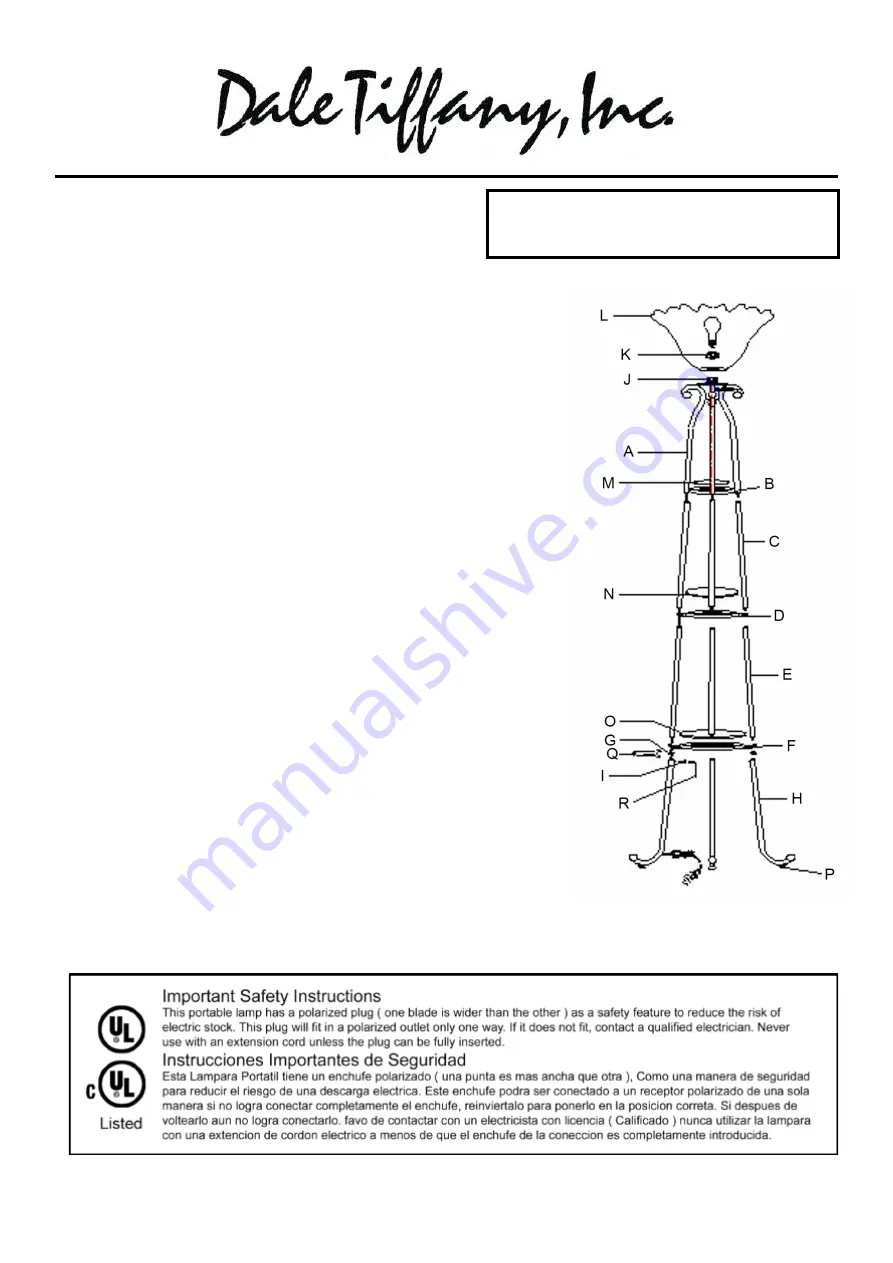
1.
Begin the assembly of the lamp from top and proceed down towards
the bottom.
2.
Screw upper columns (C) into pre-assembled rack (A).
3.
Place middle bracket (D) under upper columns (C) and screw center
columns (E) into upper columns (C).
4.
Place lower bracket (F) under center columns (E) and screw nuts (G)
using the Wrench (Q), securing the bracket in place.
5.
Screw lower columns (H) to lower bracket (F), make sure to turn feet
outwards as shown, and tighten screws (I) with the Allen Wrench (R).
6.
Stand the fixture up and use level adjustment (P) to balance the lamp.
7.
Place the shade (L) over socket (J) and tighten socket ring (K)
securing the shade in place.
8.
From smallest to largest, place glass (M), (N), and (O) onto brackets
(B), (D), and (F).
9.
Insert bulb into bulb socket.
Uses maximum (1) 150Watt, 3Way, Type A Bulb
Or maximum (1) 25Watt, CFL Bulb
(Bulb not included)
Cleaning of your lamp.
Unplug lamp, wipe with a damp cloth.
Do not use abrasives
*SAVE THESE INSTRUCTIONS FOR FUTURE REFERENCE.
Made in China Revision – 04/16/12
FOR RETURN SHIPPING PURPOSES:
PLEASE RETAIN ORIGINAL PACKAGING
TO MINIMIZE DAMAGE.