CARE AND MAINTENANCE
PORCELAIN OVEN INTERIOR (continued)
Cautions about using spray-on oven cleaners:
• Do not allow a
fi
lm from the cleaner to remain on the temperature sensor - it could cause the oven to heat improperly.
(The sensor is located at the top of the oven.) Carefully wipe the bulb clean after each oven cleaning, being careful
not to move the sensor since a change in its position could affect how the oven bakes.
• Do not spray any oven cleaner on the outside oven door, handles or any exterior surface of the oven, cabinet or
painted surfaces. The cleaner can damage these surfaces.
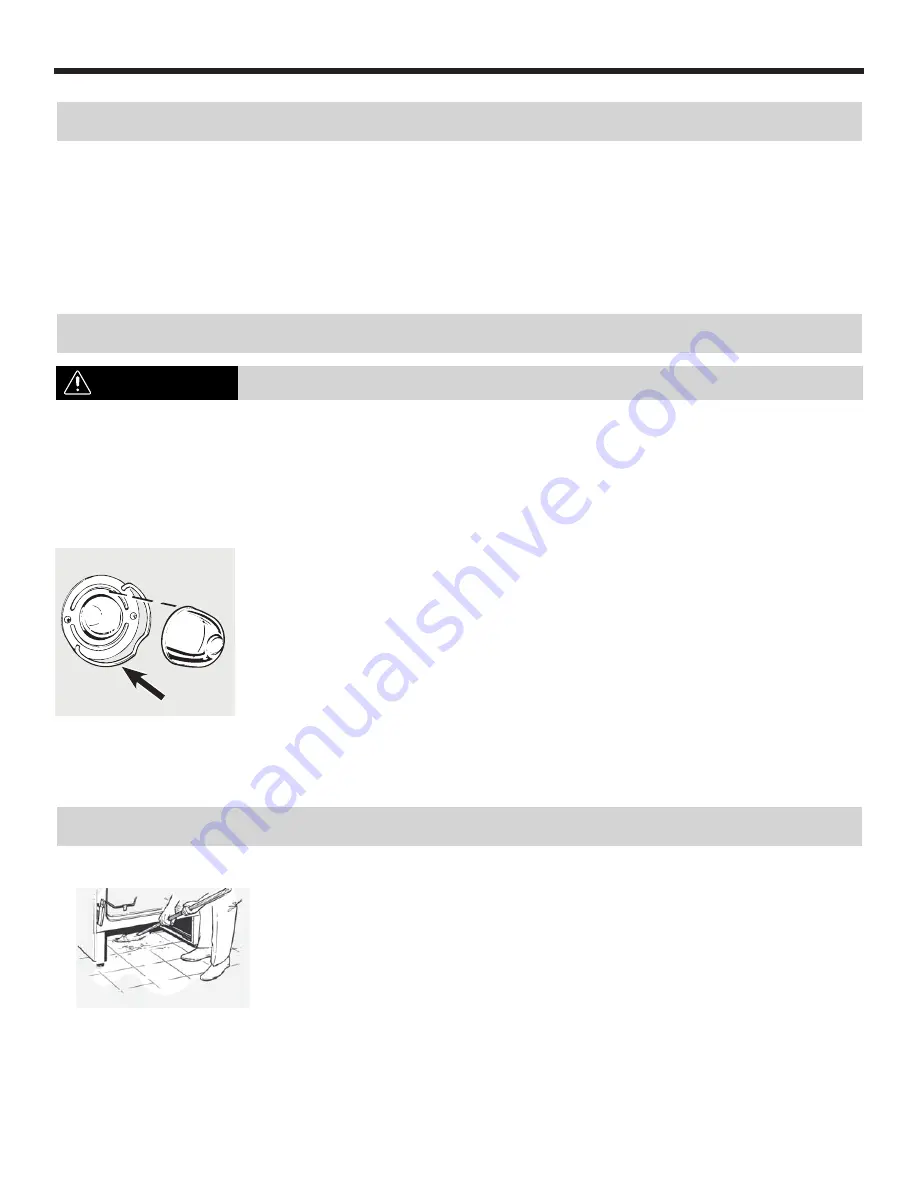
The oven light bulb is covered with a removable glass cover that is held in place with a
bail-shaped wire. Remove the oven door, if desired, to reach the cover easily.
Be sure to let the light cover and bulb cool completely.
To remove the cover:
1. Hold a hand under the cover so it doesn’t fall when released. With the
fi
ngers of the
same hand,
fi
rmly push back the wire cover holder. Lift off the cover.
Do not remove
any screws to remove the cover.
2. Do not touch the hot bulb with a wet cloth. Replace the bulb with a 40-watt appliance
bulb.
To replace the cover:
1. Place it into the groove of the light receptacle. Pull the wire forward to the center of
the cover, until it snaps into place. When in place, the wire holds the cover
fi
rmly. Be
certain that the wire is in the depression in the center of the cover.
2. Connect the electrical power to the range.
SHOCK OR BURN HAZARD
Before replacing the oven light bulb, disconnect the electrical power to the range at the main fuse or circuit
breaker panel. Failure to do so may result in electric shock or burn. Be sure to let the light cover and bulb cool
completely.
Wire cover
holder
To remove the storage drawer:
1. Pull the drawer out all the way.
2. Tilt up the front and remove it.
To replace the storage drawer:
1. Insert glides at the back of the drawer beyond the stop on range glides.
2. Lift the drawer if necessary to insert easily.
3. Let the front of the drawer down, then push in to close.
Clean under the range
WARNING
OVEN LIGHT REPLACEMENT
STORAGE DRAWER REMOVAL
1
4
Summary of Contents for DER244BSS
Page 47: ...NOTE 45 ...
Page 48: ...NOTE 46 ...


