7
Adjust the Door
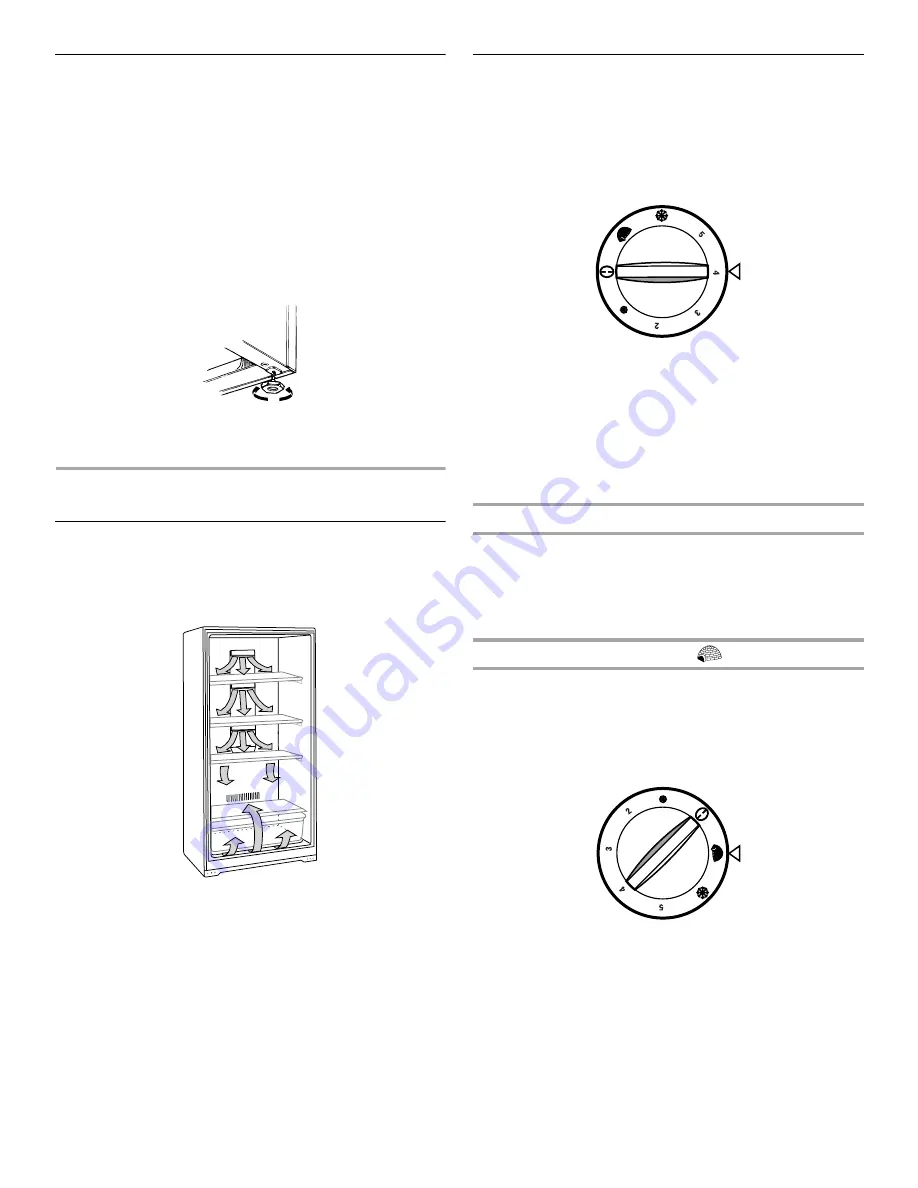
1. Locate the two front leveling legs taped among the packing
materials.
2. Screw these legs into the front holes on the bottom of the
freezer. The back of the freezer rests on two fixed supports.
3. Adjust the front legs enough to lift the cabinet up off of the
floor.
NOTE: If your model is equipped with rollers, the front legs
should be lowered enough to lift the rollers off of the floor to
ensure the freezer does not roll forward when the door is
opened.
4. Place a leveling tool on top of the freezer first side to side,
then front to back. Turn leg counterclockwise to raise a corner.
Turn leg clockwise to lower a corner.
5. Repeat Step 4 until freezer is level.
6. After freezer is fully loaded with food, recheck with level as in
Step 4.
FREEZER USE
Ensuring Proper Air Circulation
In order to ensure proper temperature, you need to permit proper
airflow in the freezer. As shown in the illustration, cool air enters
through the freezer wall and moves down. The air then
recirculates through the vent near the bottom.
Do not block any of these vents with food packages. If the vents
are blocked, airflow will be restricted, and temperature and
moisture problems may occur.
IMPORTANT: To avoid odor transfer and drying out of food, wrap
or cover foods tightly.
Using the Control
Turn the freezer temperature control to 4. This setting is designed
to maintain the temperature at or near 0°F (-17.8°C) under normal
operating conditions.
Allow the freezer to cool 6 to 8 hours before filling with frozen
food. Let the freezer cool overnight before adding large amounts
of unfrozen food. Do not add more than 2 to 3 lbs (907 to 1,350 g)
of unfrozen food per cubic foot (28.32 L) of freezer space.
NOTE: When the freezer is first started, the compressor will run
constantly until the freezer is cooled. It may take up to 6 or
8 hours (or longer), depending on room temperature and the
number of times the freezer door is opened. After the freezer is
cooled, the compressor will turn on and off as needed to keep the
freezer at the proper temperature.
The outside of your freezer may feel warm. This is normal. The
freezer’s design and main function is to remove heat from
packages and air space inside the freezer. The heat is transferred
to the room air, making the outside of the freezer feel warm.
Adjusting Control
■
Turn control to a higher number for colder temperatures.
■
Turn control to a lower number for less cold temperatures.
NOTE: The small snowflake icon represents the number 1 or
the least cold setting. The large snowflake icon represents 6 or
the coldest setting.
Fast Freeze (on some models)
This setting causes the freezer to run continuously, driving the
freezer temperature to the coldest possible temperature. To
activate, adjust the control knob to the igloo icon, which
represents the fast freeze setting. Use this feature just before
adding large amounts of unfrozen foods. For best food quality, do
not exceed 3 lbs (1,350 g) per cubic foot (28.32 L). Return to your
normal setting after 24 to 48 hours.
Summary of Contents for Designer DUF501WDD
Page 26: ...26 Notes...


