background image

4

INSTALLATION INSTRUCTIONS

Unpacking

Remove Packaging Materials

Remove tape and glue residue from surfaces before turning 
on the freezer. Rub a small amount of liquid dish soap over the 
adhesive with your fingers. Wipe with warm water and dry.

Do not use sharp instruments, rubbing alcohol, flammable 
fluids, or abrasive cleaners to remove tape or glue. These 
products can damage the surface of your freezer. For more 
information, see “Freezer Safety.”

Clean Before Using

After you remove all of the packaging materials, clean the inside of 
your freezer before using it. See the cleaning instructions in 
“Freezer Care.”

Location Requirements

IMPORTANT: Do not install the freezer near an oven, radiator, or 
other heat source, nor in a location where the temperature will fall 
below 40°F (5°C).
Check the strength of the floor before installing your freezer. It 
should hold the weight of a freezer fully loaded with food.
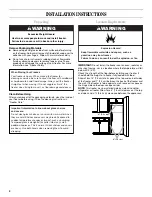
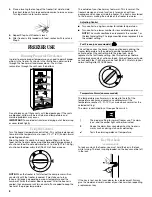
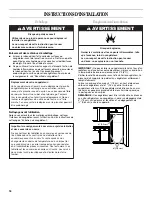
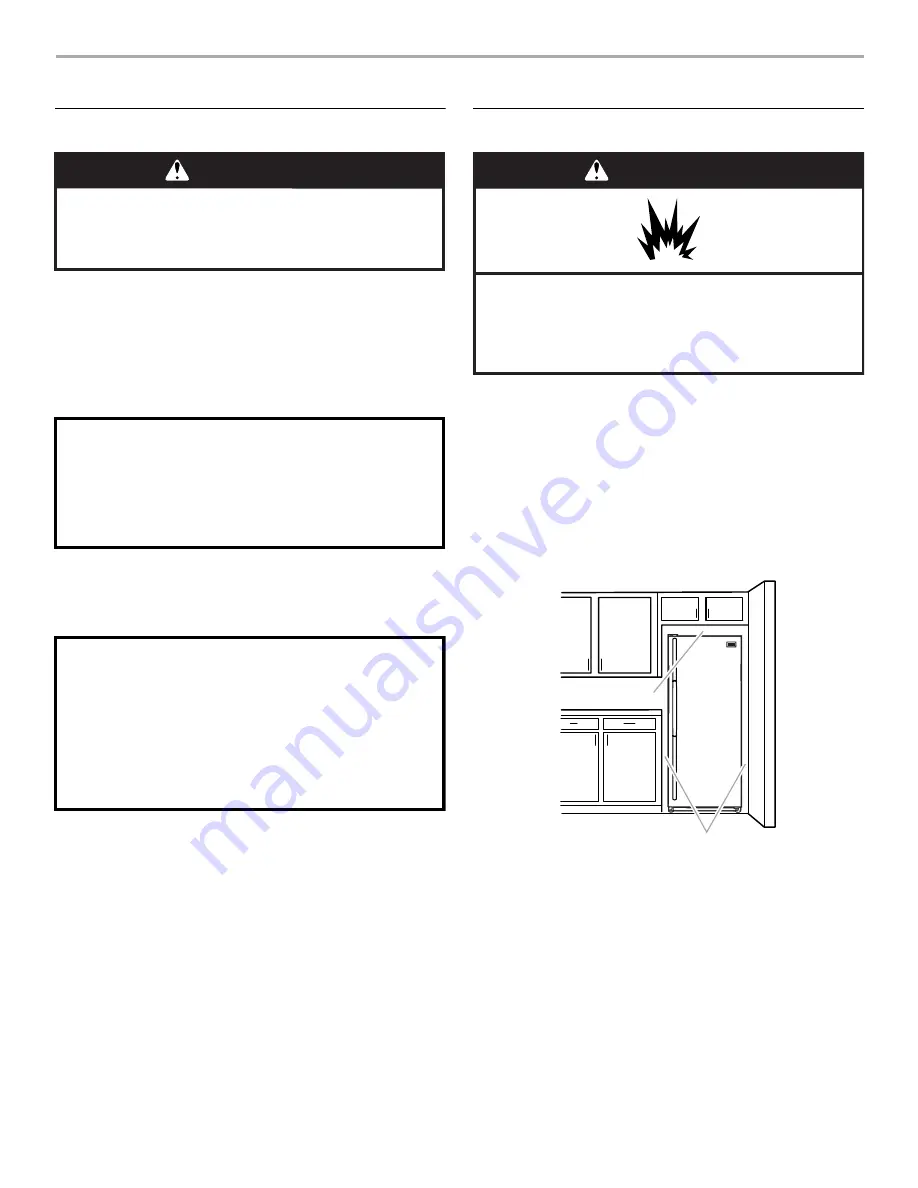
Allow at least 3" (7.5 cm) of air space at the top and on both sides 
of the freezer and 1" (2.5 cm) between the back of the freezer and 
the wall. If the freezer is to be against a wall, leave extra space on 
the hinge side so the door can open wider.
NOTE: This freezer may be installed side by side with another 
refrigerator or freezer. Allow for a 3" (7.5 cm) clearance at the top 
and sides and a 

¹⁄₄

" (0.64 cm) clearance between the appliances.

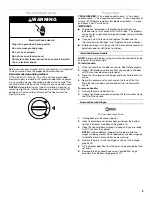
WARNING

Excessive Weight Hazard

Use two or more people to move and install freezer.

Failure to do so can result in back or other injury.

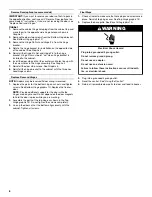
When Moving Your Freezer:

Your freezer is heavy. When moving the freezer for 
cleaning or service, be sure to cover the floor with cardboard
or hardboard to avoid floor damage. Always pull the freezer 
straight out when moving it. Do not wiggle or “walk” the 
freezer when trying to move it, as floor damage could occur.

Important information to know about glass shelves 
and covers:

Do not clean glass shelves or covers with warm water when 
they are cold. Shelves and covers may break if exposed to 
sudden temperature changes or impact, such as bumping. 
Tempered glass is designed to shatter into many small, 
pebble-size pieces. This is normal. Glass shelves and covers 
are heavy. Use both hands when removing them to avoid 
dropping.

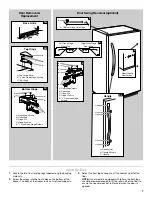
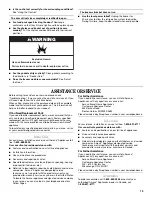
WARNING

Explosion Hazard

Keep flammable materials and vapors, such as 
gasoline, away from freezer.

Failure to do so can result in death, explosion, or fire.

 3" (7.5 cm)

 3" (7.5 cm)

Summary of Contents for DUFM454WDB

Page 1: ...ph Ontario Canada N1H 6Z9 Danby Products Inc Findlay Ohio USA 45840 Model Modèle Modelo v1 5 10 DM Owner s Use and Care Guide Guide d utilisation et soin de Propriètaire UPRIGHT FREEZER CONGÉLATEUR VERTICAL DUFM454WDB DUFM505WDB ...

Page 2: ...RRANTY 14 TABLE DES MATIÈRES SÉCURITÉ DU CONGÉLATEUR 15 Mise au rebut appropriée de votre vieux congélateur ou réfrigérateur 15 INSTRUCTIONS D INSTALLATION 16 Déballage 16 Emplacement d installation 16 Spécifications électriques 17 Portes du congélateur 17 Ajustement de porte 20 UTILISATION DU CONGÉLATEUR 20 Pour s assurer d une circulation d air appropriée 20 Utilisation de la commande 20 Serrure...

Page 3: ...rds that can kill or hurt you and others All safety messages will follow the safety alert symbol and either the word DANGER or WARNING These words mean follow instructions instructions DANGER WARNING IMPORTANT SAFETY INSTRUCTIONS To reduce the risk of fire electric shock or injury when using your freezer follow these basic precautions WARNING SAVE THESE INSTRUCTIONS Plug into a grounded 3 prong ou...

Page 4: ... wall leave extra space on the hinge side so the door can open wider NOTE This freezer may be installed side by side with another refrigerator or freezer Allow for a 3 7 5 cm clearance at the top and sides and a 0 64 cm clearance between the appliances WARNING Excessive Weight Hazard Use two or more people to move and install freezer Failure to do so can result in back or other injury When Moving ...

Page 5: ...r swing move the handle from one side of the door to the other side To install handle 1 Place the handle on the door as shown See Handle graphic 2 Using a flat blade screwdriver attach the handle to the door with the four handle screws provided 3 Place the trim pieces on the upper and lower handle ends as shown 4 Apply firm pressure with your hand on the face of the trim Slide the top trim down an...

Page 6: ... the cabinet with the three hex head hinge screws Replace Door and Hinges NOTE Graphic may be reversed if door swing is reversed 1 Replace the parts for the bottom hinge as shown and tighten screws See Bottom Hinge graphic 1C Replace the freezer door NOTE Provide additional support for the door while the hinges are being moved Do not depend on the door magnets to hold the door in place while you a...

Page 7: ...or to ensure the freezer does not roll forward when the door is opened A Cabinet Hinge Hole Plugs A 5 Door Handle Seal Screw Door Swing Reversal optional Door Removal Replacement Top Hinge Bottom Hinge A Top Hinge Cover B 3 8 Hex Head Hinge Screws C Top Hinge A B C Base Grille 2 C Hinge Pin A Door Stop Screws B Door Stop E 5 8 Hex Head Hinge Screws D Hinge Pin Nut C D E A B 1A 1B 1C 4 Right Hand H...

Page 8: ...f your freezer may feel warm This is normal The freezer s design and main function is to remove heat from packages and air space inside the freezer The heat is transferred to the room air making the outside of the freezer feel warm Adjusting Control Turn control to a higher number for colder temperatures Turn control to a lower number for less cold temperatures NOTE The small snowflake icon repres...

Page 9: ... the top of the gate slightly to clear the supports Lower the gate into the supports FREEZER CARE Cleaning YourFrost FreeFreezer somemodels Frost free means that you will not have to defrost your freezer Frost is removed by air moving and collecting any moisture and depositing it on the cooling coil The cooling coil periodically warms up enough to melt the frost and it then flows down to the drain...

Page 10: ...nd through the area behind the base grille Place a large shallow pan under the drain hose Remove the drain cap inside freezer NOTE Check the drain pan frequently to avoid water overflow Have a second pan handy for easier emptying Style 2 Models without a drain system Remove water from the freezer bottom using a sponge or baster and empty the water into a large pan 5 Place pans of hot water in free...

Page 11: ...ins ice crystals it may be refrozen although the quality and flavor may be affected If the condition of the food is poor dispose of it MovingCare When you are moving your freezer to a new home follow these steps to prepare it for the move 1 Remove all frozen food 2 Unplug the freezer 3 Take out all removable parts wrap them well and tape them together so they don t shift and rattle during the move...

Page 12: ...should produce 70 120 cubes every 24 hours Is the freezer temperature cold enough to produce ice Wait 24 hours after hookup for ice production See Using the Control Is the wire shutoff arm in the OFF arm up position Lower the wire shutoff arm to the ON arm down position See Ice Maker Is the water line shutoff valve to the freezer turned on Turn on the water valve See Connect the Water Supply Does ...

Page 13: ...ations on our full line of appliances Installation information Use and maintenance procedures Accessory and repair parts sales Specialized customer assistance Spanish speaking hearing impaired limited vision etc Referrals to local dealers repair parts distributors and service companies Amana Appliances designated service technicians are trained to fulfill the product warranty and provide after war...

Page 14: ...nada or Danby Products Inc U S A there are no other warranties conditions representations or guaran tees express or implied made or intended by Danby Products Limited or its authorized distributors and all other warranties conditions representations or guar antees including any warranties conditions representations or guarantees under any Sale of Goods Act or like legislation or statue is hereby e...

Page 15: ...messages de sécurité suivront le symbole d alerte de sécurité et le mot DANGER ou AVERTISSEMENT Ces mots signifient IMPORTANTES INSTRUCTIONS DE SÉCURITÉ Pour réduire les risques d incendie de choc électrique ou des blessures lors de l utilisation du congélateur prendre quelques précautions fondamentales y compris les suivantes AVERTISSEMENT CONSERVEZ CES INSTRUCTIONS Brancher l appareil sur une pr...

Page 16: ...t être installé côte à côte avec un autre réfrigérateur ou congélateur Laisser un dégagement de 3 7 5 cm sur le dessus et les côtés et un dégagement de 0 64 cm entre les appareils AVERTISSEMENT Risque du poids excessif Utiliser deux ou plus de personnes pour déplacer et installer le congélateur Le non respect de cette instruction peut causer une blessure au dos ou d autre blessure Déplacement de v...

Page 17: ...sférer d un côté à l autre de la porte Installation de la poignée 1 Placer la poignée sur la porte tel qu indiqué Voir l illustration de la poignée 2 En utilisant un tournevis à lame plate fixer la poignée sur la porte à l aide des quatre vis de poignée fournies 3 Placer les différentes parties de la garniture sur les extrémités inférieures et supérieures de la poignée tel qu indiqué 4 Appuyer fer...

Page 18: ...stallation Portes et charnières REMARQUE Si on inverse le sens d ouverture des portes considérer l image symétrique 1 Replacer les pièces de la charnière inférieure tel qu illustré et serrer les vis Voir l illustration 1C de la charnière inférieure Réinstaller la porte du congélateur REMARQUE Prévoir un support additionnel des portes pendant la réinstallation des charnières La force d attraction d...

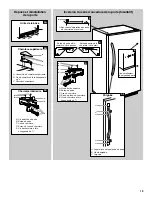
Page 19: ...de la charnière côté gauche Dépose et réinstallation de la porte Charnière supérieure Charnière inférieure A Couvercle de charnière supérieure B Vis de charnière à tête hexagonale de 3 8 C Charnière supérieure A B C Grille de la base A Vis de butée de porte B Butée de porte C Axe de charnière E Vis de charnière à tête hexagonale de 5 8 D Écrou de l axe de charnière C D E A B 1A 1B 1C A Vis de buté...

Page 20: ... conditions normales d utilisation Laisser le congélateur refroidir pendant 6 à 8 heures avant de le remplir d aliments congelés Laisser le congélateur refroidir une nuit avant d ajouter de grandes quantités d aliments non congelés Ne pas ajouter plus de 2 à 3 lb 907 à 1350 g d aliments non congelés par pied cube 28 32 L d espace de congélation REMARQUE Lors de la mise en marche initiale du congél...

Page 21: ... le congélateur il faut se rappeler ce qui suit Les clayettes de la caisse ont la meilleure capacité de congélation Les compartiments dans la porte et la base de la caisse ont une température légèrement moins froide Par conséquent les emballages sensibles à la température viande volaille etc ne devraient pas être placés dans les compartiments de la porte ou à la base du congélateur Laisser de l es...

Page 22: ... Sécher à fond avec un linge doux Pour que votre réfrigérateur en acier inoxydable conserve son aspect neuf et pour enlever les petites égratignures ou marques il est suggéré d utiliser le nettoyant et poli pour acier inoxydable approuvé par le fabricant IMPORTANT Ce nettoyant doit être utilisé sur les pièces en acier inoxydable uniquement Veiller à ce que le nettoyant et poli pour acier inoxydabl...

Page 23: ... éponge propre ou un linge doux et un détergent doux dans de l eau tiède Ne pas utiliser de nettoyant fort ou abrasif ni de nettoyant conçu pour l acier inoxydable Sécher à fond avec un linge doux Fini en acier inoxydable Laver avec une éponge propre ou un linge doux et un détergent doux dans de l eau tiède Ne pas utiliser de nettoyant fort ou abrasif ni de nettoyant conçu pour l acier inoxydable ...

Page 24: ...teur pour des renseignements sur l installation et le réglage des commandes DÉPANNAGE Essayer les solutions suggérées ici d abord afin d éviter le coût d une visite de service inutile Le congélateur ne fonctionne pas Le cordon d alimentation électrique est il débranché Brancher sur une prise à 3 alvéoles reliée à terre Le fusible est il grillé ou le disjoncteur s est il déclenché Remplacer le fusi...

Page 25: ...n d ARRÊT élevée Abaisser le levier métallique à la position ON marche abaissée Voir la section Machine à glaçons Le robinet d arrêt de la canalisation d eau reliée au congélateur est il ouvert Ouvrir le robinet d eau Voir la section Raccordement de la canalisation d alimentation en eau Y a t il de l eau dans le moule de la machine à glaçons ou ne produit elle pas de glaçons Vérifier si le congéla...

Page 26: ...ulement des pièces de rechange d origine Les pièces de rechange d origine conviendront et fonctionneront bien parce qu elles sont fabriquées selon les mêmes spécifications précises utilisées pour construire chaque nouvel appareil Amana Pour localiser des pièces de rechange d origine dans votre région nous appeler ou contacter le centre de service désigné le plus proche Pour assistance installation...

Page 27: ...e de façon manifeste ou intentionnelle par Danby Products Limitée Canada ou Danby Products Inc E U d A ou ses distributeurs agréés De même sont exclues toutes les autres garanties conditions ou représentations y compris les garanties conditions ou représentations en vertu de toute loi régissant la vente de produits ou de toute autre législation ou règlement semblables En vertu de la présente Danby...

Page 28: ...pot nearest you call Danby toll free When requesting service or ordering parts always provide the following information Product Type Model Number Part Description CONGÉLATEUR VERTICAL Le numéro de modèle se trouve sur la plaque d information sur la paroi arriere de l appareil Toutes les pieces de rechange ou commandes speciales sont disponsibles de votre centre regional de service autorise Pour ex...

Reviews: