background image

OPERATING INSTRUCTIONS

Using Proper Draw

Technique

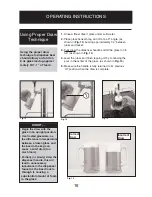
1.

Rinse a “Beer Clean” glass under cold water.

2.

Place glass beneath tap, and tilt at a 45

o

angle. (as  

shown in 

Fig. 13

) Leaving approximately 1/4” between 

glass and faucet.

3.

Fully draw the dispenser handle and fill the glass to 2/3 

full. (as shown in 

Fig. 14

).

4

.

Level the glass and finish topping off by continuing the 

pour in the center of the glass. (as shown in 

Fig. 15

)

5.

Make sure the handle is fully returned to it’s previous 
‘off’ position when the draw is complete.

Using the proper draw 
technique to dispense beer 
should allow you to fill an
8 oz glass leaving approxi
mately 3/4”- 1” of ‘foam’.

Fig. 13

Fig. 14

Fig. 15

DO NOT.....

Correct
Draw

Incorrect
Draw

Fig. 16

16

• Begin the draw with the 

glass in an upright position.

• Use frosted glassware, as 

the difference in temperature 
between a frozen glass and
the beer in the keg can 
cause a ‘wild’ draw (too 
much foam).

Partially (or slowly) draw the 

dispenser handle, this will 
lead to unnecessary
turbulence in the 

dispenser

faucet as the beer travels
through it, causing a 

substantial amount of foam 

in the glass.

2/

3

2

Barandillas cromadas (para colocar en la mesada)

4

Tornillos autorroscantes (para colocar la barandilla cromada)

1

Soporte para el cilindro de CO

2

1

Cilindro de CO

2

(vacío)

1

Regulador de CO

2

(indicador de presión alta/baja)

1

Manguera para la línea de CO

2

2

Conectores para la manguera de CO

2

(transparentes)

1

Enchufe para la manguera de CO

2

1

Acople para el barril de cerveza

1

Unidad de torre de cerveza (completa con canilla, 

manguera, tuerca y arandela de goma

Tornillos para metal (para fijar a la torre de cerveza)

1

Sello (base de la torre de cerveza)

1

Manija (canilla de la torre de cerveza)

1

Placa de protección (piso del gabinete refrigerador)

1

Bandeja plástica de goteo (2 piezas)

4

Rueditas - 2 locking

16

Tornillos para metal (para rueditas)

Descripción 

No. de Parte

Traba de la canilla de cerveza 

#7703    

Juego limpiador de la línea de

#CLEANINGKIT

cerveza 

Para obtener mayores detalles acerca de la compra de
cualquiera de los accesorios anteriores, llame a nuestro
departamento de servicio al cliente al 1-800-26-
(1-800-263-2629).

R

CARACTERÍSTICAS

ACCESORIOS

INCLUIDOS

Revise que todos los
accesorios suministrados con
esta unidad estén presente y
en buenas condiciones. Si 
alguno de los accesorios no
está presente y/o en buenas 
condiciones, llame a Danby
SIN CARGO al número 
indicado más abajo y hable 
con uno de nuestros 
representantes de servicio 
al cliente.

ACCESORIOS

OPCIONALES

No vienen incluidos con el
barril refrigerador, y deben
comprarse por separado.

47

Summary of Contents for Silhouette DKC646BLS

Page 1: ...tilisation avant l utilisation initiale de ce produit PRECAUCI N Lea y observe todas las reglas de seguridad y las instrucciones de operaci n antes de usar este producto por primera vez Danby Products...

Page 2: ...It contains instructions to help you use and maintain your keg cooler properly If you received a damaged appliance Immediately contact the dealer or builder that sold you the appliance Save time and m...

Page 3: ......

Page 4: ...s secure a C02 gas cylinder in an upright position 4 Always keep a CO2 gas cylinder away from heat 5 Never drop or throw a CO2 gas cylinder 6 Always check the D O T Department of Transport test date l...

Page 5: ......

Page 6: ...1 6 3 5 7 8 1 Black Dispense Tower 2 Dispenser Faucet Handle 3 Plastic Drip Tray FEATURES 4 2 4 Worktop Chrome Rail 5 Electronic Controls Display 6 Stainless Steel Door 7 Intake Exhaust for condenser...

Page 7: ......

Page 8: ...f beer Keg Weight 85lbs Full approx 1 6 Barrel 20 Liter Keg 5 Gal Yields 2 1 2 cases 640ozs of beer Keg Weight 60lbs Full approx FEATURES CO2 CYLINDER A fully charged 5lb CO2 cylinder will service app...

Page 9: ......

Page 10: ...der valve and tighten snug using an adjustable wrench See Fig 2 IMPORTANT NOTICE ALWAYS EXERCISE EXTREME CAUTION WHEN HANDLING THE PRESSURIZED CO2 CYLINDERS 3 Installation of CO2 Cylinder Install your...

Page 11: ......

Page 12: ...es on both gauges start to climb 15 Adjusting the CO2 Regulator There are two pressure gauges on the CO2 regulator See Fig 9 The upper gauge 1 monitors LOW internal keg pressure and must be adjusted t...

Page 13: ......

Page 14: ...Changing the temperature display Press the selector button to alternate the display between Fahrenheit and Celsius The corresponding pilot light adjacent to the selector will aluminate to signify whi...

Page 15: ......

Page 16: ...eturned to it s previous off position when the draw is complete Using the proper draw technique to dispense beer should allow you to fill an 8 oz glass leaving approxi mately 3 4 1 of foam Fig 13 Fig...

Page 17: ......

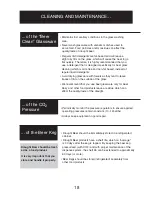
Page 18: ...e of the glass We recommend that you use beer glassware only for beer Dairy and other food products leave a residue which can effect the quality taste of the draught of the CO2 Pressure Periodically m...

Page 19: ......

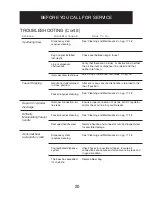
Page 20: ...nance on pg 17 18 Check seal between keg faucet Verify that there are no kinks or obstructions in either the air line red or dispenser line clear and that neither are frozen see Using Proper Draw Tech...

Page 21: ......

Page 22: ......

Reviews: