ASSEMBLY INSTRUCTIONS
Before you begin
Read all ins truction before set up.
•
Select all level site clear of rocks, branches, and other hard
or sharp objects, t o install your tent.
WARNING: Keep clear of overhead power lines.
• Do not set up your tent under trees because of potential
lightning strikes or f alling three limbs in inclement weather.
• Secure with all stakes and guylines provided to prevent
property damage or personal injury.
• For best results in windy conditions, position narrow end
of tent into the wind.
Enlist the help of at least one other person to assist you
it is time to assemble the tent.
•
when
(black, longest)
Door Pole
(red, long)
3
2
1
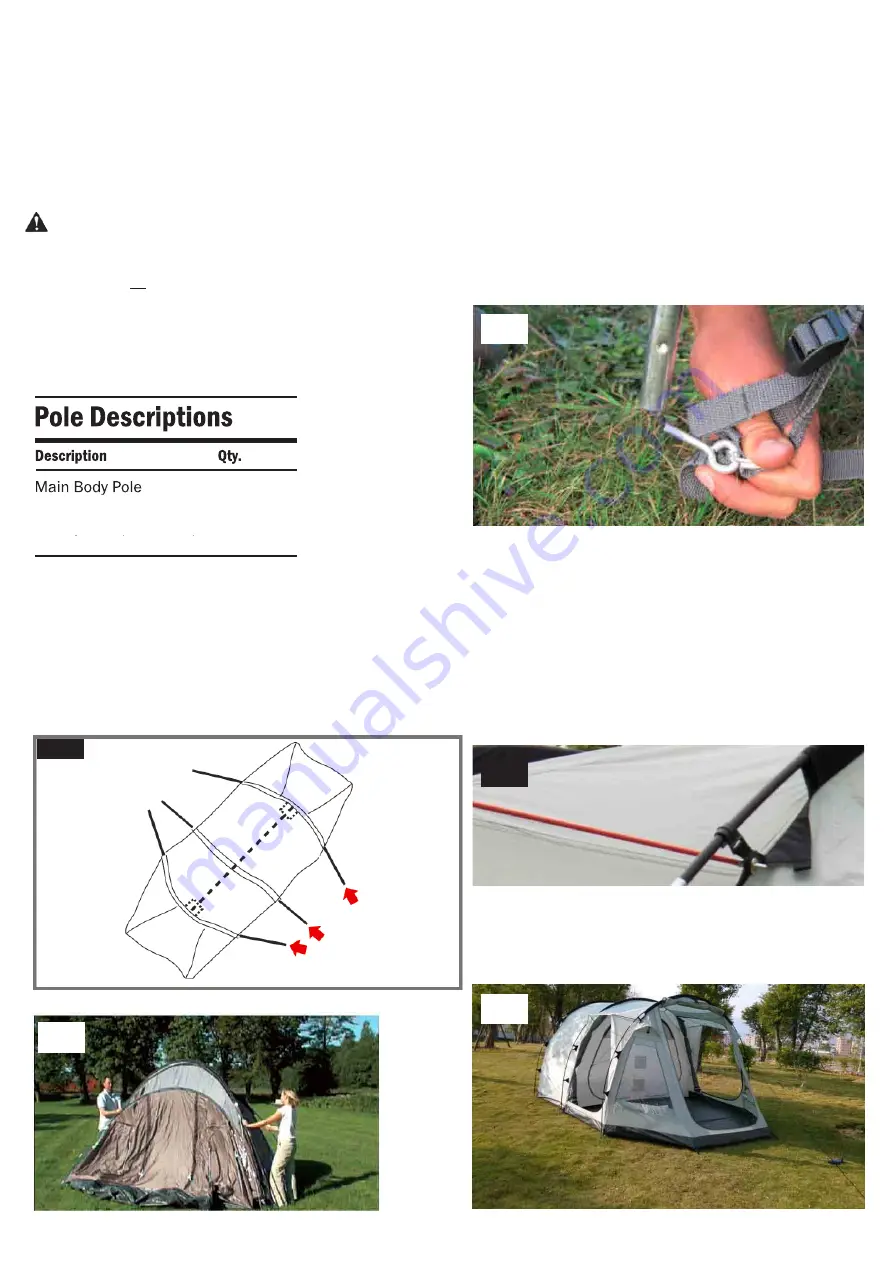
Assemble all of the poles by interlocking
-cored poles. Before setting-up the tent you
shock
open the doors to get air into the tent, then
should
the doors - this will help you to sent - up the
close
more easily. Push in the poles in their pole
tent
Fig. 1
Fig. 2
2
Place one end of the poles down over the
metal pin fastened in the ring.
(Fig. 3)
opposite end of the pole and apply
Go to the
to the pole forming an arch until
pressure
to insert the other pole end over
you are able
Repeat this with the remaining poles. Clamp the
on the tent onto the poles. Repeat this with all
the pin.
hooks
poles.
Fig. 3
3
No w you are able t o position the tent, as y ou
require by pegging the fabric loops attached
to the metal ring down. Start with the two
end corners and then the two at the
opposote end. Afterwards do it all way
around the tent. Take one of the remaining red poles,
insert it in the pole ring which is in the webbing placed
in the hook f or connecting the thicker pole. ( Fig. 4)
Repeat for the other pole.
Fig. 4
4
Finally secure the tent against strong winds
with the preattached guylines and stakes.
Use a mallet to secure the stakes. (Fig. 6)
Fig. 6
sleeves
now be
(Fig. 2)
marked with matching colours. (Fig. 1) The tent can
raised, for this you should be at least two persons.
PUSH IN THE POLES IN THEIR POLE SLEEVES MARKED WITH MATCHING COLOURS
THIS TENT SHOULD BE ERECTED BY AT LEAST 2 PERSONS
“RING & PIN” SYSTEM FOR EASY SET UP
FINALLY SECURE THE TENT AGAINST STRONG WIND


