Rigging concept and components
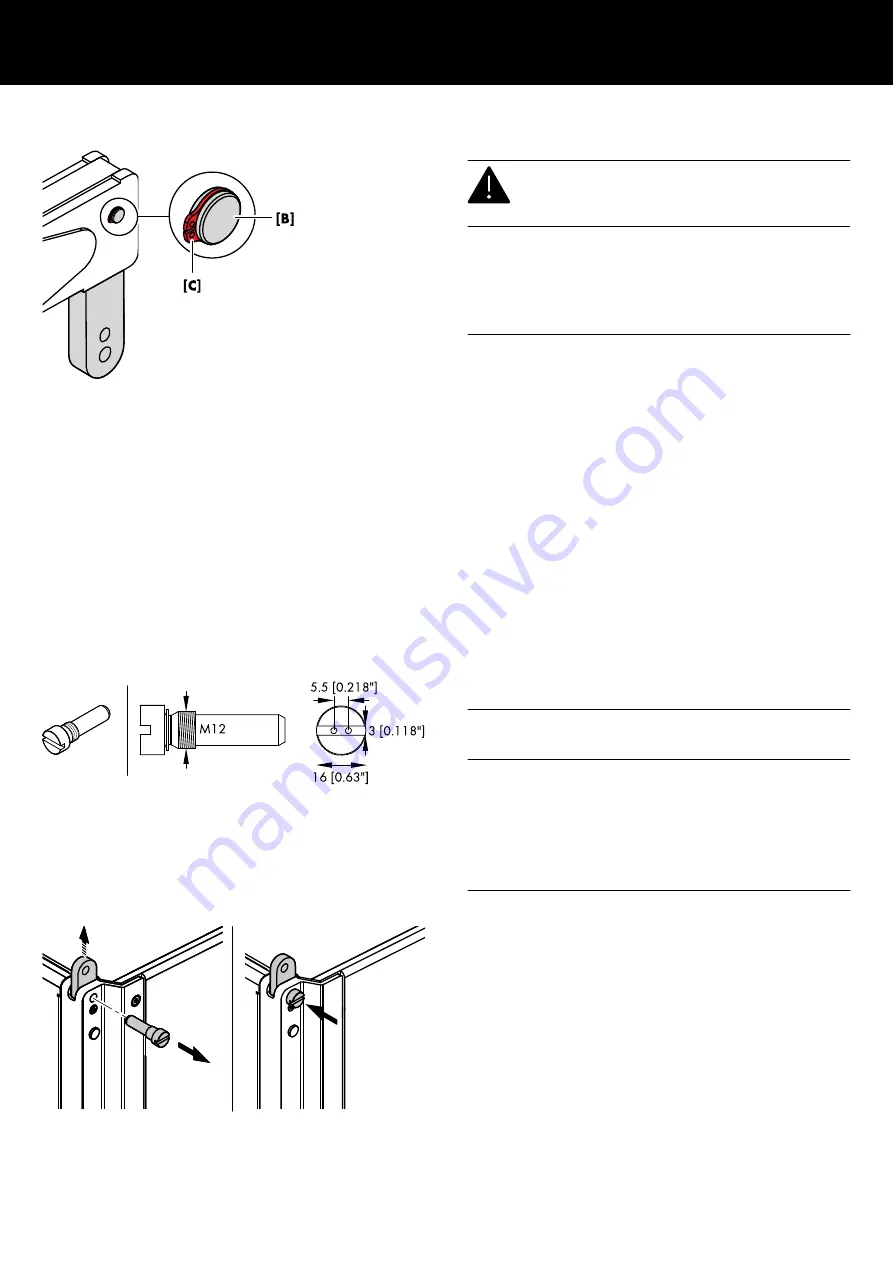
2.4 Rear link of the frames/adapter
WARNING!
Potential risk of personal injury and/or
damage to material!
The fixing bolt
[B] of the Rear link on the frames/the adapter bears
the full load of the array and therefore the fixing bolt is a safety-
relevant item.
It is essential that the bolt is fitted correctly and secured by the
circlip
[C].
2.5 Rigging mechanism of the cabinets
The cabinets are mechanically connected to the Mounting frames/
Mounting adapter and subsequent loudspeakers using the Front
links attached to both sides of the front rigging strands of the
cabinets and the central Splay/Rear link on the rear rigging strand
of the cabinet.
All necessary rigging components are mounted to the cabinets and
slide or fold out when needed.
In principle, the Front link mechanism applies to both the TOP and
SUB cabinets. The Front links are spring loaded and therefore
extend automatically as soon as the respective Locking pins are
released and pulled out.
2.5.1 Front link mechanism
Fixing bolts
The Front links are fixed using dedicated snake eye fixing bolts.
NOTICE!
Potential risk of damage to the rigging components!
The front rigging strands of the cabinets is made from high-grade
aluminum. However, to avoid any damage to the threads of the
fixing bolt slots ...:
▪ Only
hand-tighten the fixing bolt so that the fixing bolt only
just begins to tighten using an appropriate flat-head screwdriver
or a suitable snake eye spanner.
▪
Do not overtighten the fixing bolt.
TOP cabinets
1. Release the fixing bolt.
↳The Front link extends automatically.
2. Reinsert the fixing bolt to fix the Front link in place.
d&b KSLi Rigging manual 1.1 en
13


