background image

24

10. faQS

Q1: The unit gets hot when in operation. is this normal?

a: it is quite normal for the unit to release heat. Please make sure nothing is covering the unit, preventing 
it from releasing heat normally.

Q2: i have connected my device to a power supply but the indicator light remains off and the unit is not 
working.

a:  Check  the  power  cable  to  see  if  it  is  damaged.  also  check  whether  you  have  connected  the  unit 
properly to the power supply. finally, check that the power supply is switched on or is live, and that there 
isn’t a power cut.

Q3: The power indicator light is on but the unit isn’t working. 

a: Your operating procedure might be incorrect. Please reconnect to the power supply or switch the power 
key on the device’s panel off and on again.

Q4: When i switch the unit on, no image is displayed, there is no colour strip or it is fuzzy.

a i. Please check whether the av cable is properly connected.

ii. The unit’s video output mode doesn’t match the display mode. Please press the “Tv Out” key and select 
the correct mode.

ii. The display’s video input mode is incorrect. Please select the right mode (video or av).

iv. The av cable is not connected properly. Please reconnect it.

Q5: i have connected the device but there is no sound.

a: The audio cable is not connected properly. Please reconnect it. There might also be a problem with the 
original audio file.

Q6: The picture quality is poor.

a: Switch the unit off and reset the Tv or display format to NTSC or PaL. The poor picture quality might 
also originate from the original video file.

Q7. The remote control doesn’t work.

a: i. The remote control’s battery is flat. Change the battery while making sure you are using the correct 
battery type.
ii. The battery is fitted properly. Please re-insert it.

iii. The remote control is being operated too far from the unit or from to open an angle. Please move 
closer to the unit and operate the remote control within a 7m radius and at a ±30degree angle [NOTE – 60 
degrees in the remote Control section].

Summary of Contents for SO Easy HDMI +

Page 1: ...User Manual HDMI Media Player Hard Disk PC MAC...

Page 2: ...1 Warnings 4 2 INTRODUCTION 4 3 Device Performance 5 4 Accessories 7 5 Using the device 10 6 INSTRUCTIONS FOR THE SOFTWARE SYSTEM 13 7 PLAY FUNCTION 18 8 DIGITAL COMPANION FUNCTION 22 9 HOST OUTPUT 23...

Page 3: ...EN61000 6 1 The labels with the serial number on the product and its packaging are important guarantee information and should be presented in the event of any repairs The company will not perform any...

Page 4: ...lease follow these steps to switch off the unit press the stop button press the power off button Blue led is on cut off the power supply Please do not cut off the power supply while the unit is still...

Page 5: ...ed with multiple ports for connection to a television or an amplifier 4 The So Easy HDMI supports DVD navigation functions it can read IFO format files 5 The So Easy HDMI supports wide screen display...

Page 6: ...Output DC 12V 3A Power consumption USB Bus Power max 500mA 1000mA Others Unit size 200 x 111 x 40mm Working temeprature 5 45 C Main Features Formats supported Video format MPEG 1 MPG DAT MPEG 2 VOB M...

Page 7: ...cable YPbPr 1 6 USB Cable 1 7 Quick Startup Guide 1 8 Batteries 2 9 Holder 1 Remote control s functions Button Function Power Turns the device On Off Mute Plays Mutes the sound Tv Out Selects TV Video...

Page 8: ...ncel functions Menu Go to Menu Navigation button Select item up down left or right Press OK to confirm Increase or decrease the volume Page up down Play pause Begin playback confirm selection pause pl...

Page 9: ...cture menu All picture files are shown in the directory structure File Press the button to enter File menu All the Files are shown in the directory structure Remote Control Operation Please insert the...

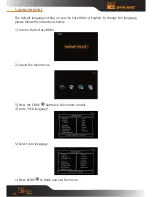
Page 10: ...asy HDMI is English To change the language please follow the instructions below 1 Turn on the So Easy HDMI 2 Access the Main menu 3 Press the SETUP button on the remote control 4 Go to OSD language 5...

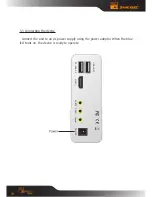
Page 11: ...11 5 1 Connecting the device Connect the unit to an AC power supply using the power adaptor When the blue led turns on the device is ready to operate USB HOST PC USB 2 0 HDMI AV YPbPr Coaxial POWER...

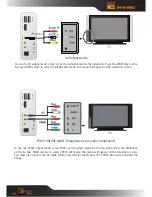
Page 12: ...rogressive scan video component To use the YPbPr output mode select YPbPr as the output mode for the television Press the VIDEO key on the So Easy HDMI remote to select YPbPr OUT mode The menu will ap...

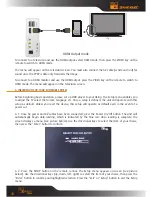
Page 13: ...nce a setup is defined the unit will operate with this setup as default Unless you reset the device this setup will operate as default even in the event of a power cut 6 1 Once he power and AV cables...

Page 14: ...are fuzzy or skip intermittently please change the TV mode setup For European countries please select PAL 6 4 TV display 4 3 P S 4 3 L B or 16 9 LARGE are available 6 5 Video output when your video o...

Page 15: ...esolution NTSC 480i 480p PAL 576i 576p 720p 1080i are available for your video outputs 6 7 Subtitle select your preferred subtitle language 6 8 SPDIF Output select SPDIF OFF SPDIF RAW or SPDIF PCM to...

Page 16: ...1 System Information to view firmware version 6 11 2 Software upgrade The unit s software can be upgraded We will provide you with the newest software on our website or through other channels To obta...

Page 17: ...rt upgrading c Once the upgrade is complete the unit will restart automatically Please note when upgrading please do not cut off the power supply as this could damage the unit Warnings when updating p...

Page 18: ...te control Press the Fast Forward or Rewind buttons to fast review the movie backwards or forwards at speeds of 2X 4X 6X 8X or 16X When playing the Movie press the Zoom key with the FWD or REV key to...

Page 19: ...The default setting is Standard If the Slide Show option is selected the music will be played in the background automatically 7 3 Photo menu By selecting Picture the picture list will appear with the...

Page 20: ...he remote control to complete copy paste delete rename create new folder show properties and cancel operations by pressing the up and down directional keys on the remote control In the File menu you c...

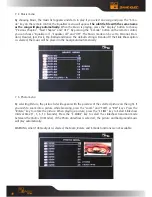
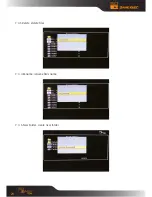
Page 21: ...21 7 4 3 Delete delete files 7 4 4 Rename rename file s name 7 4 5 New Folder create new folder...

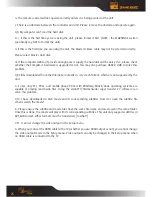
Page 22: ...22 7 4 6 Properties show properties 7 4 7 Cancel cancel the operation or push the Display button to exit...

Page 23: ...te a folder such as USB 001 for the external file copied 8 2 Copy function under the Display menu Press the Target button to select the copy destination Select the file to be copied and press the Disp...

Page 24: ...ly connected ii The unit s video output mode doesn t match the display mode Please press the TV Out key and select the correct mode ii The display s video input mode is incorrect Please select the rig...

Page 25: ...net are mostly in rm rmvb format which are not supported by the unit A So far only PCs PDAs and mobile phone PDAs with Windows WinCE Linux operating systems are capable of playing real media files Usi...

Page 26: ...www danedigital com www dane elec com...

Reviews: