background image

5

Wifi

Bluetooth
Dual SIM

P.36
P.37
P.37

P.36

P.38

P.39

3 - NETWORKING

4 - SUPPORT & WARRANTY

5 - SAFETY INSTRUCTIONS

Summary of Contents for Surnaturel R500

Page 1: ...1 USER GUIDE ...

Page 2: ... aims at familiarizing you with the technical features of your R500 in order to make operation easier NOTE All information presented in this manual and on the box were current at the time of printing However as we are per manently enhancing our products through software updates this manual and the box might not present all the functions of your actual product Pictures are for illustration purpose ...

Page 3: ...3 ...

Page 4: ...on Switch off Lock screen Power saving mode Home screen and settings Using the home screen Sections of the home screen USB connection Using the touch screen Storage file management Configuring your GoogleTM account Fingerprint reader P 8 P 9 P 10 P 11 P 12 P 13 P 14 P 14 P 14 P 17 P 22 P 27 P 29 P 29 P 32 P 33 P 35 P 6 P 7 CONTENTS 2 GETTING STARTED ...

Page 5: ...5 Wifi Bluetooth Dual SIM P 36 P 37 P 37 P 36 P 38 P 39 3 NETWORKING 4 SUPPORT WARRANTY 5 SAFETY INSTRUCTIONS ...

Page 6: ...ectors Dimensions Weight IPS 2 5D Gorilla Glass 4 5 Full HD 1920 x 1080 px 64 bits MT6753 OctaCore 1 5Ghz 3 Go 32 Go Wifi 802 11 b g n Bluetooth 4 0 13 Mpx Sony IMX214 f 2 0 8 Mpx Samsung 2700 mAh 1W 103dB G sensor Light sensor Proximity Sensor Geomagnetic sensor 3 5 mm audio jack Micro USB type C 141 4 x 69 3 x 7 4 mm 142 g ...

Page 7: ...7 BUTTONS DEVICE PARTS 3 5 mm audio jack USB Connector TypeC charge PC connection Touch screen Flash Led Fingerprint reader Camera lens Volume keys Webcam Power ON OFF Overview Menu principal Back ...

Page 8: ... simultaneously or independently INSERT THE SIM CARD Insert the SIM card s Note the right slot enables to insert either a memory card or a Nano SIM card M icro SIM Nano SIM Note If your SIM is configured with a PIN code enter it at start up then confirm by clicking on ...

Page 9: ...rranty will be void We recommend that you fully charge the battery for the first three charge times The battery should never be allowed to discharge fully full discharges under 10 cause damage to the battery and wears is off prematurely Since the battery is lithium ion you can charge it partially without a risk of damage Note To avoid electrical damage use only the universal charger supplied or a ...

Page 10: ...ne enables you to make or answer a call use options during a call and customize these functions to better fit your needs MAKE A CALL Open the dial screen dial a telephone number and press When you receive a call drag the telephone icon to the right ...

Page 11: ...rvice provider s coverage area may result in additional fees depending on the plan you have subscribed to For more information contact your service provider 1 Open the messaging application 2 Create a new message by adding recipients and type the text of your message for SMS go to step 4 3 To add an item to your message select the corresponding option then select the element 4 Send the message ...

Page 12: ...the main home screen To open Google Now press the button for 2 seconds PREVIEW Long press Open the list of thumbnails of the recently visited screens To open one click on it for a few seconds To delete a screen from the list slide your finger to the left or the right or click on X Short press Open the multi desktop menu and access quick customizations set tings wallpapers Widgets ...

Page 13: ...ey to extract the right slot and remove the memory card Do not remove the memory card while a data transfer or use is in progress It may result in data loss or corruption or cause damage to the device and memory card DANEW is not responsible for any losses relating to improper operation of corrupted memory cards including data losses Warning Not supplied ...

Page 14: ...art the phone is displayed When the battery is low the device will shutdown automatically in order to save power LOCK SCREEN POWER SAVING MODE When the device is switched on pressing the ON OFF button shortly will switch off the screen and enable the power saving mode or lock after a period of inactivity the screen switches off automatically When this mode is enabled the applications in use will n...

Page 15: ...15 To unlock the device press the ON OFF button tap the screen and slide your finger in any direction ...

Page 16: ...ttery life it is recommended to set an automatic standby period in the case of inactivity The shorter this period is the better is your battery life To set the standby period Click on Device Display Standby tab WI FI BLUETOOTH Wi Fi and Bluetooth connections are features that use energy To optimize your battery life it is recommended to disable the Wi Fi Bluetooth when not in use For example when ...

Page 17: ...17 HOME SCREEN SETTINGS Back Button Home Button Short press Settings Wallpapers Widgets Long press Open application Application Button ...

Page 18: ...18 Configure Wifi settings Configure Bluetooth settings Define preferences for SIM cards associated services View your Wifi data consumption ...

Page 19: ...19 Setting luminosity standby wallpaper rotation Volume and sound environment settings Storage device management and memory status View the battery consumption Application management ...

Page 20: ...20 Enable or disable Geolocalization services Accounts Management Gmail Facebook Manage security options of the smartphone Configuring fingerprint unlock Setting Language Keyboard Voice research ...

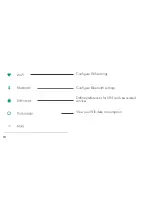
Page 21: ...21 Setting Date Time Timezones Information on the firmware version ...

Page 22: ...each one slide your finger horizontally on the screen Each screen may contain several rows of applications Shortcuts Widgets USING THE HOME SCREEN INSTALL SHORTCUTS To do so press The Applications page appears 1 Drag Drop applications icons to the main interface page ...

Page 23: ...23 Then press and hold your fingerpoint on the icon and place it by sliding your finger to the home screen ...

Page 24: ...24 2 Drag drop Widgets icons to the main interface To do so short press Click on Widgets icon Select and hold the desired Widget Place it on the home screen ...

Page 25: ...25 DELETE A SHORTCUT FROM THE HOME SCREEN Click and hold the icon Then move it to X Delete ...

Page 26: ...26 CLOSE RUNNING APPLICATIONS A short press on the button for 2 seconds displays the list of running applications Glissez votre doigt vers la droite ou vers la gauche pour fermer les applications ...

Page 27: ...er of the screen Tap and hold the clock while sliding downwards to view 2 sections Slide downwards again to view the quick settings section Wifi Luminosity Rotation Settings Battery level Airplane mode Sliding downwards for the first time will display the notifications section ...

Page 28: ...28 To hide a notification slide it to the right or the left ...

Page 29: ...ou to synchronize content between your smartphone and your computer You can also view the contents of the internal memory and the memory card USB CONNECTION USING THE TOUCH SCREEN Your device is equipped with a fully touch interface The basic movements are explained below Click once on an application menu or option to run or select them SELECT ...

Page 30: ...30 Move a selected item on the screen Click twice and quickly on an item on the screen MOVE DOUBLE CLICK Maintain your finger pressing a selected item on the screen for more than 2 seconds HOLD ...

Page 31: ...31 Move the finger quickly in the direction of the desired movement Place your thumb and forefinger on the screen Separate to zoom in and bring closer to zoom out SCROLL ZOOM ...

Page 32: ... installed to the internal memory by default You can use this space to create folders and organize your personal files The file manager also enables you to manage contents located on a memory card microSD Besides the internal memory you can also create folders to organize your files To move applications from the internal memory to the memory card go to settings then click on applications Select th...

Page 33: ...OOGLE ACCOUNT 1 Click on Personal tab Accounts 2 Click on Add an account Google Create an account 3 Enter your first and last name then click NEXT 4 Enter a username and click NEXT Your phone connects to Google servers and checks the username availability 5 Enter your password and click NEXT 6 Follow the instructions and enter required and optional information relating to your account Wait for you...

Page 34: ...our device 5 Once your Google account is configured your device will automatically sync with your Web Google account if a data connection is available When a connection is established your device synchronizes with your Google services like GmailTM Contacts and Google Calendar You can also use Maps donwload applications from Play Store save your settings to Google servers and benefit of other Googl...

Page 35: ...t is unlikely that two different fingerpoints can be mistaken by the fingerprint recogni tion sensor However in cases where the fingerpoints are very similar the sensor might consider them identical For a better fingerprint recognition To record your fingerpoints Make sure the fingerprint reader is not scratched and that the fingerprint recognition area and your fingers are clean and dry Fingerpoi...

Page 36: ... The list of nearby detected networks is displayed Select the Wi Fi network corresponding to your router by clicking on its name an icon indicates the power of the signal Once the network name selected a new window is displayed and prompts for a manual entry of the password Next click on Connect Once the connection established the Wi Fi icon appears in the task bar WIFI ...

Page 37: ...n the task bar Select the desired device to start Bluetooth pairing Your device can operate 2 SIM cards You can now be reached at two numbers at once You may choose your favorite SIM for calls outgoing SMS and MMS and even internet access You can configure and modify services associated to each SIM through the Double Sim Settings menu To do so click on Wireless and networks tab SIM cards ...

Page 38: ...thorization RMA number Returns without RMA number previously obtained will not be accepted Danew reserves the right to verify that device malfunction is not a result of improper use or manipulation by the user Product with 1 year warranty and accessories with 1 month warranty starting from the purchase date TECHNICAL SUPPORT 0899 782 728 from France Our technical support team will answer your ques...

Page 39: ...ith wet hands and do not disconnect the charger by pulling the cord off Do not bend or damage the power cord Do not use the device with wet hands or during the charge Avoid short circuiting the charger or the device Do not drop the charger or the device and prevent them from shocks Do not use an unapproved charger to charge the device Do not use the device during an electrical storm The device mig...

Page 40: ...urer before using your device in order to ensure that it will not be affected by the radiofrequencies emitted by the device Do not throw the device or the battery into a fire Follow the applicable local regulations regarding the disposal of batteries or used devices If you are wearing a hearing aid contact its manufacturer to obtain more information on the risk of interferences Switch off the devi...

Page 41: ...utions when you are exposed to artificial lights Prevent the risk of muscle injury resulting from repetitive movements When performing repetitive actions such as hitting keys drawing caracters on a touch screen or playing a game you may experience discomfort at hands neck shoulders or any other part of your body In the case of extended usage hold the device without pressure lightly click on the bu...

Page 42: ...e alter or repare the device yourself Any modification or change to your device might result in a void warranty If your device needs to be repared contact Danew s customer service Do not disassemble or puncture the battery this may result in explosion or fire Do not paint your device or put stickers on To clean your device Wipe your device or charger with a cloth or a rubber Clean the battery term...

Page 43: ...verage volume Use headsets and headphones supplied with the device Install the device and accessories carefully Make sure your mobile device and accessories are well fixed inside your vehicle Do not place your device or its accessories in close proximity to airbags system location If the mobile device is not properly installed triggering the airbags might cause serious injury The device should be ...

Page 44: ...44 ...

Page 45: ......

Page 46: ...46 Android Google Google Play and other marks are trademarks of Google Inc ...

Reviews: