3. Insert the external skiving knife as far as possible into the exter-
nal knife holder (1).
4. Release the stop lever (4).
5. Turn the external skiving knife until it audibly engages. Examine
its tight fit. The external knife has to fit tight in the holder.
4.3.4 Adjusting the external skiving diameter
1. Open the protection hood.
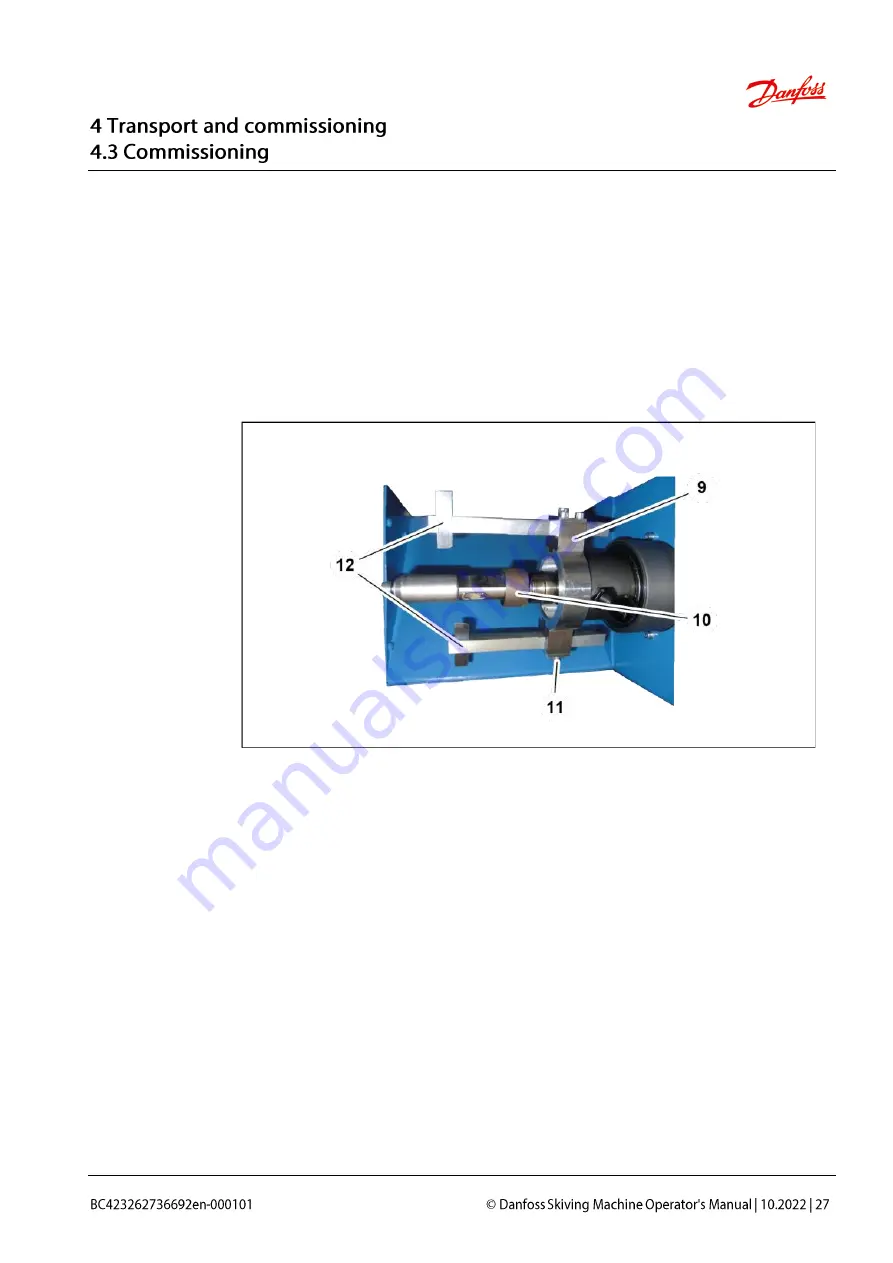
2. Loosen the screws (12) on the knife holder.
3. Move the knife until the correct outer diameter is reached.
4. Retighten the loosened screws (12).
5. Repeat the steps to adjust the opposing knife.
6. Check the distance between the two knifes.
4.3.5 Adjusting the external skiving depth
1. Assemble depth stop (10) depending on the skiving diameter.
2. Loosen the screw (11) on the knife holder of the external knife.
3. Move the knife holder (9) until it reaches the right skiving depth.
4. Repeat the steps to adjust the opposing knife.
5. Retighten the loosened screws (11).
Summary of Contents for ET6110
Page 1: ......
Page 3: ......
Page 9: ...1 3 Name plate The name plate is fixed near the power cable...
Page 31: ...10 Pull the skived workpiece out of the skiving machine...
Page 48: ...Position Anzahl Artikelnummer Bezeichnung 14 1 307 257 3 Pulley...
Page 50: ...9 3 Spare parts set Quantity Part code Designation 1 307 053 Spare part set...
Page 51: ...9 4 Electric diagram...
Page 52: ...9 5 Maintenance log Inside skiving knife Outside skiving knife Remark Date Signature...
Page 54: ......
Page 55: ......
Page 56: ......


