background image

P

AGE

 18

46517-92-1098 <90-00085>

AID 

AND

 EQT F

IELD

 C

OMMAND

 K

EYS

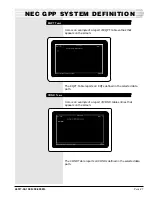
Here are brief descriptions of the command keys that you can
use while the cursor is in the AID or Eqt fields.

F1 - GOTO - Goes directly to an AID or Eqt entry.

F3 - Blank - Deletes the current point.

F5 - Range Functions - Lets you specify a range of points to:

Edit specific attributes of points.

Copy attributes of one point to a range of points.

Delete one point or a range of points.

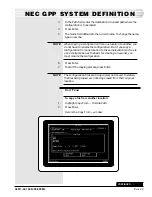
F6 - Read - Reads point definitions of one polling list and
copies them into the current polling list. When you press F6, the
Read Points window pops up:

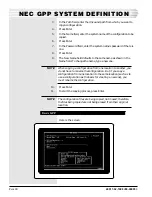
To read point definitions:

1.

Type in the name of the system you are reading from. The current
system name is the default.

2.

Press Enter.

3.

Type in the TME address of the system you are reading from.
Acceptable values are 1-128.

4.

Press Enter.

5.

Type in the TRE address of the system you are reading from.
Acceptable values are 1-128.

6.

Press Enter.

7.

Type in the display number of the system you are reading from.
Acceptable values are 1-64.

NEC GPP SYSTEM DEFINITION

CONTINUED

 . . .

Summary of Contents for 46517-92

Page 1: ...complete information on electrostatic discharge safety precautions refer to BellcoreTM Technical Reference TR NWT 000870 Copyright 1998 by Dantel Inc Dantel is a registered trademark of Dantel Inc IS...

Page 2: ...This chapter explains how To install the software program on your computer 1 Turn on the power to the computer and monitor Wait for the DOS Disk Operating System prompt to appear 2 Insert the 46517 s...

Page 3: ...screen of the program Press the F1 Info key to display the version number 5 Type COPY A This assumes that the disk is in drive A If it is in a different drive type the letter of that drive 6 Press Ent...

Page 4: ...the first field When editing the first field they exit that window When at a submenu they return cursor to the previous menu When at the Master Menu they exit the program Up Arrow The up arrow usually...

Page 5: ...left to the previous word Moves the cursor right to the previous word Deletes to the end of the field Calls up the Default Box if there is one DEFAULT BOX When defining certain fields a default box ap...

Page 6: ...you must select the Quit option from the Master Menu whenever you want to leave the T Shell program NEVER turn off the computer without properly exiting the program Doing so could corrupt the data fi...

Page 7: ...GPP Parameters Does the following Sets the communications parameters for uploading and downloading T Shell configurations between the 46517 NEC to GPP Editor and the 46062 GPP Specifies where to store...

Page 8: ...Parameters options LCD Mode If you are using a monochrome monitor or a laptop computer with a monochrome LCD display select YES use LCD mode If you are using a color monitor select NO do not use LCD...

Page 9: ...synonymous Here is the NEC to GPP Editor screen with the NEC GPP System Menu To select an option 1 Highlight an option For brief descriptions of the options refer to the next section on Menu Overview...

Page 10: ...and their corresponding alarm points TRANSFER Provides utilities for the following Downloading the configuration to a TL1 GPP database Uploading a configuration from a TL1 GPP database Downloading a...

Page 11: ...selection fields Below are the instructions for entering a system name SYSTEM NAME A T Shell GPP configuration must have a name If there are existing configurations a default box appears with their na...

Page 12: ...Wish to add Y N Type Y to add the new name If N is typed you will be prompted for another name 4 The Polling Type field automatically defaults to NEC Level 2A 5 Press Enter WARNING Refer to the Utili...

Page 13: ...ctly the first time 6 Press Enter EDIT ADDRESS This is the GPP address The default address is 1 To change the address 1 Highlight Edit Address 2 Press Enter 3 Type in the address Acceptable values are...

Page 14: ...alarm points Refer to TRE Display and Alarm Point Configuration on the next page F3 Blank Deletes the current entry F5 Compress Removes all unreferenced entries from SID AID and COND tables NOTE Comp...

Page 15: ...type N the screen prompts you for another address 6 Repeat steps 1 5 to configure additional GPP entries 7 When you finish press F8 to save the information TRE DISPLAY AND ALARM POINT CONFIGURATION To...

Page 16: ...configure additional TRE displays 6 When you finish press F8 to save the information To edit alarm points 1 In the TRE Display field select a TRE display number NOTE If you do not type in the TRE and...

Page 17: ...for a list of attributes You can type in the attribute or the forward slash key and the LEV code in the attribute list for example type 1 for MJ The default is NA 13 Press Enter 14 Type in the DIRN a...

Page 18: ...of points F6 Read Reads point definitions of one polling list and copies them into the current polling list When you press F6 the Read Points window pops up To read point definitions 1 Type in the nam...

Page 19: ...5 the Block Move window pops up To move a block 1 Type in the first point of the block Acceptable values are 1 64 2 Press Enter 3 Type in the last point of the block Acceptable values are 1 64 4 Press...

Page 20: ...ion block must accommodate the entire source block For example a block from points 1 10 cannot be moved to a block starting at point 60 because the maximum block is 64 6 Press Enter Alt F7 Previous En...

Page 21: ...2 Check the GPP Configuration address The address is shown in the NEC Editor screen Press F10 to exit the Transfer window and display the full NEC Editor screen The address must be the same as the de...

Page 22: ...g you that the data you are about to upload will overwrite any data in the configuration in the com puter Type Y and press Enter to continue or press Enter to discon tinue the operation If you are abo...

Page 23: ...w 2 Press Enter 3 Go to the subsection that explains the option you selected Polling List Without Points Contains an output of all defined polling list entries Polling List With Points Contains an out...

Page 24: ...you must press any key to continue The computer exits the program and returns to the Master Menu When a file is selected as the destination of a report you are prompted for a DOS file name If no file...

Page 25: ...lling list entry Y N If you press Y Yes then press Enter points for each polling list print on separate pages N No is the default when you press Enter points print in a continuous stream with a two li...

Page 26: ...ributes of defined points SID TABLE Here is an example of a report of SID table entries that appears on the screen The SID Table reports all SIDs defined in the selected data path AID TABLE Here is an...

Page 27: ...entries that appears on the screen The EQPT Table reports all EQTs defined in the selected data path COND TABLE Here is an example of a report of COND table entries that appears on the screen The CON...

Page 28: ...Files Rebuild rebuilds damaged index files that are out of synchronization with the data file The rebuilding process uses the data file to create a new index file When you select Key Files Rebuild an...

Page 29: ...But if you copy a configuration from one location to the same location such as to use a configuration as the basis for creating a new one you must rename the configuration 6 Press Enter 7 To start the...

Page 30: ...me field To change the name type a new one NOTE When copying a configuration from one location to another you do not have to rename the configuration But if you copy a configuration from one location...

Page 31: ...his command erases all references to the configuration NEC GPP SYSTEM DEFINITION NEC DATA PATH The NEC Data Path option of the NEC Edit Module menu lets you specify the drive and directory path where...

Page 32: ...If you specify a drive without a path for example A or C the current path of that drive is loaded into the Data Path parameter 2 Press Enter 3 Press F8 to save the new path NEC DATA PATH NEC PARAMETER...

Page 33: ...rt that your computer does not have the T Shell program locks up when the computer tries to use that port and you must reboot your computer Baud Sets the baud rate for the communications port Accept a...

Page 34: ...drive and directory that the computer is to use to store any reports that are sent to a file For more information see the Reports section of the NEC GPP System Definition chapter This field defaults...

Page 35: ...the terminal The data then can be reviewed at a later time F3 Open Capture File O Cap Opens a capture file F4 Close Capture File C Cap Closes a capture file F5 Load Configuration File Ld Cnf Changes t...

Page 36: ...The Edit Configuration window appears Options include Change the terminal s configuration for communicating with another device See Terminal Attributes in this section Program the function keys See Sh...

Page 37: ...press F8 to return to the Edit Configuration window At the last field Prot base press Enter after making a change to the terminal attributes If you do not change the value of the protocol base press...

Page 38: ...he terminal emulator communicates Acceptable values are Y es echo results in half duplex opera tion and N o don t echo results in full duplex operation This field defaults to N Append LF Tells the com...

Page 39: ...appears 2 Enter a string of characters up to a maximum of 56 characters An Enter can be included as part of the string by entering Ctrl M 3 Press Enter Press Enter to skip one function key and move to...

Page 40: ...ars 2 Enter a string of characters up to a maximum of 56 characters An Enter can be included as part of the string by entering Ctrl M 3 Press Enter Press Enter to skip one function key and move to the...

Page 41: ...s 2 Enter a string of characters up to a maximum of 56 characters An Enter can be included as part of the string by entering Ctrl M 3 Press Enter Press Enter to skip one function key and move to the n...

Page 42: ...er The new settings are now the defaults for the terminal configu ration whenever the Terminal Emulator is entered from the Master Menu To create a file that does not change the default settings 1 Mak...

Page 43: ...capture save the data and close the file press F4 The maximum amount of data that can be stored in one capture file is 16 kilobytes This is the contents of approximately eight screens When the file is...

Page 44: ...line at the bottom of the screen The message in the status line indicates the name of file being transferred and the number of bytes transferred so far To terminate the file transmission press either...

Page 45: ...o Send EOF Char Z This parameter controls whether the computer transmits an end of file Ctrl Z character at the end of a DOS file Acceptable responses are Y yes or N no The Send EOF Char defaults to N...

Page 46: ...ten instrument signed by a duly authorized officer of the Seller and accepted by the Buyer Warranty and remedies on products not manufactured by the Seller are in accordance with warranty of the respe...

Reviews: