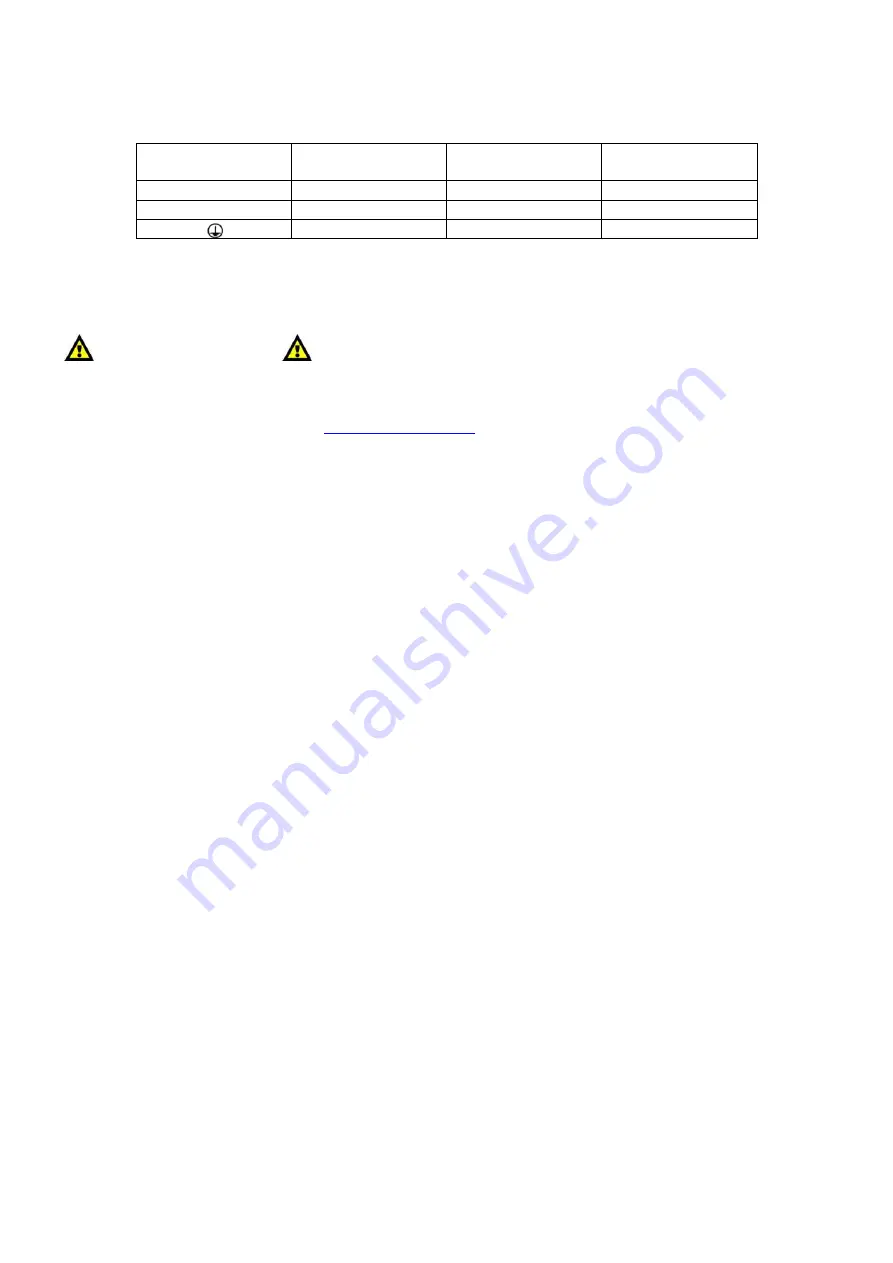
background image


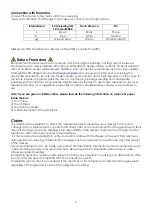
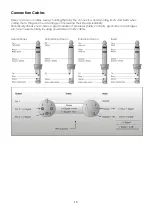
Connection with the mains 


Connect the device to the mains with the power-plug. 
Always pay attention, that the right color cable is connected to the right place. 
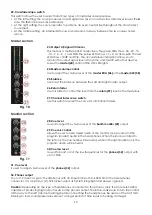
 

International 

EU (including UK) 

From April 2004 

North America 

Pin 

Brown 

Black 

Phase  

Blue 

White 

Neutral 


Green/Yellow 

Green 

Protective Earth 


Make sure that the device is always connected 

properly

 to earth!  


Return Procedure 

Returned merchandise must be sent prepaid and in the original packing, call tags will not be issued. 
Package must be clearly labeled with a Return Authorization Number (RMA number). Products returned 
without an RMA number will be refused. Highlite will not accept the returned goods or any responsibility. 
Call Highlite 0031-455667723 or mail 

aftersales@highlite.nl

 and request an RMA prior to shipping the 

device. Be prepared to provide the model number, serial number and a brief description of the cause for 
the return. Be sure to properly pack the device, any shipping damage resulting from inadequate 
packaging is the customer’s responsibility. Highlite reserves the right to use its own discretion to repair or 
replace product(s). As a suggestion, proper UPS packing or double-boxing is always a safe method to 
use. 
 

Note: If you are given an RMA number, please include the following information on a piece of paper 
inside the box: 

1) Your name 
2) Your address 
3) Your phone number 
4) A brief description of the symptoms 


Claims 

The client has the obligation to check the delivered goods immediately upon delivery for any short-
comings and/or visible defects, or perform this check after our announcement that the goods are at their 
disposal. Damage incurred in shipping is the responsibility of the shipper; therefore the damage must be 
reported to the carrier upon receipt of merchandise. 
 It is the customer's responsibility to notify and submit claims with the shipper in the event that a fixture is 
damaged due to shipping. Transportation damage has to be reported to us within one day after receipt 
of the delivery.  
Any return shipment has to be made post-paid at all times. Return shipments must be accompanied with 
a letter defining the reason for return shipment. Non-prepaid return shipments will be refused, unless 
otherwise agreed in writing. 
Complaints against us must be made known in writing or by fax within 10 working days after receipt of the 
invoice. After this period complaints will not be handled anymore. 
Complaints will only then be considered if the client has so far complied with all parts of the agreement, 
regardless of the agreement of which the obligation is resulting. 


Summary of Contents for Core Mix-3 USB

Page 1: ...Core Mix 3 USB ORDERCODE D2303 Highlite International B V Vestastraat 2 6468 EX Kerkrade The Netherlands...

Page 2: ...n DAP Audio for more excellent audio products We design and manufacture professional audio equipment for the entertainment industry New products are being launched regularly We work hard to keep you o...

Page 3: ...ain Channels 7 Master section 8 Monitor section 8 Record Module 8 Rear 9 Installation 10 Set Up and Operation 10 Functions 10 Microphone Channels 10 Main Channels 11 Master section 12 Monitor section...

Page 4: ...ystem To maintain perfect condition and to ensure a safe operation it is absolutely necessary for the user to follow the safety instructions and warning notes written in this manual Please consider th...

Page 5: ...y to reduce the input signal level by using the INPUT control To emphasize a frequency range you don t necessarily have to move its respective control upward try lowering surrounding frequency ranges...

Page 6: ...method to use Note If you are given an RMA number please include the following information on a piece of paper inside the box 1 Your name 2 Your address 3 Your phone number 4 A brief description of th...

Page 7: ...y for party jocks MC s Low tone control on the headphone output makes it possible to adjust your favorite sound All the pots are firmly locked on the internal chassis for extra stability The Core Mix...

Page 8: ...8 Talkover switch Fig 2 Main Channels 9 Selection switch CD USB 1 Line 10 Channel VU meter 11 Selection switch CD USB2 Line 12 Selection switch CD Phono MP3 Line 13 Gain control 14 Hi control 15 Mid c...

Page 9: ...curve switch Fig 4 Monitor section 28 Cue level control 29 Cue mix control 30 Cue low level control 31 Cue level control 32 Phones output Fig 5 Record Module 33 EQ button 34 USB slot 35 SD card slot 3...

Page 10: ...e RCA input 50 Channel 3 phono RCA input 51 Channel 3 CD RCA input 52 Channel 2 line RCA input 53 Channel 2 CD RCA input 54 Channel 1 line RCA input 55 Channel 1 CD RCA input 56 AC inlet with integrat...

Page 11: ...ind of equipment Note When connecting signal sources please make sure that the corresponding Channel s level control and the master faders are at their minimum settings Otherwise unpleasant plug in no...

Page 12: ...do not light up 14 15 16 Channel EQ Hi Mid Low controls Each channel is fitted with 3 band EQ The Hi 14 Mid 15 and Bass 16 bands have their center frequencies fixed at 12 Khz 1kHz and 80 Hz respectiv...

Page 13: ...he level from the return 59 input in the mastermix 27 Channel fader curve switch Use this switch to select the curve for all channel faders Fig 10 Monitor section 28 Cue level Is used to adjust the vo...

Page 14: ...e pause mode and again to resume playback 40 button Tapping this button allows you to skip to the next track Pushing and holding this button allows you to play a track fast forward 41 button Tap this...

Page 15: ...phono RCA input Use to connect a turntable 51 Channel 3 CD RCA input Use to connect a CD player 52 Channel 2 line RCA input Use to connect a line level device 53 Channel 2 CD RCA input Use to connect...

Page 16: ...tputs to connect an amplifier with balanced inputs 59 Return input To connect the stereo outputs of your effectprocessor 60 Send output To connect the stereo inputs of your effectprocessor 61 USB 2 in...

Page 17: ...le to remove the fader cover Fig 16 4 Now you have easy access to the faders and crossfader Replacing a fader 1 Remove the upper screw indicated by the dotted line circle 2 Remove the two screws of th...

Page 18: ...the Core Mix 3 USB with PC software which can only access a single soundcard If the PC software you plan on using with the two USB1 68 and USB2 66 ports can only be set up with a single soundcard You...

Page 19: ...s and twists when coiling them This gives the advantage of increasing their life and reliability Periodically check your cables A great number of problems faulty contacts ground hum discharges etc are...

Page 20: ...nnections are thoroughly dry before linking equipment or supplying electric power Troubleshooting DAP Audio Core Mix 3 USB This troubleshooting guide is meant to help solve simple problems If a proble...

Page 21: ...cy 1 kHz Mid range 26dB 12dB Low frequency 70 Hz Low range 26dB 12dB Microphone EQ High frequency 5 kHz High range 12dB 12dB Mid frequency 800 kHz Mid range 12dB 12dB Low frequency 120 Hz Low range 12...

Page 22: ......

Reviews: