39
Ordercode: D2289
GIG-202 Tab
DCA set interface
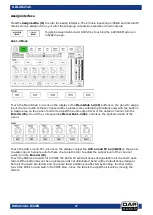
Press the DCA button (31) located on the panel to enter the page DCA group assignment. The button will
flash to indicate that edit mode is active. In order to access this screen, you can also press the DCA icon
while operating in the following menus: Mixer, Assign, Channel and System.
Press one of the DCA1-6 icons on the display. The icons will light up, indicating that it is
possible to make changes or to add/delete channels.
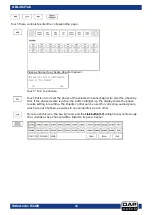
In order to select channels, touch the box corresponding to the
desired channel. The selected box will change color indicating
that the channel was added. Similarly, touch the channel box to
remove the desired channels.
Each DCA group can be renamed, if need be. Touch the respective DCA box and hold
it until the keyboard appears on the display. You can also access this function, while on
the menus: Long Fader or Mixer.
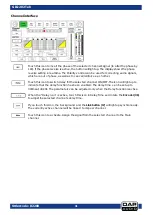
Once you have edited the DCA group, press the “DCA Set” button (either on the panel
(31) or on the display). Repeat the above steps to edit other DCA groups. Each group
may be assigned to multiple channels. For example, channel 3 can be assigned to
DCA1 and DCA2 at the same time.
Once you have made the adjustments, the system will automatically return to Mixer
page. Now, it is possible to operate the selected group. Move the fader on the left-
hand side of the display or turn the corresponding controls to increase/decrease the
channel fader levels (not volume).
While in the DCA, if you press the SOLO button (44), you can monitor the entire group,
using headphones. The S icons belonging to the channels, which are assigned to the
group, will light up.
While in a DCA group, press the MUTE button (45). The whole group will be muted and
the light indicators assigned to each channel will be off.
Press this icon to erase the channel selection from the desired DCA group.
Summary of Contents for GIG-202 Tab
Page 62: ...61 Ordercode D2289 GIG 202 Tab Block Diagram...
Page 64: ...2016 DAP Audio...

