background image

2

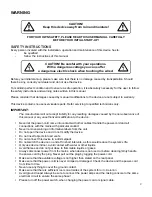
WARNING

FOR YOUR OWN SAFETY, PLEASE READ THIS USER MANUAL CAREFULLY

BEFORE YOUR INITIAL START-UP!

SAFETY INSTRUCTIONS

Every person involved with the installation, operation and maintenance of this device has to:

-

 be 

qualified

-


follow  the instructions of this manual

Before your initial start-up, please make sure that there is no damage caused by transportation. Should
there be any, consult your dealer and do not use the device.

To maintain perfect condition and to ensure a safe operation, it is absolutely necessary for the user to follow
the safety instructions and warning notes written in this manual.

Please consider that damages caused by manual modifications to the device are not subject to warranty.

This device contains no user-serviceable parts. Refer servicing to qualified technicians only.

IMPORTANT:

The manufacturer will not accept liability for any resulting damages caused by the non-observance of
this manual or any unauthorized modification to the device.


Never let the power-cord come into contact with other cables! Handle the power-cord and all
connections with the mains with particular caution!


Never remove warning or informative labels from the unit.


Do not open the device and do not modify the device.


Do not insert objects into air vents.


Do not connect this device to a dimmerpack.


Do not switch the device on and off in short intervals, as this would reduce the system’s life.


Only use device indoor, avoid contact with water or other liquids.


Avoid flames and do not put close to flammable liquids or gases.


Always disconnect power from the mains, when device is not used or before cleaning! Only handle
the power-cord by the plug. Never pull out the plug by tugging the power-cord.


Make sure that the available voltage is not higher than stated on the rear panel.


Make sure that the power-cord is never crimped or damaged. Check the device and the power-cord
from time to time.


Never use anything to cover the ground contact.


Make sure that there is sufficient room on all sides of the system for

 air circulation.


Avoid ground loops! Always be sure to connect the power amps and the mixing console to the same
electrical circuit to ensure the same phase!


Please turn off the power switch, when changing the power cord or signal cable.

CAUTION!

Keep this device away from rain and moisture!

CAUTION! Be careful with your operations.

With a dangerous voltage you can suffer

a dangerous electric shock when touching the wires!

Summary of Contents for Palladium P-400

Page 1: ...Palladium P 400 ORDERCODE D4131 P 500 ORDERCODE D4132 P 700 ORDERCODE D4133 P 900 ORDERCODE D4134 P 1200 ORDERCODE D4135 P 1600 ORDERCODE D4136 P 2000 ORDERCODE D4137...

Page 2: ...ly on DAP Audio for more excellent audio products We design and manufacture professional sound equipment for the entertainment industry New products are being launched regularly We work hard to keep y...

Page 3: ...udio Dap Audio Palladium Vintage Series Product Guide Warning Safety instructions Operating Determinations Description Features Frontside Backside Installation Set Up and Operation Maintenance Trouble...

Page 4: ...ver remove warning or informative labels from the unit Do not open the device and do not modify the device Do not insert objects into air vents Do not connect this device to a dimmerpack Do not switch...

Page 5: ...nect mains power supply immediately Have a qualified engineer inspect for safety before operating If the device has been exposed to drastic temperature fluctuation e g after transportation do not swit...

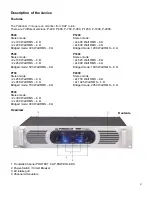
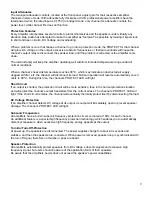
Page 6: ...600 Stereo mode Stereo mode 2x 160 Watt RMS 8 2x 525 Watt RMS 8 2x 250 Watt RMS 4 2x 800 Watt RMS 4 Bridged mode 500 Watt RMS 8 Bridged mode 1600 Watt RMS 8 P700 P2000 Stereo mode Stereo mode 2x 250 W...

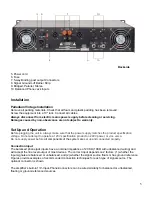
Page 7: ...product specification voltage Do not attempt to operate a 120V specification product on 240V power or vice versa Do not supply power before all components of the system are set up and connected proper...

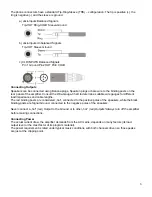
Page 8: ...determine suitable wire gauges for different load impedances and cable lengths The red binding posts are considered hot connected to the positive poles of the speakers while the black binding posts ar...

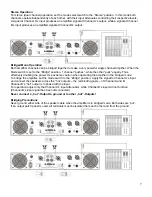
Page 9: ...er pulls equally Thus effectively doubling the power Use extreme caution when operating the amplifier in the bridged mode To bridge the amplifier set the mode switch to the Bridge position Apply the s...

Page 10: ...the rear barrier strip This jumper electrically connects the signal ground to the chassis AC ground If the jumper is removed the signal ground is lifted and completely isolated from the chassis AC gro...

Page 11: ...omatically once it cools to 80 C During this time the channel s PROTECT LED will light Short Circuit If an output is shorted the protection circuit will be more sensitive than in the normal protection...

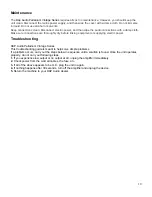
Page 12: ...t or supplying electric power Troubleshooting DAP Audio Palladium Vintage Series This troubleshooting guide is meant to help solve simple problems If a problem occurs carry out the steps below in sequ...

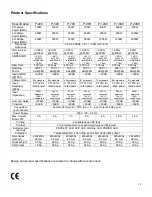
Page 13: ...775V for rated power 0 775V for rated power 0 775V for rated power 0 775V for rated power 0 775V for rated power 0 775V for rated power Input Impedance 20K balanced 10K unbalanced 20K balanced 10K un...

Page 14: ...2003 DapAudio...
Reviews: