Page 13 of 20
5.3 X210LR Rail Mounted version
Check you have the following items:
X210 LED Light – supplied complete with mounting box/PSU
X210 Rail Mount Kit accessory
Kit including user manual and hex key
NOTE: Rail not supplied – if required, order code XRAIL
If you are installing the XRAIL:
Hold the rail against the selected location on the wall, bearing in mind the final position
and range of travel of the light-head required, to project its light patch where it will be
needed.
Ensuring the rail is horizontal; drill the required fixing positions for 2 screw holes.
Fix the rail to the wall, using appropriate fixings if necessary and the 2 screws provided.
NOTE: Make sure you are aware of any hidden services in the wall.
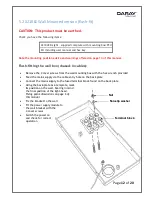
Ensure the rail end caps and cover infill are properly fitted.
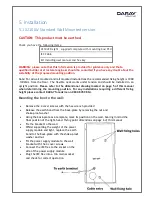
The rail mount clamp should already be fitted to the power supply module.
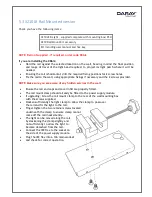
If upgrading; Screw the rail mount clamp to the rear of the wall mounting box
with the screws supplied.
Slacken sufficiently the light clamp to allow the clamp to pass over
the rail and fit the light to the rail.
Finger tighten the two retainer screws located
underneath the clamp to ensure clamp cannot
come off the rail inadvertently.
The light can be moved along the rail
by slackening the clamp slightly and
not sufficiently to allow the light to
become detached from the rail.
Connect the IEC flex to the socket on
the side of the power supply module.
Plug the IEC flex into a 13A mains socket
and check for correct operation.
Summary of Contents for X210 LED
Page 1: ...X210 LED Examination Light Operating Installation Manual QAM X210 0818 10 X210LW ...
Page 2: ...Page 1 of 20 ...
Page 6: ...Page 5 of 20 1 2 Technical Drawings ...
Page 7: ...Page 6 of 20 ...
Page 21: ...Page 20 of 20 Service Notes ...
Page 22: ...Page 21 of 20 ...
Page 23: ...Page 22 of 20 ...


