background image

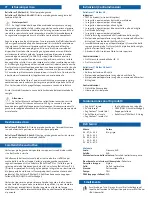
To avoid the hook and loop straps getting in the way during the individu-

al application steps, attach them behind onto the respective fleece side.

Using the Relief Insert® 2.0 as a splinting system:

When used as a splinting system, the Relief Dual® Plus Off-loading 

Shoe is not required. Set the shoe aside and proceed with opening the 

splinting system.

1.  Fold the front splint away to the side.

2.   If desired, another compatible DARCO insole can be placed in the 

splinting system. To do this, remove the grey insole. Then place and 

fix the desired insole analogously to the grey insole in the splinting 

system.

3.   Place the leg on the calf liner of the calf splint. Make sure that the 

foot is in contact with the insole.

4.   The width of the guide splint automatically adjusts to the patient’s 

needs by means of the adjuster on the back of the guide splint.

5.   Once the leg is positioned, close the splinting system. To do this, 

place the front splint on the shin. Make sure that the front splint 

is positioned centrally within the calf splint. Guide the three hook 

and loop straps through the loops. Pull the hook and loop straps 

as tight as necessary. Ensure that the leg is supported comfortably. 

Optionally, the blue forefoot strap (F) can be attached to the forefoot 

for additional support.

Using the Relief Insert® Walker 2.0 as a lower leg / foot orthosis:

Perform steps 1 – 5 as described. After that, please continue as follows. 

6.   Let the patient step into the opened foot section of the Relief Dual® 

Plus Off-loading Shoe with the orthosis (splint) on. For particularly 

easy entry, open the Relief Dual® Plus completely using the hook and 

loop straps (A, B, C). Make sure that the insole is positioned securely 

at the front in the shoe.

7.   Now close the off-loading shoe with the two hook and loop straps C 

of the heel cap.

8.  The inner shoe tabs can be placed over each other either way (D).

9.   Close the two hook and loop straps A, B as described below. Fold the 

strap A on the outer side (left or right) around the tab and secure it 

firmly. Close the shoe with the strap on the other side. If needed, the 

length of the upper hook and loop strap A can be customised to fit. 

Now close the shoe with the lower hook and loop fastener B such 

that the DARCO logo is on the outside of the shoe.

10.  To achieve additional stabilisation of the ankle joint, the volume of 

the air chambers can be increased using the pump attached to the 

side. To reduce the volume, release the air using the silver valve. This 

allows for individual filling and adjustment. Ensure that the leg is 

supported comfortably. If impaired sensation, swelling or pain occurs, 

the pressure should be reduced by releasing air from the chambers 

using the valve. Should persistent pain occur, the treatment should 

be interrupted and a doctor should be consulted.

Using the Relief Insert® Walker 2.0 Achill as an Achilles walker:

11. Fold the front splint to the side.

12. Leave the insole in the splint.

13.  Place the wedges in the heel area of the splint on the insole, cor-

responding to the degree of plantar flexion that is therapeutically 

required. A wedge has a height of approx. 11 mm. Depending on the 

number of wedges used, the height varies and the angle of plantar 

flexion can, thus, be adjusted individually. 3 wedges are equivalent to 

approx. 120° slant.

14. Fix the wedges to the insole using the adhesive dots.

15.  Depending on the therapy course, the wedges can be removed and, 

thus, the height adjusted.

Once the wedges are positioned, please carry out steps 3 to 10.

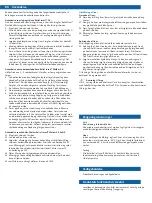
Changing the lining

Removing the lining:

16.  Remove the blue calf liner attached to the calf splint with hook and 

loops.

17.  The grey air liner with integrated air chambers and pump remains  

in the product and must not be removed.

18.  Now carefully remove the blue front liner attached to the front splint 

with hook and loop fasteners.

19.  The calf liner, front liner and forefoot strap can be washed, if re-

quired.

Fitting the lining:

After cleaning the blue lining, please carry out the steps described below:

20.  First attach the front liner to the front splint using the hook and loop 

fasteners. To do this, fold the liner in the middle lengthwise and place 

it centrally (according to the shape of the front splint) on the front 

splint. By unfolding the liner, it clings to the front splint in the correct 

position. Gently press the front liner against the splint.

21.  The calf liner is also folded lengthwise in the middle for attachment 

to the splint. Place the calf liner in the centre of the calf splint with 

the notches at the level of the ankle. By unfolding the liner, it clings 

to the calf splint in the correct position. Gently press the calf liner.

To close the splinting system or walker, follow the steps described from 

step 1.

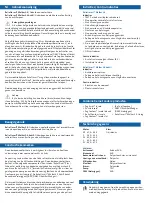
Instructions for use

The Relief Insert® Splinting System may only be used in combina-

tion with the Relief Dual® Plus Off-loading Shoe for walking. The splint is 

not designed for walking without a shoe.

EN Use

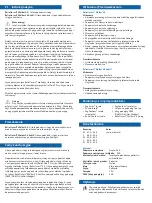
Maintenance

The product does not require maintenance.

Cleaning instructions

Washing

Shoe, splint, grey insole, wedges:

If these are slightly soiled, wipe with a damp cloth or clean with 

commercially available disinfectants.

Liners:

To wash, the blue calf and front liners are removed from the splint 

and then washed at approx. 60° C in a washing machine. The op-

tional forefoot strap can also be washed at 60° C. The air liner with 

air chambers and the pump cannot be washed.

Drying

Do not dry any of the components of the Relief Insert® Walker 2.0 | 

Achill in a dryer or on a radiator, but dry them at room temperature.

Working life / Lifespan of the product

The lifespan of the medical device is determined by natural wear 

and tear due to proper handling / cleaning.

Summary of Contents for Relief Dual Plus

Page 1: ...illes tendon relief DE Unterschenkel Fu orthese mit Achillessehnenentlastung ES Ortesis de pierna y pie con descarga del tend n de Aquiles FR Orth se de jambe pied avec d charge du tendon d Achille IT...

Page 2: ...C A B D E F E I J H G E M K L Relief Dual Plus Relief Insert 2 0...

Page 3: ...anciare NL Automatische wijdteaanpassing Waar nodig los te haken DA Automatisk bredderegulering Kan h gtes af efter behov SV Automatisk viddreglering kan hakas loss vid behov PL Automatyczna regulacja...

Page 4: ...r as soon as possible If you report this to the specialist dealer the dealer will forward this immediately The reports are agreed with and processed by the competent authorities Please always follow t...

Page 5: ...d be interrupted and a doctor should be consulted Using the Relief Insert Walker 2 0 Achill as an Achilles walker 11 Fold the front splint to the side 12 Leave the insole in the splint 13 Place the we...

Page 6: ...r Bei einer Meldung an den Fachh ndler wird dieser diese umgehend weiter leiten Die Meldungen werden mit den zust ndigen Beh rden abgestimmt und bearbeitet Beachten Sie bitte immer diese Gebrauchsanwe...

Page 7: ...auerhafte Schmerzen auftreten ist die Versorgung zu unterbrechen und ein Arzt sollte konsultiert werden Anwendung als Achilles Walker Relief Insert Walker 2 0 Achill 11 Klappen Sie die Front Schiene z...

Page 8: ...quierdo o derecho se realiza al colocar las cintas con cierre de gancho y bucle La ortesis de pierna y pie consta de los componentes siguientes Un zapato Relief Dual Plus Zapato de descar ga con ca a...

Page 9: ...de la v lvula Si el dolor no desaparece suspenda el uso de la ortesis y consulte a un m dico Aplicaci n como andador protector del tend n de Aquiles Relief Insert Walker 2 0 Achill 11 Pliegue la f ru...

Page 10: ...ent Remarques importantes Si l utilisation du dispositif m dical entra ne une d gradation grave de l tat de sant veuillez contacter au plus vite votre fournisseur ou le fabricant Une notification au f...

Page 11: ...En cas de douleurs permanentes interrompre l utilisation et consulter un m decin Utilisation comme Achilles Walker Relief Insert Walker 2 0 Achill 11 Rabattez l attelle avant sur le c t 12 Laissez la...

Page 12: ...tate con le autorit competenti Seguire sempre queste istruzioni per l uso In presenza di effetti indesiderati ad es rigonfiamento della pelle compressioni disturbi della circolazione sanguigna ecc inf...

Page 13: ...cazione come Achilles Walker Relief Insert Walker 2 0 Achill 11 Girare la stecca anteriore a lato 12 Lasciare la soletta interna nella stecca 13 A seconda della posizione del piede equino terapeuticam...

Page 14: ...eedt meld dit dan zo snel mogelijk bij uw vakhandel of de fabrikant Bij een melding bij de vakhandel zal deze uw melding direct doorgeven De meldingen worden in overleg met de bevoegde autoriteiten be...

Page 15: ...pijn daarna niet minder wordt moet de behandeling worden onderbroken en een arts geraadpleegd worden Gebruik als achilles walker Relief Insert Walker 2 0 Achill 11 Klap de frontbrace naar de zijkant 1...

Page 16: ...ren vil dette jeblikkeligt blive videreformidlet Anmeldelserne koordineres og behandles i samarbejde med de ansvarlige myndigheder Overhold altid denne brugsanvisning I tilf lde af bivirkninger f eks...

Page 17: ...og l gen konsulteres Anvendelse som Achilles Walker Relief Insert Walker 2 0 Achill 11 Klap front skinnen til siden 12 Lad inders len blive i skinnen 13 L g kilen afh ngig af p kr vet behandling af sp...

Page 18: ...ljaren ska denna omedelbart vidarebefordra detta Rapporterna ska st mmas av och bearbetas med beh rig myndighet Beakta alltid denna bruksanvisning Informera l karen om du f r biverk ningar till exempe...

Page 19: ...ventilen Avbryt f rs rjningen vid l ngvarig sm rta och r dg r med en l kare Anv ndning som Achilles Walker Relief Insert Walker 2 0 Achill 11 F ll frontskenan t sidan 12 L t innersulan ligga kvar i s...

Page 20: ...atychmiastowe przekazanie Zg oszenia s uzgadniane i przetwarzane z w a ciwymi organami Nale y zawsze przestrzega instrukcji u ycia W przypadku wyst pienia dzia a niepo danych np obrz ku sk ry odcisk w...

Page 21: ...ania b lu nale y przerwa stosowanie produktu i skonsultowa si z lekarzem Stosowanie jako Achilles Walker Relief Insert Walker 2 0 Achill 11 Odsun na bok szyn frontow 12 Pozostawi podeszw zewn trzn w s...

Page 22: ...a prodajalca ali proizvajalca V primeru prijave specializiranemu prodajalcu bo slednji to takoj poslal naprej Poro ila se usklajujejo in obdelujejo s pristojnimi organi Vedno upo tevajte ta navodila z...

Page 23: ...1 Sprednjo opornico odprite v stran 12 Notranji podplat pustite v opornici 13 V petni predel opornice na notranji podplat postavite klinasti povi ek skladno s terapevtskimi potrebami glede naklona sto...

Page 24: ...ogu e prodava u od kojeg ste kupili proizvod ili proizvo a u Ako se javite prodava u on e Va problem odmah proslijediti dalje Prijave se uskla uju i obra uju u suradnji s nadle nim dr avnim tijelima U...

Page 25: ...onzultirati lije nika Primjena kao ortoza za hodanje za rastere enje Ahilove pete Relief Insert Walker 2 0 Achill 11 Otklopite prednju udlagu u stranu 12 Ostavite unutarnji potplat u ipci 13 Ovisno o...

Page 26: ...poss vel Se o revendedor especializado for informado transmiti lo imediatamente ao fabricante As informa es s o coordenadas e processadas em articula o com as autoridades competentes Observar sempre e...

Page 27: ...como Achilles Walker Relief Insert Walker 2 0 Achill 11 Abra a tala dianteira pondo a para o lado 12 Deixe a palmilha na tala 13 Coloque as cunhas na regi o do calcanhar da tala na palmilha de acordo...

Page 28: ...identifikator proizvoda PT Identificador nico do dispositivo EN Latex free DE Latexfrei ES Sin l tex FR Sans latex IT Senza lattice NL Latexvrij DA Latexfrit SV Latexfri PL Niezawieraj ce lateksu SL...

Reviews: