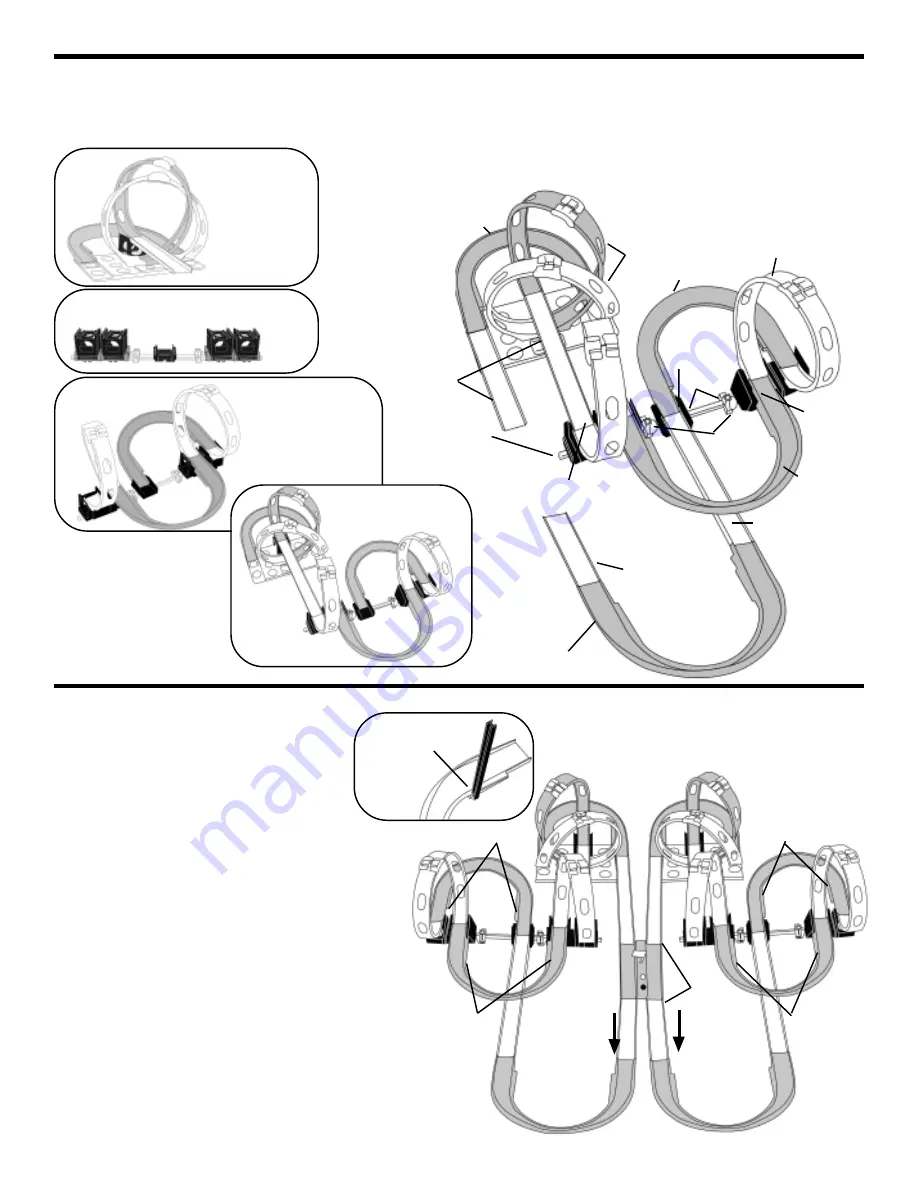
STEP 6
• Once you have completed your
set, attach 8 bars to the flexi-curves
shown in Figure 7. Attach by sliding
through the notches on the interior of
the curves. These will help stabilize the
layout.
STEP 7
FIGURE 6.5
FIGURE 6.1
FIGURE 6.3
Bars
Bars
Bars
Bars
Track
Joiners
Cars race
in this
direction
Cars race
in this
direction
FIGURE 7
PAGE 5
*NOTE ABOUT STICKERS, TUNNEL, and MOUNTAINS
The photo on the front of the box suggests where to
place the stickers, tunnel, and mountains. When placing
these decorations on your layout, please remember:
1) Do not place stickers across any track connections.
2) Place the tunnel flat on the ground so that it does not
impede the cars on the track.
3) Mountains can be placed wherever you like, so long as
they do not impede the cars on the track.
• Attach the second half of the set to
the start-win box using 2 track joiners.
Your completed set should now look
like Figure 7.
Note: You will have 2 Track Joiners
left over.
FIGURE 6.2
• Assemble the second half of the set, which is a mirror image of the half you just assembled. Figures 6.1
through 6.4 illustrate how to build the mirror image. Figure 6.5 shows the completed mirror image.
Slide bar into
notch on inner
side of
flexi-curve
Flexi-Curve
2 Stacking Bridges
Bars
Large
Joiner
Bar
Couplers
2 Stacking
Bridges
On Large
Joiners
Loop
Loops
Flexi-Curve
14" Straight
7" Straight
Flexi Curve
14" Straight
Tracks
Flexi-Curve
FIGURE 6.4


