6
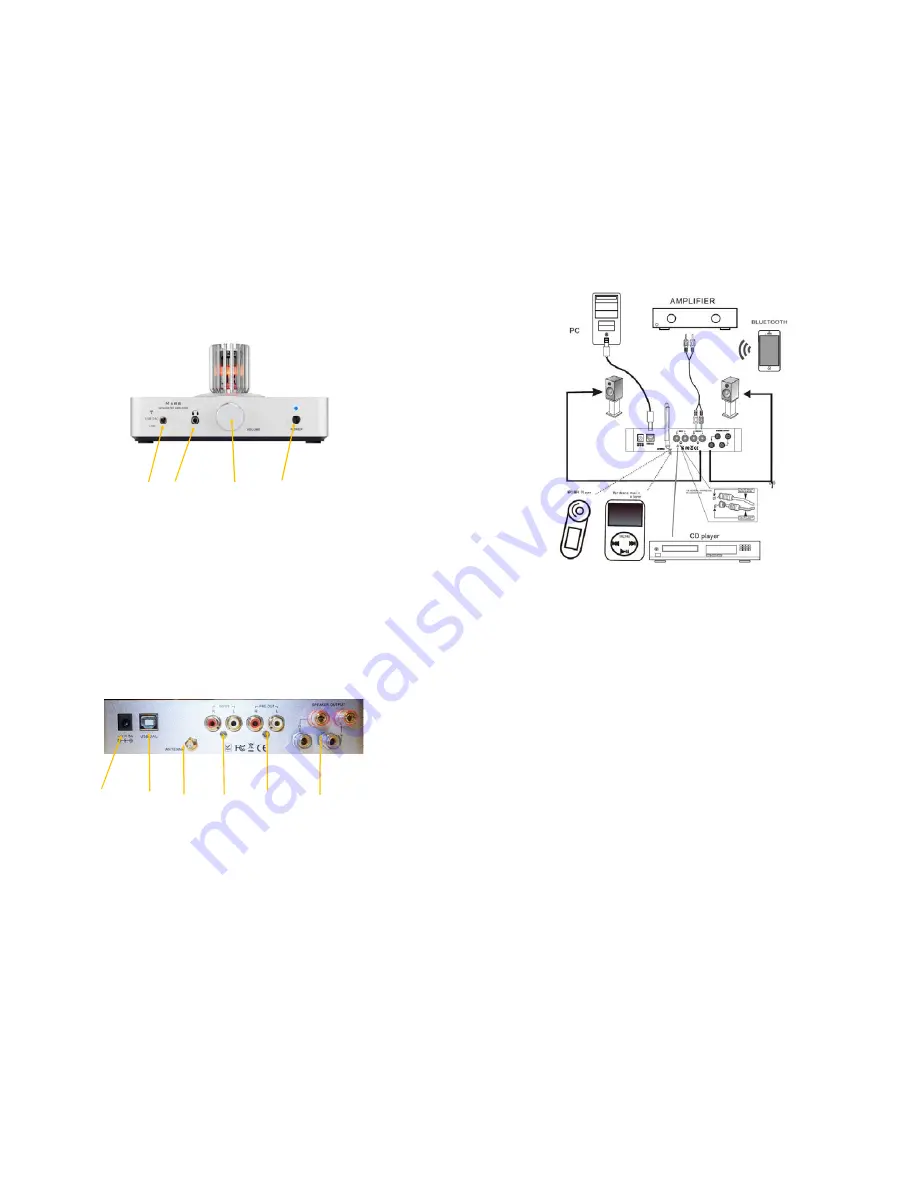
Front
5.0 FAMILIARIZING YOURSELF WITH YOUR MARS AMP
(1) USB, LINE or Wireless input selector
(2) Headphone Jack
(3) Volume Control
(4) Power On/Off Button
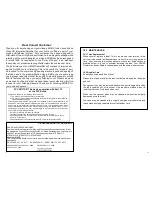
(5) Power Input Jack: 12
—
14 VDC, 5A
(6) USB DAC
(7) Antenna for Wireless receiver
(8) Line Input
(9) Preamplifier output (L&R)
(10) Right and Left Speaker Output; 4 or 8 Ohms
Rear Panel Connections
1
3
2
Shown with protective tube cage removed.
4
5
6
7
8
9
10
7
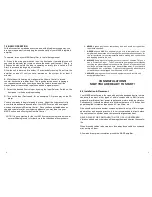
6.1 Connect your MARS integrated amplifier to the various components that
you wish to use. (Example: CD Player connected to Line Input via a pair of
good quality RCA terminated shielded cables, and your PC to the DAC input
via USB cable.) Check Channel designations (L + R, Red and Black).
6.2 Connect your MARS amplifier’s speaker outputs using good quality desig-
nated audiophile speaker cable to your speakers. (Your Authorized DARED
Dealer may be of assistance regarding cable selections.) Check channel des-
ignations, L & R (Left & Right) as well as Speaker Polarity Red & Black (+
and
-
).
6.3 With all input and output connections made, Use the supplied AC power
adapter with its IEC power cord, connecting the 3.5 mm plug into the power
jack on the rear panel. Ensure that the AC wall outlet you use has a function-
ing ground. Then, it is preferable that you plug your MARS amplifier into a
surge suppressor or combination surge suppressor power bar used as well for
your other audio components. Best is to connect the AC power cord, suppres-
sor or power bar directly into a dedicated AC outlet. Best to avoid using an
extension cord.
NOTE: In order to obtain the maximum performance from your audio system
we strongly recommend that the detachable power cord does not come into
physical contact with any of the interconnect cables running to and from your
MARS amplifier. In the event that this can’t be avoided, you should ensure
that any cables coming into contact with each other are crossed at ninety de-
gree angle to minimize the contact area.
6.0 CONNECTIONS


