background image

16

Summary of Contents for DMWH001

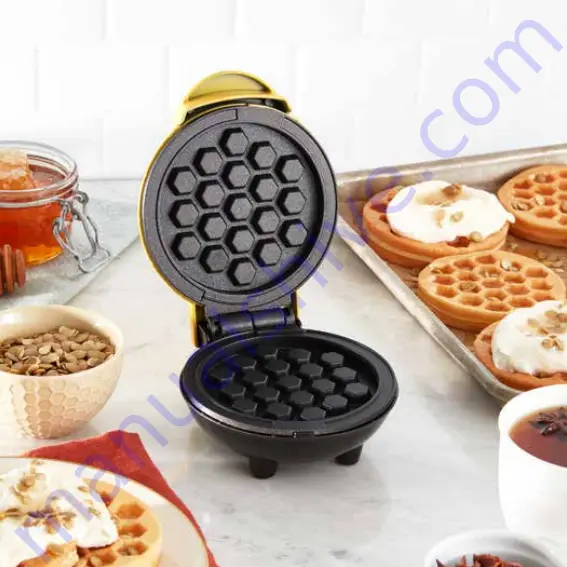
Page 1: ... DMWH001 HONEYCOMB Mini Waffle Maker recipes inside Instruction Manual Recipe Guide ...

Page 2: ......

Page 3: ...afeguards 4 7 Parts Features 8 Using Your Mini Waffle Maker 9 12 Cleaning Maintenance 13 Troubleshooting 14 15 Recipes 17 26 Notes 28 29 Customer Support 30 Warranty 31 HONEYCOMB Mini Waffle Maker t h e dash team ...

Page 4: ...stick Cooking Surface Do not operate this appliance with a damaged cord damaged plug after the appliance malfunctions is dropped or damaged in any manner Return appliance to the nearest authorized service facility for examination repair or adjustment DO NOT use the Mini Waffle Maker near water or other liquids with wet hands or while standing on a wet surface For maintenance other than cleaning pl...

Page 5: ...e or even in personal injury This appliance has a polarized plug one blade is wider than the other To reduce the risk of electric shock this plug will fit in a polarized outlet only one way If the plug does not completely fit in the outlet reverse the plug If it still does not fit contact a qualified electrician Do not attempt to modify the plug in any way A short power supply cord is to be provid...

Page 6: ...dommages corporels ne mettez pas le cordon la prise ou l appareil dans ou à proximité de l eau ou d autres liquides Le mini gaufrier n est PAS lavable en machine N utilisez jamais des produits d entretien abrasifs pour nettoyer l appareil car cela pourrait endommager le mini gaufrier et sa surface de cuisson anti adhérente N utilisez pas cet appareil avec un cordon ou une prise endommagé e ou si l...

Page 7: ... une mauvaise utilisation de l appareil Une mauvaise utilisation du mini gaufrier peut entraîner des dommages matériels ou même des dommages corporels Cet appareil a une fiche polarisée un des brins est plus large que l autre Afin de réduire le risque d électrocution cette fiche ne s insère dans la prise électrique que d une façon Si la fiche ne s insère pas complètement dans la prise inversez la ...

Page 8: ... 8 Indicator Light Cover Non slip Feet Cover Handle Cooking Surfaces parts Features ...

Page 9: ...d may cause injury Always lift and lower the Cover by the Cover Handle Lift from the side Never touch the Cooking Surface or Cover while appliance is in use Before first use remove all packaging material and thoroughly clean your Honeycomb Mini Waffle Maker using your Mini Waffle Maker ...

Page 10: ...lug the cord into a power outlet The Indicator Light photo A will illuminate signaling that the Mini Waffle Maker is heating up Once the Cooking Surface reaches the optimal cooking temperature the Indicator Light will automatically shut off Now you re ready to get cooking photo B 10 B A ...

Page 11: ...Mini Waffle Maker 4 Place or pour batter onto the Cooking Surface photo D and close the Cover 3 Carefully lift the Cover by the Cover Handle and spray both Cooking Surfaces with a small amount of cooking spray photo C C D 11 ...

Page 12: ... nylon or silicone cooking utensil photo E When you have finished cooking unplug your Mini Waffle Maker and allow it to cool before moving or cleaning photo F using your Mini Waffle Maker 12 NOTE Do not use metal utensils to remove or place food on the Cooking Surface as this will damage the non stick surface 12 F E ...

Page 13: ...l completely Using a damp soapy cloth wipe down the Cooking Surface and Cover Thoroughly rinse the cloth and wipe again Thoroughly dry the Honeycomb Mini Waffle Maker before storing If there is food burned onto the Cooking Surface pour on a little cooking oil and let sit for 5 to 10 minutes Scrub the Cooking Surface with a sponge or soft bristled brush to dislodge food Use a damp soapy cloth to wi...

Page 14: ...ing process the heating element will automatically turn on and off to regulate the temperature and ensure that the Cooking Surface does not get too hot or cold When this occurs the Indicator Light turns on and off How do I know when the Mini Waffle Maker is heated and ready to use When the Waffle Maker reaches the optimal temperature the Indicator Light shuts off and that means you re ready to get...

Page 15: ...t food residue on the Cooking Surface This is normal especially when cooking with sugar Allow the appliance to cool fully pour on a little cooking oil and let sit for 5 10 minutes Scrub Surface with a sponge or soft bristled brush to dislodge food Use a damp soapy cloth to wipe down the Cooking Surface Rinse the cloth and wipe again If food remains pour on cooking oil and let sit for a few hours t...

Page 16: ...16 ...

Page 17: ...17 HONEYCOMB Mini Waffle Maker RECIPE guide Follow us bydash for recipes videos daily inspiration ...

Page 18: ... egg milk and melted butter in a separate bowl Add the wet ingredients to the dry and mix until just incorporated 2 Grease the Mini Waffle Maker with butter or coat with a light coat of cooking spray Pour cup of the batter into the Honeycomb Mini Waffle Maker and cook until golden brown Repeat with the remaining batter 3 Serve with a drizzle of maple syrup and fresh berries Ingredients 18 Yield 8 ...

Page 19: ... 19 ...

Page 20: ...bsp of the Parmesan cheese on the bottom of the Honeycomb Mini Waffle Maker Add half the cauliflower mixture spreading it evenly Sprinkle 1 tbsp more of the Parmesan cheese on top of the cauliflower mixture 3 Cook the chaffle until well browned and crisp 6 mins Set chaffle aside to cool Repeat 3 more times making 4 chaffles 4 Top each chaffle with 2 tbsp of the pizza sauce Sprinkle on 1 tbsp mozza...

Page 21: ...pped walnuts Ingredients Carrot Cake waffles Directions 1 Mix together flour sugar baking powder baking soda cinnamon clove and nutmeg 2 Whisk together egg buttermilk milk and vanilla extract until smooth Add in dry ingredients and mix until no clumps remain Mix in carrot raisins and walnuts 3 Add 3 tbsp of waffle mix to your Honeycomb Mini Waffle Maker and cook until golden brown on both sides 21...

Page 22: ... 22 ...

Page 23: ...aking powder sugar cinnamon and cream of tartar in a large bowl 3 Whisk together eggs and vanilla Slowly pour in the warmed milk and butter 4 Pour dry ingredients into the wet in three stages incorporating all dry ingredients before adding the next 5 Add 3 5 tbsp of waffle mix to your Honeycomb Mini Waffle Maker and cook until golden brown on both sides 6 Remove waffle and set on a wire rack and s...

Page 24: ... smooth Add dry ingredients and mix until no clumps remain 3 Add 3 tbsp of batter to your Honeycomb Mini Waffle Maker and cook until crispy on both sides 4 Remove waffles and immediately drape over a rolling pin or similarly sized cylindrical object to form taco shape Let waffles cool on rolling pin for 3 minutes then place in freezer 5 Serve with ice cream sprinkles and a caramel drizzle Ingredie...

Page 25: ... sure they are not overdried Once dried at a malleable consistency take the dehydrated tomatoes and compress them in a jar layering them with the garlic cloves and fresh basil Sprinkle the rest of the dried oregano along with the salt and pepper throughout the layering process Pour in olive oil until all ingredients are submerged Cover and refrigerate Ingredients 2 3 lbs fresh tomatoes cut into sl...

Page 26: ...ashed Potato Bite 3 tbsp mashed potatoes 5 min S more Biscuit 1 refrigerated biscuit dough sliced lengthwise 2 squares milk chocolate 5 mini marshmallows 5 7 min Grilled Cheese 2 slices white or wheat bread buttered 2 slices American Cheese 5 min Chocolate Chip Cookie 2 tbsp cookie dough 5 7 min Waffle Omelette 1 egg beaten 2 tbsp chopped veggies 1 tbsp grated Swiss cheese 5 min ...

Page 27: ...Brilliant waffle recipes over 80 for your Dash Mini Waffle Maker available now in our SWEET NEW COOKBOOK find more creative recipes at bydash com ...

Page 28: ... 28 customer support notes 28 ...

Page 29: ... 29 notes ...

Page 30: ...dash com customer support 30 Dash values quality and workmanship and stands behind this product with our Feel Good Guarantee To learn more about our commitment to quality visit bydash com feelgood 8am 8pm 9am 9pm 10am 10pm Hey Hawaii You can reach our customer service team from 5AM to 5PM And also Alaska feel free to reach out from 6AM 6PM feel good guarantee ...

Page 31: ...Send all inquiries to support storebound com There are no express warranties except as listed above REPAIR OR REPLACEMENT AS PROVIDED UNDER THIS WARRANTY IS THE EXCLUSIVE REMEDY OF THE CUSTOMER STOREBOUND SHALL NOT BE LIABLE FOR ANY INCIDENTAL OR CONSEQUENTIAL DAMAGES OR FOR BREACH OF ANY EXPRESS OR IMPLIED WARRANTY ON THIS PRODUCT EXCEPT TO THE EXTENT REQUIRED BY APPLICABLE LAW ANY IMPLIED WARRAN...

Page 32: ...1 800 898 6970 unprocessyourfood bydash com ...

Reviews: