∙ 5 ∙
∙ 4 ∙
•
Please read and save this instruction manual.
•
When using electrical appliances, basic safety
precautions should be followed including:
•
Read all instructions.
•
Remove all bags and packaging from
appliance before use.
•
Do not use appliance outdoors or for
commercial purposes.
•
Never leave appliance unattended when in
use.
•
Only use the appliance on a stable, dry surface.
•
Make sure the appliance is cleaned thoroughly
before using.
•
Do not use appliance for other than its
intended use. For household use only. Do not
use outdoors.
•
Close supervision is necessary when any
appliance is used by or near children. Children
should be supervised to ensure that they do
not play with the appliance.
•
Do not operate this appliance with a damaged
cord, damaged plug, after the appliance
malfunctions, is dropped, or damaged in
any manner. Return appliance to the nearest
authorized service facility for examination,
repair, or adjustment.
•
For maintenance other than cleaning, please
contact StoreBound directly at 1-800-898-6970
from 7AM-7PM PT Monday-Friday or by email
at support@storebound.com.
•
Do not place appliance on or near a hot gas
burner, hot electric burner, or in a heated
oven. Extreme caution must be used when
moving an appliance containing hot oil
or other hot liquids. Always attach plug to
appliance first, then plug cord into the wall
outlet. To disconnect, turn any control to “off”,
then remove plug from wall outlet. Do not use
appliance for other than intended use.
•
Refrain from using attachments that are not
recommended by the appliance manufacturer,
as this may result in fire, electric shock, or
personal injury.
•
Do not let the cord touch hot surfaces, or hang
over the edges of tables or counters.
•
This appliance is not intended for use by
persons (including children) with reduced
physical, sensory, or mental capabilities, or
lack of experience and knowledge unless they
are provided with supervision and instruction
concerning use of the appliance by a person
responsible for their safety.
•
Always be sure to unplug the appliance from
the outlet prior to moving, cleaning, storage,
and when not in use.
•
StoreBound shall not accept liability for
damages caused by improper use of the
appliance.
•
Improper use of the appliance can result in
property damage or even in personal injury.
•
This appliance has a polarized plug (one blade
is wider than the other). To reduce the risk of
electric shock, this plug will fit in a polarized
outlet only one way. If the plug does not
completely fit in the outlet, reverse the plug. If it
still does not fit, contact a qualified electrician.
Do not attempt to modify the plug in any way.
•
Turn the appliance OFF, then unplug from the
outlet when not in use, before assembling or
disassembling parts and before cleaning. To
unplug, grasp the plug and pull from the outlet.
Never pull from the power cord.
•
A short power supply cord is to be provided
to reduce the risk resulting from becoming
entangled in or tripping over a longer cord. An
extension cord may be used if care is exercised
in its use. If an extension cord is used, the
marked electrical rating of the extension cord
should be at least as great as the electrical
rating of the appliance. The extension cord
should be arranged so that it will not drape
over the countertop or tabletop where it can
be pulled on by children or tripped over
unintentionally. If the appliance is of the
grounded type, the cord set or extension cord
should be a grounding-type 3-wire cord.
•
Warning: Hot surfaces! Never touch the
Cooking Surface or Cover while appliance is
in use. Always lift and lower the Cover by the
Cover Handle.
•
DO NOT lift the Cover so that your arm is over
the Cooking Surface as it is hot and may cause
injury. Lift from the side.
•
To prevent the risk of fire, electric shock, or
personal injury, do not put cord, plug, or
appliance in or near water or other liquids. The
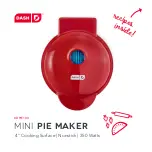
Mini Pie Maker is NOT dishwasher safe.
•
Never use abrasive cleaning agents to clean
your appliance as this may damage the Mini Pie
Maker and its non-stick Cooking Surface.
•
DO NOT use the Mini Pie Maker near water or
other liquids, with wet hands, or while standing
on a wet surface.
•
Allow Mini Pie Maker to cool completely before
moving, cleaning, or storing.
IMPORTANT SAFEGUARDS
IMPORTANT SAFEGUARDS
IMPORTANT SAFEGUARDS:
PLEASE
READ AND SAVE THIS INSTRUCTION
AND CARE MANUAL.
IMPORTANT SAFEGUARDS:
PLEASE
READ AND SAVE THIS INSTRUCTION
AND CARE MANUAL.
When using electrical appliances, basic safety precautions should be followed, including:


