FireWire Int. Convertor Quick Installation
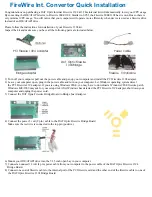
PCI Firewire 1394 Adapter
Bridge Adapter
DAT Optic Firewire
1394 Bridge
Power cable
Firewire 1394 Cable
Congratulations on purchasing a DAT Optic Internal Firewire 1394 kit. This internal kit will dramastically lower your CPU usage
By converting the IDE/ATAPI device to Firewire IEEE1394. Similar to SCSI, the Firewire IEEE1394 has its own Bus so there is
very minimal CPU usage. You will notice that your computer will operate more efficiently when device is used as a firewire drive
instead of an IDE/ATAPI drive.
Please follow the instructions for installation of your Firewire 1394 kit.
Inspect the kit and make sure you have all the following parts are included below.
1) Turn off your computer, pull out the power cable and pen up your computer and install the PCI Firewire 1394 adapter.
2) Leave your computer open, plug in the power cable and turn on your computer. Let Windows operating system detect
the PCI Firewire 1394 adapter. If you are using Windows 98SE, you may have to download a Windows 98SE firewire patch.
Windows ME/2000 may ask for your setup disk. After Windows has detected the PCI Firewire 1394 adapter, shut down your
computer and unplug the power cord.
3) Connect the DAT Optic Firewire Bridge Board to Bridge board adapter.
4) Connect the power 5 volt (2 pin) cable to the DAT Optic Firewire Bridge Board.
Make sure the red wire is connected to the top pin (positive).
6) Mount your IDE/ATAPI drive into the 5.25 inch open bay in your computer.
7) Connect an unused 12 volt (4 pin) power cable from your computer to the power cable of the DAT Optic Firewire 1394
Bridge Board.
8) Connect one end of firewire cable to the internal port of the PCI firewire card and the other end of the firewire cable to one of
the DAT Optic Firewire 1394 Bridge Board.
Optional


