CPU, I/O Expansion, and Graphics Boards
9-19
014–002091
4.
Lift the boardaway from the boardstack, andset it aside.
If you removeda failedgraphics board, insert it in an antistatic bag andreturn it
to Data General. Contact the Customer Support Center, as described in the
Preface, for information on returning the faulty part.
If you temporarily removed a board, put it inside an antistatic bag until you are
ready to reinstall it.
If you have not yet removedthe appropriate option board, or if you are removing
all option boards to replace the system board, remove the next option board by
repeating Steps 1 through 3 above. After you remove the appropriate option
board, continue with the next section, Installing the Graphics or Z-Buffer
Board." If you have removed all option boards to replace the system board,
proceedto the next chapter, Replacing the System Board."
Installing the Graphics or Z–Buffer Board
Before you can install a graphics boardor z-buffer board, you must remove the
computer unit's right side cover and attach the ESD wrist strap as described in
Chapter 6, Expanding and Maintaining Your Computer System."
CAUTION: Unless you are properly grounded, you can discharge static electricity and
damage components in the system.
To install the graphics boardor z-buffer board, follow the steps below. If you are
installing a new graphics controller board, start with Step 1. To install a new
z-buffer board, start with Step 2. If you are reinstalling a board you removed
temporarily, start with Step 3.
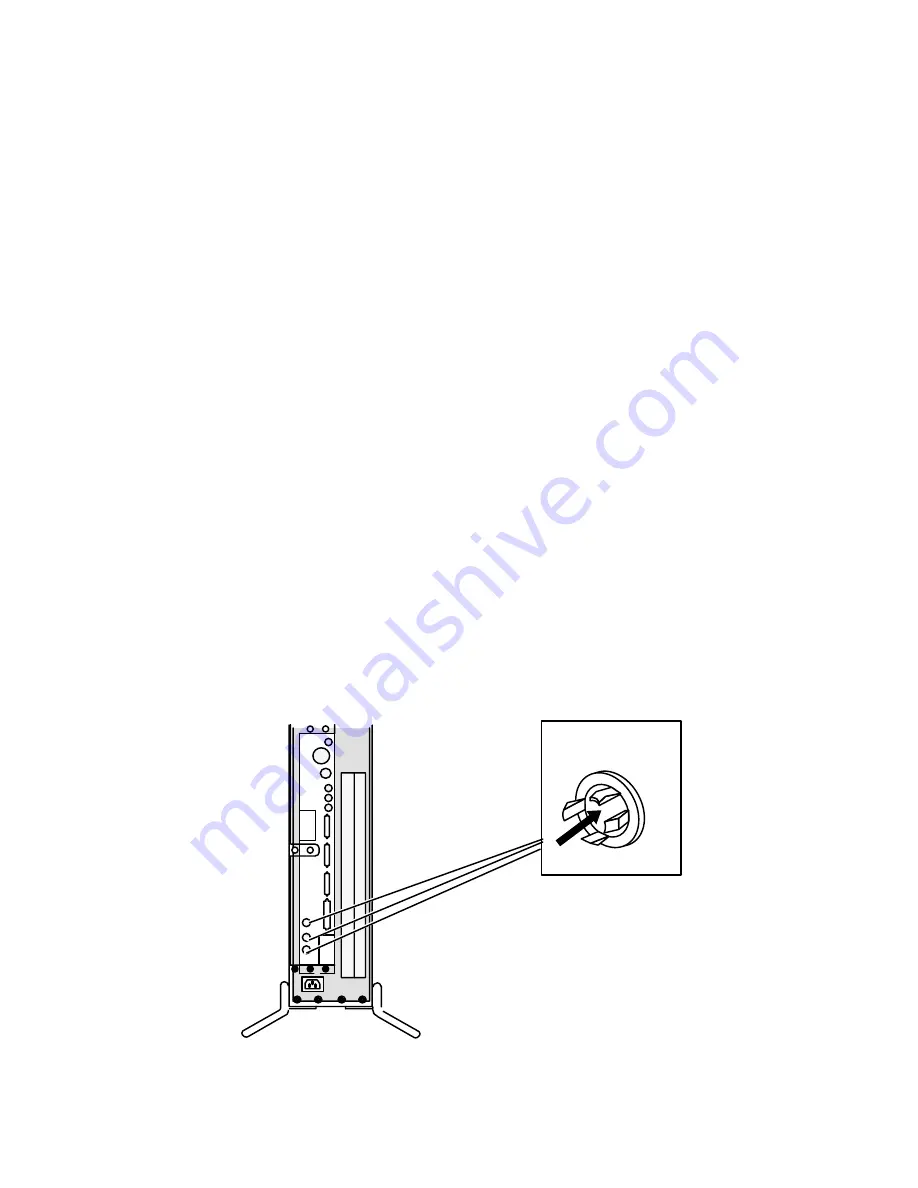
1.
From inside the computer unit, push out the three filler plugs that cover the
monitor connector slots on the computer unit bulkhead, as shown in
Figure 9Ć23.
Computer unit (back)
Remove filler plugs
Figure 9-23 Removing the Graphics Monitor Connector Filler Plugs
Summary of Contents for AViiON 4600 Series
Page 1: ... Customer Documentation P R O D U C T L I N E ...
Page 2: ......
Page 6: ......
Page 14: ...Preface xii 014 002091 ...
Page 24: ...Contents xxii 014 002091 ...
Page 58: ...Setting Up Your Computer System 2 18 014 002091 ...
Page 84: ...Setting Up and Installing a SCSI Bus 4 16 014 002091 ...
Page 122: ...Expanding and Maintaining Your Computer System 6 18 014 002091 ...
Page 148: ...Adding or Replacing Memory Modules 8 8 014 002091 ...
Page 182: ...Replacing the System Board 10 12 014 002091 ...
Page 188: ...Replacing the Fan Assembly 11 6 014 002091 ...
Page 236: ...Using the System Control Monitor B 22 014 002091 ...
Page 248: ...Solving Power Up Problems C 12 014 002091 ...
Page 260: ...Index 12 014 002091 ...
Page 262: ......
Page 266: ...Appendix Title 093 xxxxxx 2 Licensed Material Property of Data General Corporation ...


