Setting Up Your Computer System
2-6
014–002091
3.
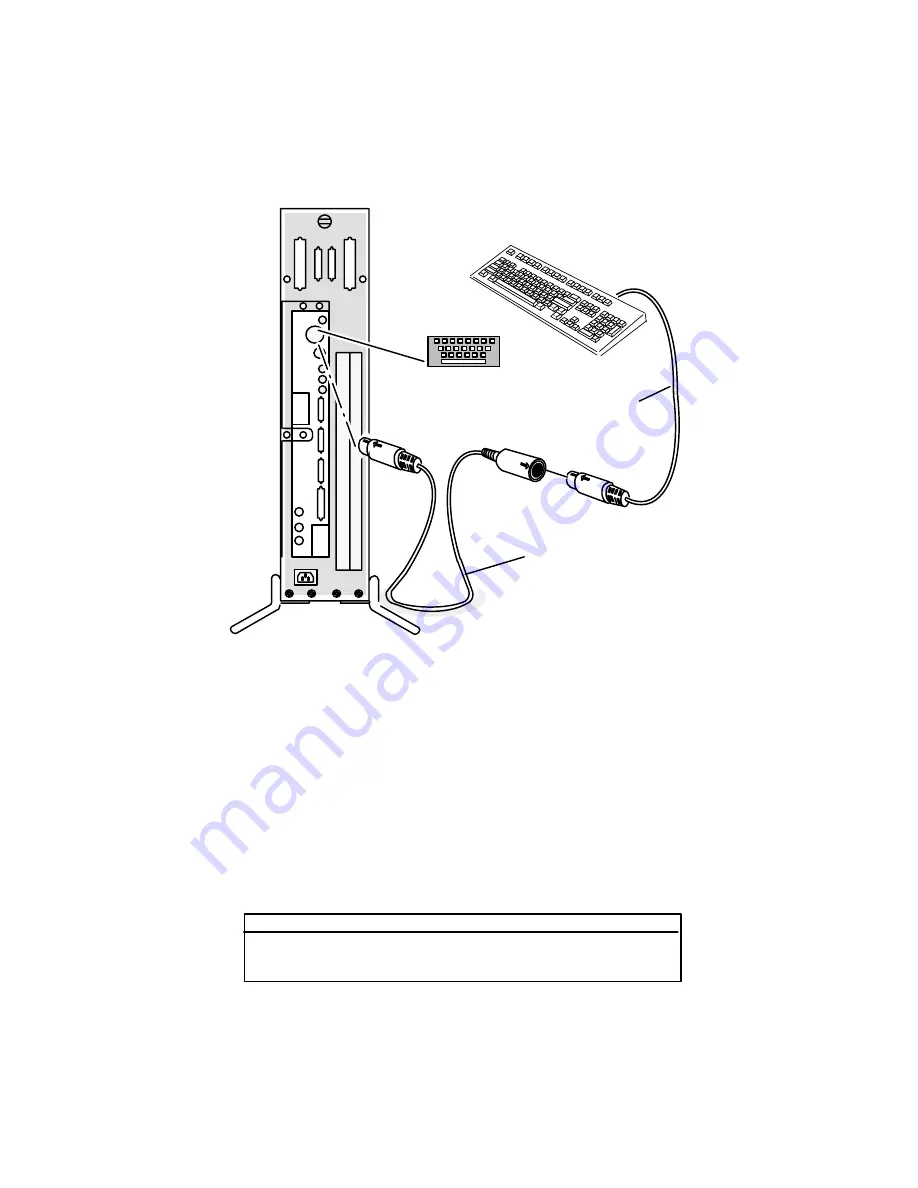
Attach the female end ofthe keyboard extension cable to the end ofthe keyboard
cable; then, plug the other end ofthe extended keyboard cable into the keyboard
connector on the rear panel ofthe computer unit, as shown in Figure 2Ć5.
Keyboard
connector
Keyboard
cable
Keyboard
extension cable
Computer Unit
Rear Panel
ÈÈ
ÈÈ
Figure 2-5 Connecting the Graphics Keyboard
Connecting the Mouse
(AViiON 530 Series)
Follow these steps to connect the mouse device to the computer unit. Reverse the
order ofthese instructions to remove a faulty mouse in order to replace it.
CAUTION: Do not try to remove or replace your mouse while computer power is on.
AViiON 530 series systems use the following extension cable to connect the mouse
cable to the computer unit:
Cable
part number
model number length (ft.)
Mouse
005-08468
1537E005
5
(extension)
1.
Position the computer unit so that you have access to the rear panel connectors.
2.
Place the mouse and pad on the work surface. Position the mouse pad so that its
longer side aligns with the edge ofthe work surface and place the mouse on the
mouse pad.
Summary of Contents for AViiON 4600 Series
Page 1: ... Customer Documentation P R O D U C T L I N E ...
Page 2: ......
Page 6: ......
Page 14: ...Preface xii 014 002091 ...
Page 24: ...Contents xxii 014 002091 ...
Page 58: ...Setting Up Your Computer System 2 18 014 002091 ...
Page 84: ...Setting Up and Installing a SCSI Bus 4 16 014 002091 ...
Page 122: ...Expanding and Maintaining Your Computer System 6 18 014 002091 ...
Page 148: ...Adding or Replacing Memory Modules 8 8 014 002091 ...
Page 182: ...Replacing the System Board 10 12 014 002091 ...
Page 188: ...Replacing the Fan Assembly 11 6 014 002091 ...
Page 236: ...Using the System Control Monitor B 22 014 002091 ...
Page 248: ...Solving Power Up Problems C 12 014 002091 ...
Page 260: ...Index 12 014 002091 ...
Page 262: ......
Page 266: ...Appendix Title 093 xxxxxx 2 Licensed Material Property of Data General Corporation ...


