CPU, I/O Expansion, and Graphics Boards
9-20
014–002091
2.
Carefully remove the option board from its package. Save the antistatic shipping
bag and packing materials to use if you have to return the option board.
CAUTION: If you need to set the option board down, put it back inside the
antistatic shipping bag.
3.
If you are installing a graphics controller board, insert the three BNC monitor
connectors through the holes in the computer unit bulkhead before continuing
with this step.
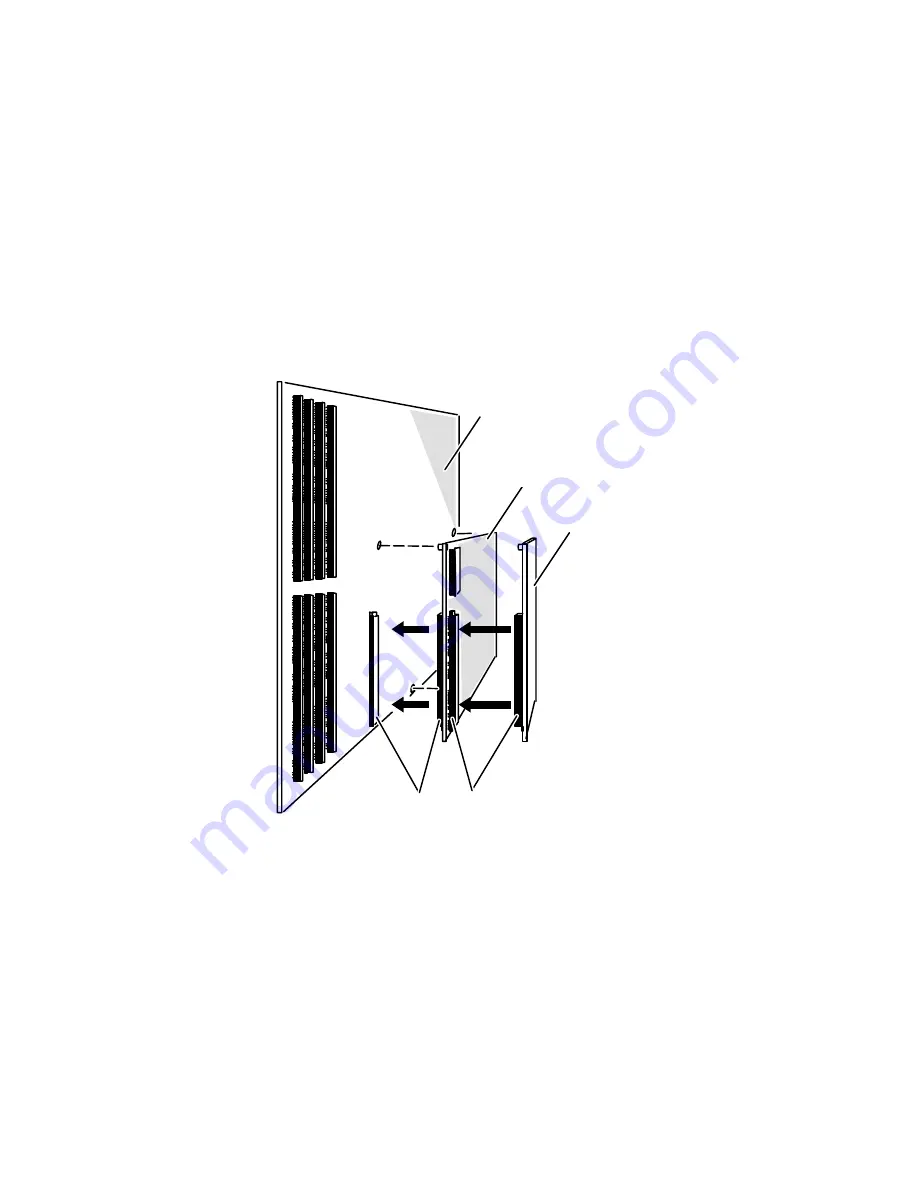
Align the interboard connectors and press them together as shown in
Figure 9Ć24. If you cannot press the connectors together, make sure that the
connectors are aligned correctly, and then try pressing them together again.
Graphics option board
System board
Interboard connectors
Z–buffer board
Figure 9-24 Joining the Interboard Connectors
If you are inserting another option board, repeat Steps 1 through 3 above. Otherwise,
go onto Step 4.
4.
Replace the board-retaining screws after you have installed all the option boards
as showninFigure 9Ć25.
Summary of Contents for AViiON 530 Series
Page 1: ...Customer Documentation P R O D U C T L I N E...
Page 2: ......
Page 6: ......
Page 14: ...Preface xii 014 002091...
Page 24: ...Contents xxii 014 002091...
Page 58: ...Setting Up Your Computer System 2 18 014 002091...
Page 84: ...Setting Up and Installing a SCSI Bus 4 16 014 002091...
Page 122: ...Expanding and Maintaining Your Computer System 6 18 014 002091...
Page 148: ...Adding or Replacing Memory Modules 8 8 014 002091...
Page 182: ...Replacing the System Board 10 12 014 002091...
Page 188: ...Replacing the Fan Assembly 11 6 014 002091...
Page 236: ...Using the System Control Monitor B 22 014 002091...
Page 248: ...Solving Power Up Problems C 12 014 002091...
Page 260: ...Index 12 014 002091...
Page 262: ......
Page 266: ...Appendix Title 093 xxxxxx 2 Licensed Material Property of Data General Corporation...


