Removing the system board
8-3
014–002250–01
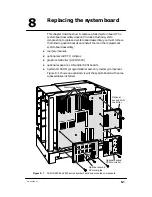
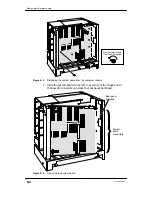
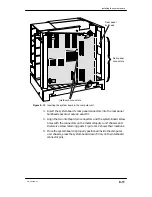
4. Using the medium Phillips screwdriver, remove the four screws
shown in Figure 8–3.
ÉÉÉ
ÉÉÉ
ÉÉÉÉ
ÉÉÉÉ
ÉÉÉÉ
ÉÉÉÉ
ÉÉÉÉ
ÉÉÉÉ
ÉÉÉ
ÉÉÉ
ÉÉÉ
ÉÉÉ
ÉÉÉ
ÉÉÉ
Remove four screws.
Figure 8–3
Unscrewing the main system board screws
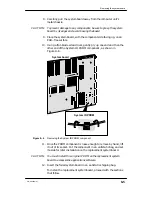
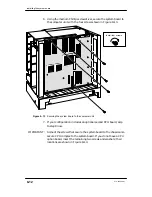
5. If you do not have a second CPU option, remove the two remaining
screws, as seen in Figure 8–4. Skip this step if your configuration
includes a CPU option board.
6. Grasp the the system board at its top and bottom centers, above
and below the interboard connectors, as seen in Figure 8–4. Gently
pull to dislodge the system board from the computer chassis
connector.
Summary of Contents for AViiON 550 Series
Page 2: ......
Page 6: ......
Page 12: ...Joining our users group x 014 002250 01 ...
Page 86: ...Opening and closing the computer unit 4 12 014 002250 01 ...
Page 96: ...Installing a drive assembly 5 10 014 002250 01 ...
Page 188: ......
Page 191: ......


