Replacing the speaker/LED assembly
9-6
014–002250–01
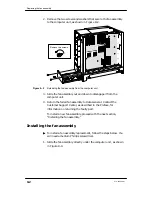
2. Grasping the LED wires from the inside of the chassis, pull the
LED back through the hole in the metal chassis.
3. Re–attach the plastic LED cover and let the LED hang freely inside
the computer chassis while you remove the rest of the assembly.
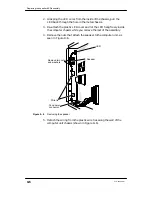
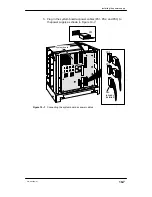
4. Remove the nuts that attach the speaker to the computer unit, as
seen in Figure 9–6.
Remove two nuts
and washers
Wire tie
Speaker
LED
Fan power
connector
Figure 9–6
Removing the speaker
5. Detach the wiring from the plastic wire ties along the wall of the
computer unit chassis (shown in Figure 9–6).
Summary of Contents for AViiON 550 Series
Page 2: ......
Page 6: ......
Page 12: ...Joining our users group x 014 002250 01 ...
Page 86: ...Opening and closing the computer unit 4 12 014 002250 01 ...
Page 96: ...Installing a drive assembly 5 10 014 002250 01 ...
Page 188: ......
Page 191: ......

