background image

5 … Sign-off Charts 

 Daily Sign-off 

—41—

Daily Sign-off

Date

Initials

Notes

Summary of Contents for FLX500

Page 1: ... 096 0257 002D Flash Programming Handler 500 Maintaining the After initial set up Please run and record the Performance Verifica tion Kit to establish a reference speed Contents Contact Us ...

Page 2: ...of this document or the product which it accompanies No part of this document may be reproduced or transmitted in any form or by any means electronic or mechanical for any purpose without written permission from Data I O Data I O is a registered trademark of Data I O Corporation FLX500 is a trademark of Data I O Corporation Data I O Corporation acknowledges the trademarks of other organizations fo...

Page 3: ...intenance 11 Monthly or Quarterly Maintenance 15 Annual Maintenance 20 3 Troubleshooting 25 Rerunning the PV Kit 26 Actuating a Programmer Without Power 27 Fiducial Scan Errors 28 Insufficient Vacuum 30 Failures Picking and Placing 30 PIN 31 Electrical Fuse 31 4 Correspondence 33 Information We Need 34 Customer Support 35 5 Sign off Charts 37 Daily Sign off 38 Weekly Sign off 43 Monthly Quarterly ...

Page 4: ... Data I O FLX500 ii ...

Page 5: ... Mouse The FLX500 incorporates a touch screen however some maintenance procedures require the use of a keyboard and mouse The keyboard and mouse plug into the back of the FLX500 See Fig ure 1 on the next page 1 Tools and Materials ...

Page 6: ...PS 2 Keyboard and Mouse 1 End a job if one is running 2 Exit the FLX500 application 3 Plug in the keyboard and mouse according to the label See Figure 1 4 Switch off the power by pressing the power switch right side once and releasing Then push it and release once more to turn the power back on again Figure 1 Keyboard and Mouse Connections on the back of the FLX500 Early models require PS 2 con ne...

Page 7: ... log file that helps when diagnosing problems The file name has the date and time the log was created and ends with txt For example FLX_20070607_162818 txt Log files are typically saved to the C drive of the FLX500 C Flx_500 Log You can also save a log file to a different location 1 Tap the Version button 2 Tap Save Log 3 Select a drive and path where you want the FLXLog zip file written or insert...

Page 8: ...ows XP operating system Tools Required Keyboard and Mouse CAUTION Possible virus hazard The FLX has no antivirus software installed from the factory It is highly recommend that customers install their own antivirus software The software should be set to run virus scans manually rather than at a scheduled time unless you are sure that the FLX will not be running jobs at that time A mouse and keyboa...

Page 9: ...he PV Kit NOTE Be sure the Socket Adapters are clean before running the PV Kit job 1 Set up for the PV Kit job Trays Socket Adapters Actuator Plates For instructions see the on screen Help 2 Tap the Job File button 3 Select the PV Kit job from the Job Window and tap OK 4 Tap Run 5 When it finishes tap the Statistics button on the Run Window and read the Throughput displayed on the statistics windo...

Page 10: ...tions Disposal of FLX500 Dispose in a separately managed collection for electronic equipment per Directive 2002 96 EC or return to Data I O no charge RoHS for China Restriction of the use of certain hazardous sub stances in electrical and electronic equipment in China Data I O Part Number Basic Spares Kit 952 0377 ...

Page 11: ...Cr 6 ᄙ 㘨㣃 PBB ᄙ Ѡ㣃䝮 PBDE 㒧ᵘ X O O O O O ࡼᴎẄ㞖 X O O O O O ប X O O O O O X O O O O O ⓨ य़㓽ᴎ X O O O O O 㓪 ഫ X O O O O O ऩᦦᑻय़ᵓ X O O O O O 䕧ܹᵓ X O O O O O 㾚ሣ X O O O O O O㧦 䆹 ᆇ 䋼 䆹 ӊ᠔ ഛ䋼ᴤ Ёⱘ 䞣ഛ SJ T 11636 2006 ޚ 㾘ᅮⱘ䰤䞣㽕 ҹϟDŽ X㧦 䆹 ᆇ 䋼㟇ᇥ 䆹䚼ӊⱘᶤϔഛ䋼ᴤ Ёⱘ 䞣䍙ߎ SJ T 11636 2006 ޚ 㾘ᅮⱘ䰤䞣㽕 DŽ ...

Page 12: ... Data I O FLX500 Chptr 1 8 blank page ...

Page 13: ...not remove any panels or covers on the FLX500 There are no customer ser viceable parts behind the covers High voltage may be present and exposed if covers are removed High voltage can cause injury or death 2 Periodic Maintenance ...

Page 14: ...h as pick and place failures you can rescan the fiducials at the Diagnostics Mod ules Window verify system calibrations at the Diagnostics Alignment Window If the verification fails see Calibration Fails in the on screen Help For more information see the on screen Help in the diagnostics area of the application Daily Maintenance Clean the Sockets Tools Required Shop air clean and dry 48 55 MPa 70 ...

Page 15: ...est throughput remove the Socket Adapter and clean it in an ultrasonic bath with approved cleaning fluid Isopropyl alcohol isopropanol can be used to clean the Socket Adapter Weekly Maintenance Running the Self test Checking Probe Tips Cleaning the Fiducials and Sensors Running the Self test Tools Required Vacuum tweezers Perform the system Self test once each week to verify proper operation of al...

Page 16: ... Clean the rubber PNP probe tips with water on a clean lint free cloth or swab 2 Check for wear or cracking replace the tips if necessary CAUTION Probe tips could get damaged by isopropyl alcohol Do not use isopropyl alco hol on the rubber probe tips It will dry them excessively making them prone to cracking and leaking air Cleaning the Fiducials and Sensors Tools Required shop air clean and dry 4...

Page 17: ...cally when starting a job if any modules have been changed and for the first job after startup The scan can also be run any time via the Diagnostic Windows To clean fiducials and sensors Remove dust and debris from the fiducials and sensors with clean dry compressed air See Fig ure 4 and Figure 5 Figure 4 A Tray Module fiducials circled and a Tray Module sensor arrow ...

Page 18: ...grammer Module fiducial Module surfaces may be too dark or too bright for a successful scan and may need to be pol ished if too dark or scuffed if too bright For optic values and correcting surface reflection see Fiducial Scan Errors on page 28 ...

Page 19: ...placing probe tips after any repair on the PNP Head or probes if you are experiencing problems picking devices especially with probe two To recalibrate the offset see the on screen Help for the Diagnostics Alignment Window NOTE Recalibration takes 5 to 7 minutes to complete a Calibration Tool a 4 mm hex key Allen wrench and a PIN Personal Identi fication Number to access the Diagnostics Windows af...

Page 20: ...ver and work surface with isopropyl alcohol on a cloth every four months CAUTION Do not use solvents such as acetone lacquer thinner mineral spirits or any type of abrasive compound on the cover Use of these products or excessive pressure will damage the surface reduce visibility and remove the ESD dissipative properties Maintaining Air Flow NOTE Shop air to the FLX should be 48 55 MPa 028 M3 min ...

Page 21: ...an reduce the need to perform this blowout proce dure as often Figure 8 Probe air shut off buttons on the Run Window Probe Blowout Procedure Tools Required Standard flat screwdriver tape or method to mark tubes compressed air clean and dry 48 62 MPa 70 90 PSI 1 Stop the job if applicable For instructions see the on screen Help 2 Switch power off 3 Push the E Stop Blow Out the Probes 4 Open the cov...

Page 22: ...lastic housings that hold the filters Unscrew the screws securing the housings 9 Remove the housings being careful not to lose their gaskets 10 Carefully remove the gaskets CAUTION Health Hazard For the next step wear eye protection The tube fittings on the manifold are pointed up When blow ing air through the manifold protect your eyes and face 11 Use clean and dry compressed air 48 62 MPa 70 90 ...

Page 23: ... it isn t already Check Vacuum 15 Switch the power on and check the pressure at each probe tip You can accomplish this as follows 15a Clean the probe tips 15b Ensure that there is a standard output module installed not a Drop Module without a tray on it 15c Release the E Stop and close the cover 15d Open the Diagnostic Window by tap ping the Tools button and entering your PIN 15e Tap the System bu...

Page 24: ...ard screwdriver tweezers To remove the air filters 1 End the job if one is running For help end ing a job tap the for on screen Help 2 Push the Emergency stop button This allows moving the gantry by hand 3 Open the cover and move the PNP Head closer to you for access to its far side 4 Locate the two clear square plastic housings that hold the filters Unscrew the screw securing the upper filter 5 R...

Page 25: ...s may be adjusted depending on the amount of use Oil Specification The OEM Original Equipment Manufacturer recommends mineral oil CLP DIN 51517 or HLP DIN 51524 with a viscosity of ISO VG100 in accordance with DIN 51519 Tools Required Lubricating oil above Clean cloth Syringe oil tube optional Lubricate the Small Rail as Follows 1 End the job if one is running For help end ing a job tap the questi...

Page 26: ...se the Emergency stop button Lubricate the Large Rail as Follows 1 End the job if one is running For help end ing a job tap the question mark button for on screen Help 2 Push the Emergency stop button This allows moving the gantry by hand 3 Wipe any dust or dirt off the rail NOTE There is one carriage on the large rail with a plate on each end of the carriage Each plate contains two lubrication ho...

Page 27: ...rmance Verification Performance verification uses the Diagnostic Adapter Board DAB to provide a thorough hardware test of the programmer electronics as well as check that precision references are within operating ranges Tools Required 4 mm Hex Key Allen wrench DAB Use PN below to purchase Once a year perform the Performance Verifica tion using the DAB or send the FLX500 Program mer Modules to Data...

Page 28: ... Data I O FLX500 Chptr 2 24 blank page ...

Page 29: ...en Diagnostics Help for a thorough troubleshooting tree This Help is only available when in the diagnostics area of the software interface opened with the Tools button The Diagnostics Windows require a PIN Personal Identification Number for access 3 Troubleshooting ...

Page 30: ...ement parts for the PV Kit NOTE Be sure the Socket Adapters are clean before running the PV Kit job 1 Rerun the PV Kit job For instructions see Run PV Kit on page 5 2 Read the Throughput displayed on the sta tistics screen on the monitor by tapping the Statistics button on the Run Window Record the PPH in the PV Kit Performance chart on page 47 Figure 14 The Statistics Window displays Throughput o...

Page 31: ...gs related to device or job file Actuating a Programmer Without Power If you have a Programmer Module that is not installed on an FLX500 and still has a Socket Adapter in it the Actuator Plate should be in the up position for removal of the Socket Adapter If it is in the down position you can remove the adapter by manually actuating the Actuator Plate to the up sockets closed position To manually ...

Page 32: ... Fiducial Scan Errors If the FLX500 fails to program after the PNP Head scans the modules there may be a problem with the scanning NOTE For accurate scanning the fiducials and sensors must be clean and the FLX cover must be closed For cleaning instructions see Cleaning the Fiducials and Sensors on page 12 For this check only open the cover and view the PNP Head optic sensor during scanning The dig...

Page 33: ...h the top surface with fine emery cloth If the reading on the fiducial slot is not within the allowed range 0 500 gently blow out the fiducial slot with clean dry compressed air NOTE When running the Fiducial Scan from the Diagnostic Window repeatability on subsequent scans should be 10 counts One count is 1 100 mm If problems with the fiducial scan continue see the on screen Diagnostics Help whic...

Page 34: ...ning Air Flow on page 16 the air filters are not dirty Replace air filters if necessary See Checking Air Filters on page 20 the input air to the FLX is at 48 55 MPa 70 80 PSI If you can t find the source of the problem save the detailed Check Vacuum report and send it to support dataio com Failures Picking and Placing If probes drop devices or fail to pick and place devices accurately check the fo...

Page 35: ...t information see Customer Support on page 35 Electrical Fuse The FLX500 uses one fuse that is located at the back of the machine below the power connec tion If you suspect the fuse has failed replace it with another 5 Amp 250 Volt fuse 5 x 20 mm To replace the fuse 1 Exit the FLX500 Application 2 Turn off the power by pressing the power switch once and releasing and tapping OK to close the FLX Ap...

Page 36: ...a spare The spare fuse slides out left right unlike the main fuse 5 To remove the active fuse farthest in press down lightly on the drawer while pushing up on the fuse 6 If the fuse is burnt replace it with the spare which slides out left or right 7 Close the drawer 8 Plug the power cord back into the FLX ...

Page 37: ... 33 If you wish to contact Data I O Technical Sup port or a service center see the following pages for information we need from you as well as how to contact us 4 Correspondence ...

Page 38: ...sible after removing the modules The FLX software and firmware version num bers These are displayed by tapping the Ver sion button on the Run Window The log file See Log File on page 3 Results from running the PV Kit job See Rerunning the PV Kit on page 26 Error message if there is one Device manufacturer and part number if device related NOTE For the latest version of this manual see Support Tech...

Page 39: ... WA USA 98052 Telephone 425 881 6444 USA 800 3 DATAIO 1 800 332 8246 Fax 425 867 6972 E mail support dataio com Web Address www dataio com Germany www dataio de China www dataio cn Other Countries Contact your local Data I O representative To find your local representative visit http www dataio com contact repsearch asp ...

Page 40: ... Data I O FLX500 Chptr 4 36 blank page ...

Page 41: ..._____________ The charts on the following pages can be used to record maintenance performed on the FLX Daily Sign off 38 Weekly Sign off 43 Monthly Quarterly Sign off 45 Annual Sign off 46 PV Kit Performance 47 5 Sign off Charts ...

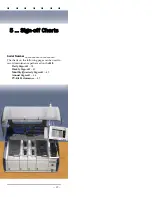
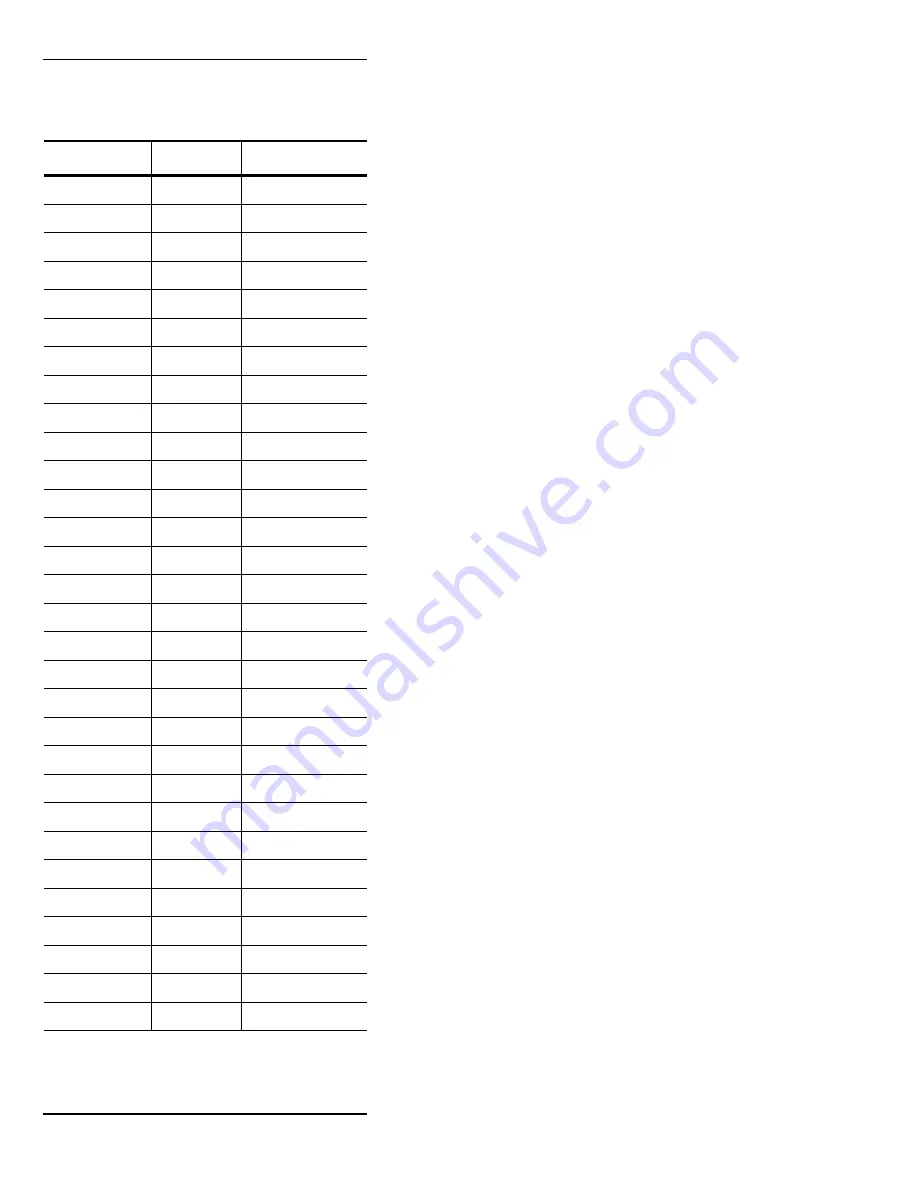
Page 42: ... Data I O FLX500 Chptr 5 38 Daily Sign off Clean the sockets page 10 Date Initials Notes ...

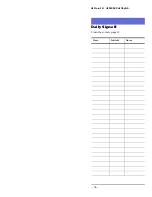
Page 43: ...5 Sign off Charts Daily Sign off 39 Daily Sign off Date Initials Notes ...

Page 44: ... Data I O FLX500 Chptr 5 40 Daily Sign off Date Initials Notes ...

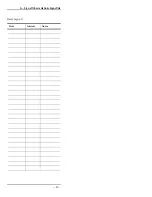
Page 45: ...5 Sign off Charts Daily Sign off 41 Daily Sign off Date Initials Notes ...

Page 46: ... Data I O FLX500 Chptr 5 42 Daily Sign off Date Initials Notes ...

Page 47: ...5 Sign off Charts Weekly Sign off 43 Weekly Sign off Run the Self test page 11 Clean the probe tips page 12 Clean the fiducials and sensors page 12 Date Initials Notes ...

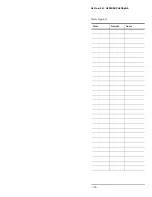
Page 48: ... Data I O FLX500 Chptr 5 44 Weekly Sign off Date Initials Notes ...

Page 49: ...5 Sign off Charts Monthly Quarterly Sign off 45 Monthly Quarterly Sign off Calibrate Probe Offset page 15 Clean the cover and work surface page 16 Maintaining air flow page 16 Date Initials Notes ...

Page 50: ... Data I O FLX500 Chptr 5 46 Annual Sign off Check the air filters page 20 Lubricate the gan try page 21 Return the FLX unit to Data I O for performance verification page 23 Date Initials Notes ...

Page 51: ...5 Sign off Charts PV Kit Performance 47 PV Kit Performance Run the PV Kit job and record the PPH See Run PV Kit on page 5 or Rerunning the PV Kit on page 26 Date PPH Initials ...

Page 52: ... Data I O FLX500 Chptr 5 48 blank page ...

Page 53: ...ting Probe Offset 15 China RoHS 6 Cleaning fiducials 12 probe tips 12 sensors 12 sockets 10 Cleaning Air lines 16 Contacting Data I O 35 Covers cleaning 16 ESD note 16 safety 9 D DAB 23 Data I O Representatives 35 Diagnostic Adapter Board 23 Disposal 6 Dropped devices 30 F Fiducials cleaning 12 scanning errors 28 Filters 20 Firmware version 34 FLX500 version number 34 Fuse 31 ...

Page 54: ...oard connection 1 L Log file 3 Low throughput 26 Lubricating oil 21 Lubrication gantry rails 21 M Mouse connection 1 O Oil 21 Optic sensor PNP Head 28 P Part Numbers DAB 23 oil 21 23 Probe Tips 12 Spares Kits 6 Parts per hour PPH 26 Passwords 31 Performance Verification Kit recording chart 47 rerunning 26 Performance verification annual 23 Personal Identification Number 31 ...

Page 55: ...re 16 shutting off air 17 Programmer Module fiducial 12 PVK see Performance Verification Kit 26 PV Kit 5 R Rerunning the PV Kit 26 RoHS 6 Running the PV Kit 5 S Scanning errors 28 Self Service Spares Kit 6 Self test 11 Sensors cleaning 12 Serial Number 37 Serial Number location 34 Shutting off air 17 Sign off charts 37 Slow performance 26 Socket Adapter cleaning 10 removing 27 Sockets actuating 10...

Page 56: ...cleaning cover 16 cleaning fiducials 12 cleaning probe tips 12 diagnostics check 23 lubricating the rails 21 probe blowout procedure 17 running PV Kit 5 Self test 11 sockets cleaning 10 Tray Module fiducial 12 Tray Module sensor 12 V Vacuum probe tips cleaning 30 Version number 34 Virus protection 4 W WEEE 6 Z Z offset 15 ...

Page 57: ... FLX500 ...

Page 58: ... FLX500 FLX programmable media experts ...

Reviews: