Calibration Procedure
The software prompts for calibration vary from one program to another. All of the procedures include
two measurements:
•
The black trap
•
The
white
tile
Before you begin, verify that the aperture plate at the port matches the aperture selection in the
program you are running.
1. Access the calibration procedure in the program you are running.
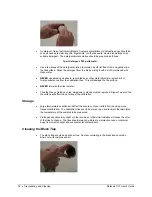
2. When you are prompted by the program, place the black trap at the instrument port and
start the measurement.
3. When you are prompted by the program, place the white tile at the instrument port and
start the measurement.
4. The program may prompt you for a diagnostic tile. If prompted, place the green tile at the
instrument port and start the measurement.
5. After these measurements are completed, the program will display a message that the
calibration is successful. You can now start measuring samples.
The Datacolor Users Guide for the program you are running (e.g., Datacolor Tools, etc.) provides step-
by-step instructions regarding the (instrument) software setup and calibration procedure.
Datacolor 110 User's Guide
Overview
•
23
Summary of Contents for 110
Page 1: ...Datacolor Datacolor 110 User s Guide ...
Page 4: ......
Page 8: ...4 Accessories Datacolor 110 User s Guide N O T E S ...
Page 20: ...16 USB Driver Installation Datacolor 110 User s Guide N O T E S ...
Page 28: ...24 Overview Datacolor 110 User s Guide N O T E S ...
Page 32: ...28 About Sample Presentation Measurement Datacolor 110 User s Guide N O T E S ...
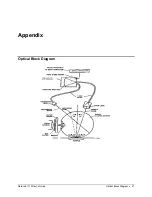
Page 35: ...Appendix Optical Block Diagram Datacolor 110 User s Guide Optical Block Diagram 31 ...
Page 38: ...34 Compliance Statements Datacolor 110 User s Guide N O T E S ...


