RAPID CONFIGURATION
9
1
Focus Lock/Unlock
You must perform the
Focus Lock
procedure to save the mechanical focus position to
memory. When Locked, if the mechanical focus position is changed by more than the
allowed tolerance of the value in memory, a diagnostic alarm will be sent to the display. See
par. 2.3.1 for details.
NOTE:
For Stand Alone or Master devices, the diagnostic alarm can also be
sent to any of the desired communication channels by selecting it in the
Diagnostic>Actions branch of the Genius configuration tool.
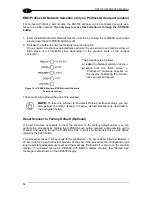
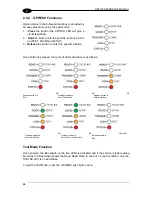
1. Enter the Focus Lock function by holding the X-PRESS push button pressed until the
FOCUS LOCK LED is on.
2. Release the button to enter the
Focus Lock
function.
Once entered, the scanner automatically performs the Lock (saving) or Unlock procedure
depending on the previous state of the Locked Position parameter.
Figure 9
– X-PRESS Interface: Focus Lock/Unlock
Function
The procedure is as follows:
A)
enter
the Focus Lock function
B)
wait
until the "Focus locked at..."
message appears on the display
(indicating the focus position has
been saved to memory). The
following parameters are set:
Locked Position = your mechanical
setting
Focus Displacement (Alarm) = set
(default to display only)
The scanner will be reset at the end of the process. The LEDs turn off, the Display goes
blank and then the Ready LED will turn on indicating the scanner is ready.
NOTE:
If your application has been configured using X-PRESS, go to
STEP 6.
Summary of Contents for DS5100-X200
Page 1: ......
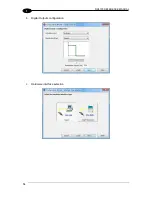
Page 30: ...DS5100 REFERENCE MANUAL 14 1 b Digital Outputs configuration c Hardware interface selection ...
Page 62: ...DS5100 REFERENCE MANUAL 46 3 Figure 18 DS5100 OM Serial Model Overall Dimensions ...
Page 78: ...DS5100 REFERENCE MANUAL 62 4 Figure 38 ID NET Network Connections with isolated power blocks ...
Page 97: ...TYPICAL LAYOUTS 81 5 7 Double click on the DS5100 scanner to configure it ...
Page 163: ...147 X X PRESS Human Machine Interface 23 ...
Page 164: ......


