SOFTWARE CONFIGURATION
49
3
2) Click on the
button available in the “Devices” area to open the Network
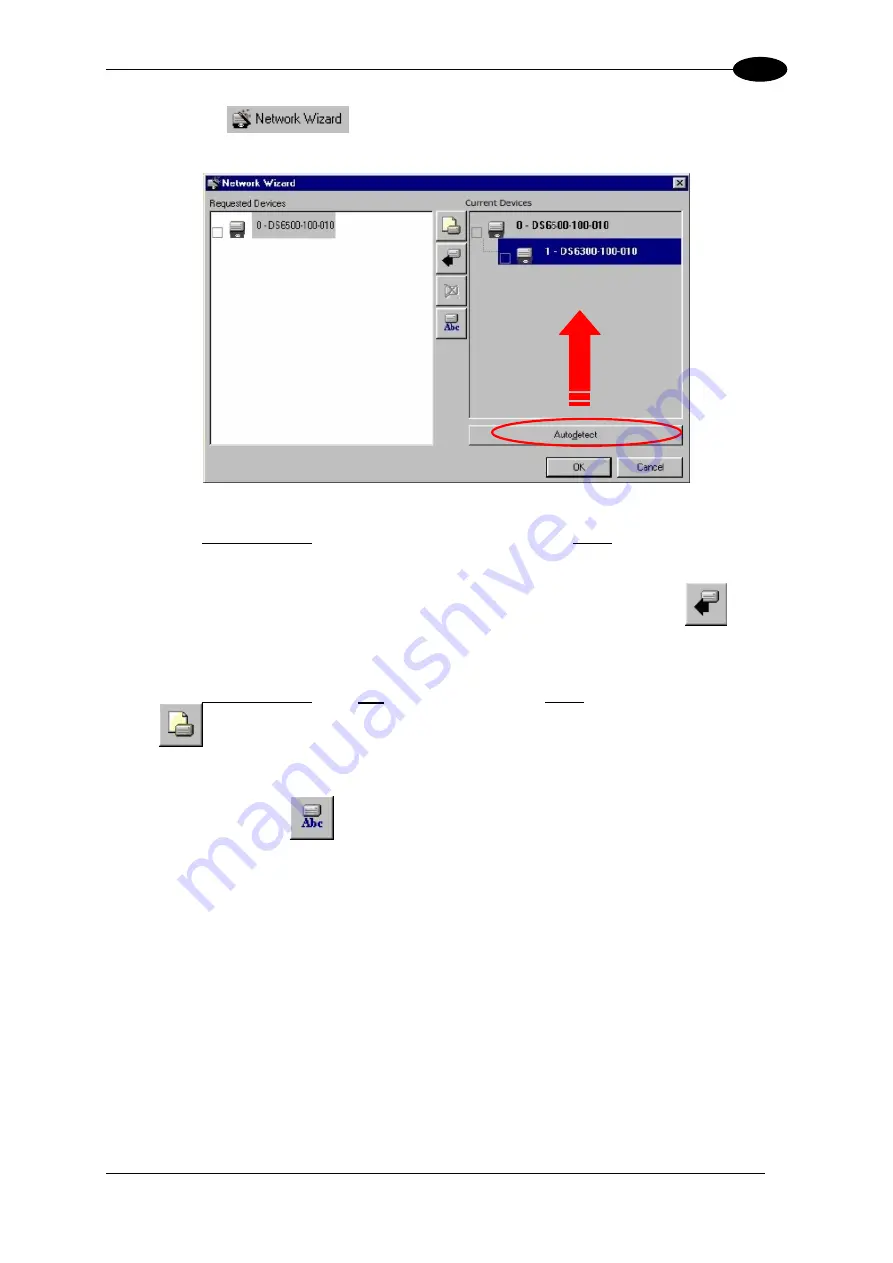
Wizard dialog box:
Figure 77 – Network Wizard
a) if the slave scanners have been already configured and wired to the network, click on
the Autodetect button to start a polling procedure of the current network. All found
slave scanners will be represented in the “Current Devices” area. Then, select the
desired slave scanner from the “Current Devices” area and click on the
icon (or
drag drop) to transfer it in the “Requested Devices” area where customizing your
network.
b) if the slave scanners have
not
been configured and wired to the network, click on the
icon to add a new device defining its address and model. The added slave
scanner will be then displayed in the “Current Devices” area.
3) If desired, select the transferred/added slave scanner within the “Requested Devices”
area and click on the
icon to customize the scanner label.
4) Once your network has been customized, close the network wizard. Before closure, the
program will show a dialog box asking whether sending the new configuration to the
Master. Choose the “Yes” option to start this procedure.


