Set-Up & Installation
Product Reference Guide
2-35
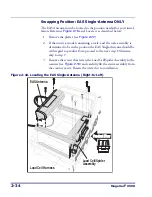
4. Disconnect the Load Cell harness.
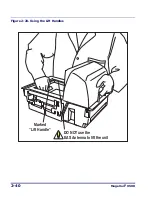
5. Move the Load Cell/Spider Assembly into position on the opposite
side of the scanner cavity and re-install the original screws. Torque
the screws evenly to 50 in-lb.
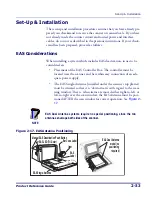
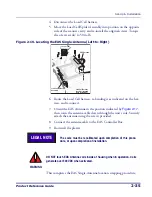
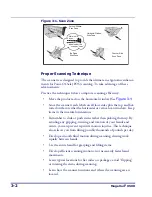
Figure 2-19. Locating the EAS Single-Antenna (Left-to-Right)
6. Route the Load Cell harness, re-bending it as indicated on the har-
ness, and reconnect.
7. Orient the EAS Antenna in the position indicated by
Figure 2-17
,
then route the antenna cable down through the unit’s side. Securely
attach the antenna using the screws provided.
8. Connect the antenna cable to the EAS Controller Box.
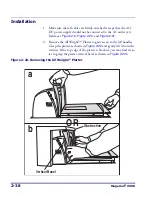
9. Re-install the platter.
This completes the EAS Single-Antenna location swapping procedure.
EAS Antenna
Product Flow
Product Flow
Load Cell/Spider
Assembly
Load Cell Harness
(bend for left-hand
scale installation)
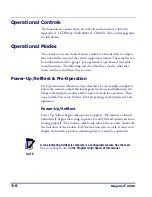
The scale must be recalibrated upon completion of this proce-
dure, or upon completion of installation.
WARNING
DO NOT touch EAS Antenna coils inside of housing when in operation. Coils
generate over 500 VDC when activated.
LEGAL NOTE
Summary of Contents for Magellan 9500?
Page 1: ...Magellan 9500 9500 9504 9504 with SmartSentry Product Reference Guide...
Page 28: ...1 16 Magellan 9500 NOTES...
Page 100: ...4 14 Magellan 9500 NOTES...
Page 116: ...5 16 Magellan 9500 NOTES...
Page 396: ...6 280 Magellan 9500 NOTES...
Page 416: ...B 10 Magellan 9500 NOTES...
Page 426: ...D 2 Magellan 9500 NOTES...
Page 442: ...E 16 Magellan 9500 NOTES...
Page 458: ...F 16 Magellan 9500 NOTES...

