Product Reference Guide
47
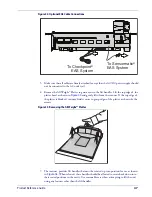
Figure 32. Optional EAS Cable Connections
To Checkpoint
®
EAS System
To Sensormatic
®
EAS System
5. Make sure that all cables are firmly attached (except that the AC/DC power supply should
not be connected to the AC outlet yet).
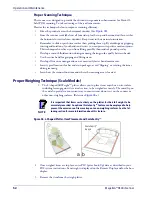
6. Remove the All Weighs™ Platter to gain access to the lift handles. Lift the top edge of the
platter bezel as shown in
and gently lift it from the scanner. If the top edge of
the platter is blocked, you may find it easier to grasp edges of the platter as shown by the
arrows.
Figure 33. Removing the All Weighs™ Platter
7. The scanner provides lift handles that must be rotated up into position for use as shown
. When released, these handles should be allowed to rotate back down into
their seated positions in the cavity. Use reasonable care when attempting to lift the unit
using any features other than the lift handles.
Summary of Contents for Magellan 9800i
Page 1: ...MagellanTM 9800i Product Reference Guide...
Page 62: ...Site Preparation and Installation 50 Magellan 9800i Scanner NOTES...
Page 102: ...Calibration Procedures 90 Magellan 9800i Scanner NOTES...
Page 112: ...Programming 100 Magellan 9800i Scanner NOTES...
Page 158: ...Enter Exit Programming Mode 146 Magellan 9800i Scanner NOTES...
Page 174: ...EAS Features 162 Magellan 9800i Scanner NOTES...
Page 378: ...Enter Exit Programming Mode 366 Magellan 9800i Scanner NOTES...
Page 400: ...2D Symbology Programming 388 Magellan 9800i Scanner NOTES...
Page 414: ...402 Magellan 9800i Scanner NOTES...
Page 424: ...412 Magellan 9800i Scanner NOTES...
Page 438: ...426 Magellan 9800i Scanner NOTES...
Page 450: ...438 Magellan 9800i Scanner NOTES...


