background image

Enter Configuration

Exit and Save Configuration

Product Reference Guide

                           41

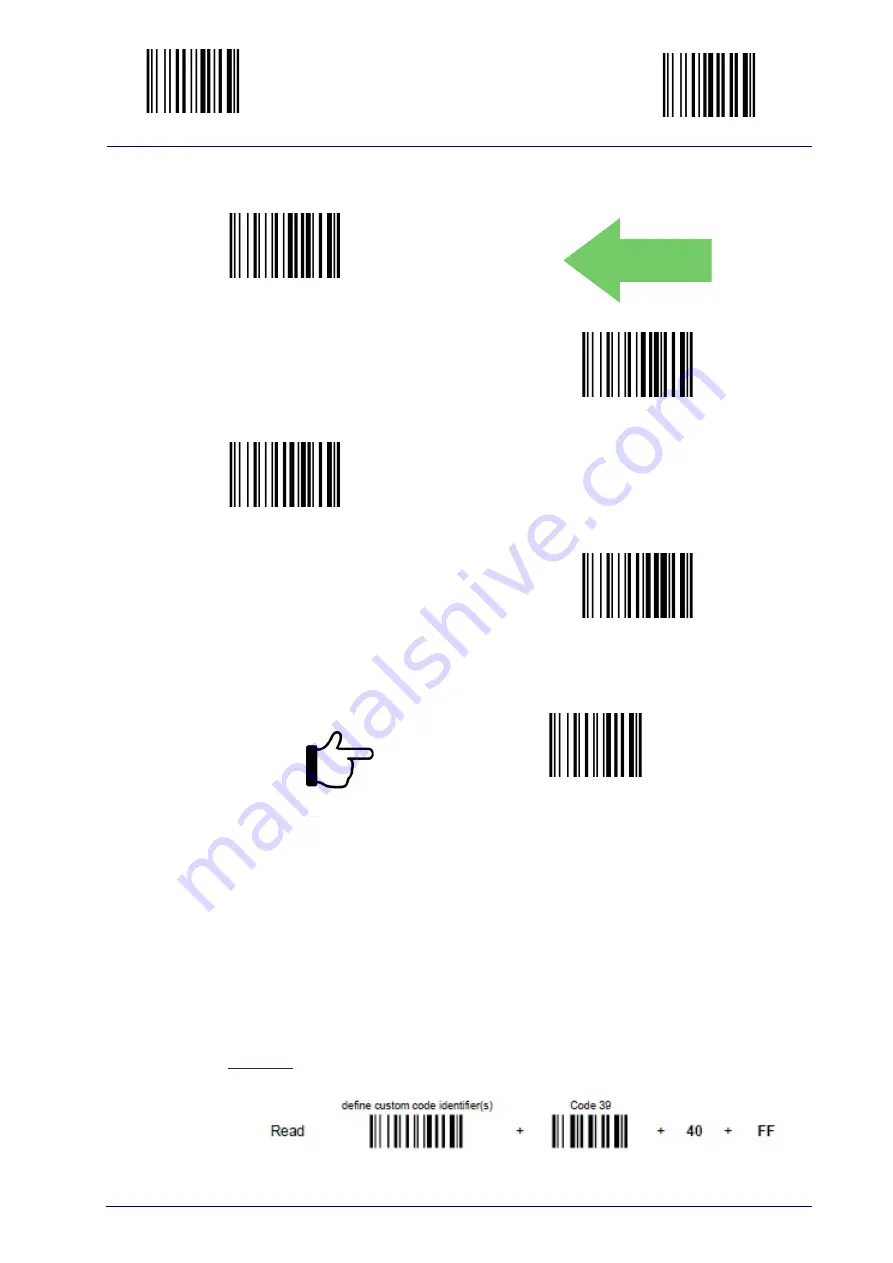
Code Identifier

Code Identifier = disable

DEFAULT

Code Identifier = Datalogic standard

Code Identifier = AIM standard

Code Identifier = custom

Custom Code Identifier

define custom code identifier(s)

1. Read the above code. (Code Identifiers default to Datalogic stan-

dard, see table on previous page).

2. Select the code type from the code table in Appendix B for the iden-

tifier you want to change.

3. You can define 1 or 2 identifier characters for each code type. If only 

1 identifier character is required, the second character must be 

selected as FF (disabled). Read the hexadecimal value corresponding 

to the character(s) you want to define as identifiers for the code 

selected in step 2. : valid characters are in the range 00-FD.

Example: To define Code 39 Code Identifier = @

Summary of Contents for PowerScan PM8300

Page 1: ...PowerScan M9300 PM8300 Compatibility Product Reference Guide...

Page 2: ...ation Should future revisions of this manual be published you can acquire printed versions by con tacting your Datalogic representative Electronic versions may either be downloadable from the Datalogi...

Page 3: ...rd Speed 23 WEDGE PARAMETERS 25 Keyboard Nationality 26 Caps Lock 27 Caps Lock Auto recognition IBM AT Compatible Only 28 Num Lock 28 Inter character Delay 29 Inter code Delay 29 Control Character Emu...

Page 4: ...ARD DATA FORMAT ENABLE DISABLE 63 TIME STAMPING MODE 64 SCANNER DATA HEADER TERMINATOR 65 HEADER 65 TERMINATOR 67 KEYPAD DATA HEADER TERMINATOR 69 HEADER 69 TERMINATOR 71 OPERATIVE MODE 73 MODE SELECT...

Page 5: ...his Manual It is possible to still uses the standard configuration manual or Aladdin in order to configure parameters not present here Changing from Normal to Compatible Mode PM9300 Handheld 1 With th...

Page 6: ...the Unlink programing label Unlink 3 Now you can link your PM9300 to a BC9xxx in normal mode the PM9300 will inherit the programmed speed from the BC9xxx BC9xxx Base 1 With a PM9300 in normal mode re...

Page 7: ...dio address and bind PowerScan M8300 to the BC 80X0 cradle 1 Enter Configuration 2 Set Date six digits for Day Month and Year DDMMYY 3 Set Time four digits for Hour and Minutes HHMM 4 Set Radio Addres...

Page 8: ...following paragraph Using Multiple M8300 Series Readers with Same Cradle Bind The green LED on the PowerScan M8300 will blink the reader is ready to be inserted into the cradle 7 Firmly insert the re...

Page 9: ...ccessive readers can be associated with the same cradle by following the configuration procedure substituting the Bind command with Join step 7 7 Join The green LED on the PowerScan M8300 will blink t...

Page 10: ...cate with STAR Modem in Stand alone Mode follow the procedure on page 3 substituting steps 6 and 7 with those below 6 STAR Modem Address Read the code above and the four digit address of the STAR Mode...

Page 11: ...llowing procedure allows configuring a PowerScan M8300 reader to communicate with various STAR System devices such as STARGATE RF base stations 1 Restore PowerScan M8300 Default 2 Enter Configuration...

Page 12: ...stems with BC 8000 as Master 6 Set Radio Address four digits from the Numeric Table in the range 0000 1999 All readers must have different addresses 7 First STAR System Address Read the code above and...

Page 13: ...base station addresses steps 7 and 8 must have the same value POWERSCAN M8300 STAR SYSTEM SETUP Product Reference Guide 9 9 Exit and Save Configuration END of procedure YOUR READER IS NOW READY TO RE...

Page 14: ...060 Address from 0000 to 1999 All cradles used in the network must have different addresses 2 Exit and Save configuration 3 Read the Bind code to pair the PowerScan M8300 to the BC 8060 cradle for con...

Page 15: ...ogic com For BC 8060 Master Network Layouts the network configuration parameters can be changed either through the Datalogic Aladdin configuration soft ware running on the PC or by reading the barcode...

Page 16: ...L Nixdorf Mode A WEDGE Wedge IBM AT or PS 2 PCs Wedge PC Notebook WEDGE ALT MODE The ALT mode selection allows barcodes sent to the PC to be interpreted correctly independently from the Keyboard Natio...

Page 17: ...D USB USB IBM Table Top USB USB KBD ALT MODE USB USB IBM Hand Held USB USB COM When configuring USB COM the relevant files and drivers must be installed from the USB Device Installation software which...

Page 18: ...C 8060 Network config urations The following parameter groups are common to all interface applications DATA FORMAT parameters regard the messages sent to the Host sys tem for all interfaces except Pen...

Page 19: ...AKING CONTROL on page 18 INTER CHARACTER DELAY on page 18 1 Read the Enter Configuration code ONCE available at the top of each page 2 Read configuration codes from the desired groups Read the code an...

Page 20: ...Enter Configuration Exit and Save Configuration 16 PowerScan PD9330 PBT9300 PM9300 Baud Rate Baud Rate 1200 Baud Rate 2400 Baud Rate 4800 DEFAULT Baud Rate 9600 Baud Rate 19 200 Baud Rate 38 400...

Page 21: ...Enter Configuration Exit and Save Configuration Product Reference Guide 17 Parity DEFAULT Parity None Parity Even Parity Odd Stop Bits DEFAULT Stop Bits 1 stop bit Stop Bits 2 stop bits...

Page 22: ...Control RTS Handshaking Control hardware RTS CTS Handshaking Control software XON XOFF Handshaking Control RTS always ON Inter character Delay Delay between characters transmitted to Host Read 2 numbe...

Page 23: ...chapter allow modifications to the stan dard RS 232 and USB Com interfaces Reference Appendix C Standard Defaults for a listing of standard factory settings 1 Read the Enter Configuration code ONCE a...

Page 24: ...Configuration Exit and Save Configuration 20 PowerScan PD9330 PBT9300 PM9300 USB COM Handshaking Handshaking RTS DEFAULT Handshaking hardware RTS CTS Handshaking software XON XOFF Handshaking RTS alwa...

Page 25: ...lable for USB KBD ALT MODE Interface This parameter default value is restored through the Interface Selection code and not Restore Default Keyboard nationality Belgian Keyboard nationality Enlish UK K...

Page 26: ...ly for IBM AT compatible PCs Enter Configuration Exit and Save Configuration 22 PowerScan PD9330 PBT9300 PM9300 Keyboard Nationality continued Inter code Delay Delay between characters transmitted to...

Page 27: ...Enter Configuration Exit and Save Configuration Product Reference Guide 23 USB Keyboard Speed DEFAULT USB Keyboard Speed Normal USB Keyboard Speed Fast...

Page 28: ...24 PowerScan PD9330 PBT9300 PM9300 NOTES...

Page 29: ...on page 28 INTER CHARACTER DELAY on page 29 INTER CODE DELAY on page 29 CONTROL CHARACTER EMULATION on page 30 1 Read the Enter Configuration code ONCE available at the top of each page 2 Read config...

Page 30: ...guration 26 PowerScan PD9330 PBT9300 PM9300 Keyboard Nationality Keyboard Nationality Belgian Keyboard Nationality English UK Keyboard Nationality French Keyboard Nationality German Keyboard Nationali...

Page 31: ...Caps lock manual configuration is ignored when Caps Lock Auto Recognition is enabled For PC Notebook interface selections the caps lock status is automatically recognized therefore this command is no...

Page 32: ...ock DEFAULT Num Lock num lock unchanged This selection is used together with the Alt Mode interface selection for AT or Notebook PCs It changes the way the Alt Mode procedure is executed therefore it...

Page 33: ...is selected Delay between characters transmitted to Host Read 2 numbers from the table where 00 DELAY disabled 01 99 DELAY from 1 to 99 milliseconds DEFAULT Delay disabled Inter code Delay This optio...

Page 34: ...Enter Configuration Exit and Save Configuration 30 PowerScan PD9330 PBT9300 PM9300 Control Character Emulation Control Character Emulation Ctrl Shift Key DEFAULT Control Character Emulation Ctrl Key...

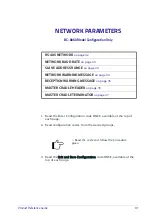
Page 35: ...uration code ONCE available at the top of each page 2 Read configuration codes from the desired groups Read the code and follow the procedure given 3 Read the Exit and Save Configuration code ONCE ava...

Page 36: ...T RS 485 Network enable RS 485 slave RS 485 Network enable RS 485 master If a BC 8060 cradle is errantly configured as a Slave but not connected to a network it may not be able to receive further comm...

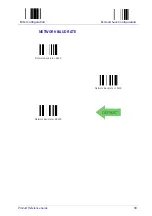
Page 37: ...Enter Configuration Exit and Save Configuration Product Reference Guide 33 NETWORK BAUD RATE Network Baudrate 9600 Network Baudrate 19200 Network Baudrate 38400 DEFAULT...

Page 38: ...rst Address Read the code above and the four digit address of the First Slave device in the system Slave Address Range Last Address Read the code above and the four digit address of the Last Slave dev...

Page 39: ...NING MESSAGE Reception Warning Message not transmitted DEFAULT Reception Warning Message transmitted MASTER CRADLE HEADER Master Cradle Header no header DEFAULT Master Cradle Header one character head...

Page 40: ...Master Cradle Header eight character header Enter Configuration Exit and Save Configuration 36 PowerScan PD9330 PBT9300 PM9300 MASTER CRADLE HEADER continued After selecting one of the desired Header...

Page 41: ...Master Cradle Terminator no terminator DEFAULT Master Cradle Terminator one character terminator Master Cradle Terminator two character terminator Master Cradle Terminator three character terminator M...

Page 42: ...terminator Enter Configuration Exit and Save Configuration 38 PowerScan PD9330 PBT9300 PM9300 MASTER CRADLE TERMINATOR continued After selecting one of the desired Header codes read the character s f...

Page 43: ...e 46 on page 47 1 Read the Enter Configuration code ONCE available at the top of each page 2 Read configuration codes from the desired groups Read the code and follow the procedure given 3 Read the Ex...

Page 44: ...2 X y X MSI M y Z Code 11 H y b GS1 DataBar Expanded Linear and Stacked e 0 t GS1 DataBar Limited e 0 v GS1 DataBar 14 Linear and Stacked e 0 u AIM standard identifiers are not defined for all codes t...

Page 45: ...o Datalogic stan dard see table on previous page 2 Select the code type from the code table in Appendix B for the iden tifier you want to change 3 You can define 1 or 2 identifier characters for each...

Page 46: ...guration Exit and Save Configuration 42 PowerScan PD9330 PBT9300 PM9300 HEADER Header no header Header one character header Header two character header Header three character header Header four charac...

Page 47: ...n character header Header eight character header Enter Configuration Exit and Save Configuration Product Reference Guide 43 HEADER continued After selecting one of the desired Header codes read the ch...

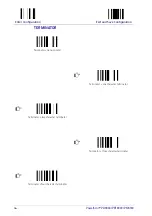
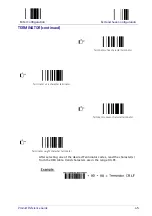
Page 48: ...Configuration 44 PowerScan PD9330 PBT9300 PM9300 TERMINATOR Terminator no terminator Terminator one character terminator Terminator two character terminator Terminator three character terminator Term...

Page 49: ...n character terminator Terminator eight character terminator Enter Configuration Exit and Save Configuration Product Reference Guide 45 TERMINATOR continued After selecting one of the desired Terminat...

Page 50: ...NG Address stamping disable reader address stamping DEFAULT Address stamping enable reader address stamping ADDRESS DELIMITER Address delimiter disable reader address delimiter DEFAULT Address delimit...

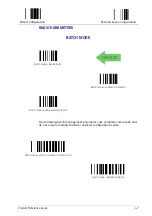
Page 51: ...E Batch mode disable batch DEFAULT Batch mode enable normal batch Batch mode enable automatic batch The following batch management parameters are complete commands and do not require reading the Enter...

Page 52: ...48 PowerScan PD9330 PBT9300 PM9300 NOTES...

Page 53: ...1 on page 52 on page 52 1 Read the Enter Configuration code ONCE available at the top of each page 2 Read configuration codes from the desired groups Read the code and follow the procedure given 3 Rea...

Page 54: ...330 PBT9300 PM9300 DISPLAY PARAMETERS 3 KEY MODEL PARAMETERS DATE AND TIME Date and time set date Read 6 numbers for DDMMYY Date and time set time Read 4 numbers for HHMM Contrast lighter Contrast dar...

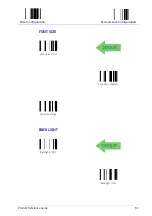
Page 55: ...Font size small DEFAULT Font size medium Font size large Enter Configuration Exit and Save Configuration Product Reference Guide 51 FONT SIZE Backlight OFF DEFAULT Backlight ON BACKLIGHT...

Page 56: ...M9300 DISPLAY OFF TIMEOUT timeout Read 2 numbers in the range 00 99 00 disables display timeout always on 01 to 99 timeout from 1 to 99 seconds DEFAULT display off after 8 seconds Display mode normal...

Page 57: ...n page 73 1 Read the Enter Configuration code ONCE available at the top of each page 2 Read configuration codes from the desired groups Read the code and follow the procedure given 3 Read the Exit and...

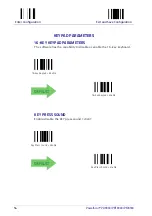
Page 58: ...0 KEYPAD PARAMETERS 16 KEY KEYPAD PARAMETERS The software has the capability to disable or enable the 16 key keyboard 16 key Keypad disable DEFAULT 16 key Keypad enable KEY PRESS SOUND Enable disable...

Page 59: ...below To pro gram the function key labels see Function Key Label command on page 57 The following table shows the list of commands and available strings CMD_ID NAME FUNCTION DEFAULT LABEL 0 ENTER CMD...

Page 60: ...ding to the command ID 0 A STRING TABLE The Powerscan 16 key model allows you to define a String Table a data base with room for five entries from String1 to String5 which can be recalled using a Func...

Page 61: ...e the Function Key Programming command on page 55 define function key label Function key label length is fixed at 4 characters and is not programmable 1 Read the above code 2 Specify which Function Ke...

Page 62: ...s to toggle from numeric to alpha model After the Shift Key has been defined as Function 5 refer to the FUNCTION KEY PROGRAM MING on page 55 SHIFT KEY normal mode DEFAULT SHIFT KEY function 5 ECHO Thi...

Page 63: ...set date Read 6 numbers for DDMMYY Date and time set time Read 4 numbers for HHMM Contrast lighter Contrast darker CONTRAST DISPLAY OFF TIMEOUT timeout Read 2 numbers in the range 00 99 00 disables d...

Page 64: ...TOUT NOTE Just as in the settings for the standard Powerscan the display has an active timeout before going in OFF state This timeout has a higher prior ity than the LAST CODE SHOWN TOUT so the two pa...

Page 65: ...code shown timeout 40 second Last code shown timeout 60 second Last code shown timeout 80 second Last code shown timeout 99 second Enter Configuration Exit and Save Configuration Product Reference Gui...

Page 66: ...IGHT This feature defines the behavior of the 16 key scanner Backlight both for display and keyboard Backlight all backlighting disabled DEFAULT Backlight display enabled keyboard disabled Backlight d...

Page 67: ...abels read by the scan engine Use this command only if you require differentiation in formatting between scanned barcodes and data that is input from the keyboard Refer to the standard Data Format sec...

Page 68: ...mping Mode can be applied when entering data from either a bar code from the keyboard or both TIME STAMPING MODE data from both barcode and keyboard DEFAULT TIME STAMPING MODE data only from barcode T...

Page 69: ...rminator data format added to a barcode read from the device Keyboard data format enable disable on page 63 must be used to enable the Header and Terminator setup so the two parameters should be com b...

Page 70: ...ader eight character header Enter Configuration Exit and Save Configuration 66 PowerScan PD9330 PBT9300 PM9300 HEADER continued After selecting one of the desired Header codes read the character s fro...

Page 71: ...Save Configuration Product Reference Guide 67 TERMINATOR Terminator no terminator Terminator one character terminator Terminator two character terminator Terminator three character terminator Terminat...

Page 72: ...tor Terminator eight character terminator Enter Configuration Exit and Save Configuration 68 PowerScan PD9330 PBT9300 PM9300 TERMINATOR continued After selecting one of the desired Header codes read t...

Page 73: ...r and Terminator data format added to data typed on the keypad Keyboard data format enable disable must be used to enable the Header and Terminator setup so the two parameters should be combined to ge...

Page 74: ...ader eight character header Enter Configuration Exit and Save Configuration 70 PowerScan PD9330 PBT9300 PM9300 HEADER continued After selecting one of the desired Header codes read the character s fro...

Page 75: ...Configuration Product Reference Guide 71 TERMINATOR Terminator no terminator DEFAULT Terminator one character terminator Terminator two character terminator Terminator three character terminator Term...

Page 76: ...tor Terminator eight character terminator Enter Configuration Exit and Save Configuration 72 PowerScan PD9330 PBT9300 PM9300 TERMINATOR continued After selecting one of the desired Header codes read t...

Page 77: ...Selection Simple data input mode DEFAULT Mode Selection Quantity Code mode QTY CODE MODE When the scanner is in Quantity Code Mode the operator is prompted with two data fields named QTY and CODE The...

Page 78: ...red in the QTY field so it is left empty Options are code is transmitted with default QTY 1 code is transmitted alone without any quantity information code is discarded and an error beep is generated...

Page 79: ...at preced ing CODE field and its predefined format 1 code is transmitted with CODE field and its predefined format preced ing QTY field and its predefined format 2 code in CODE field is sent out for t...

Page 80: ...DE field by keyboard and the code is transmitted 1 Barcode data is appended to any text in the CODE field and the code is transmitted 2 Barcode data is appended to any text in the CODE field but the c...

Page 81: ...ct Reference Guide 77 Chapter 7 References This section contains explanations and examples of selected bar code fea tures NETWORK PARAMETERS on page 78 DISPLAY PARAMETERS SOME M8300 MODELS ONLY on pag...

Page 82: ...l be operative and can collect data from all devices CAUTION All Slaves must be powered up either before or together with the Master Slaves successively powered will not be recognized by the system ev...

Page 83: ...S 232 no header terminator CR LF WEDGE no header terminator ENTER Address Stamping It is possible to include the reader address in the message sent to the host The Reader Address Stamping and the Crad...

Page 84: ...y Clear Display After Decode mode When a barcode is read with the reader The code is sent to the Host The reader display is cleared Therefore if any previous data was dis played on the reader screen i...

Page 85: ...lay if the RS 232 interface is selected for communication between the Host and the BC 80X0 cradle then the following additional communications between Host and Scanner can occur The Host can send mess...

Page 86: ...d Parameters It is additional to Header programmed from general Data Format It can be o Scanner Data Header or o Keypad Data Header depending on whether data is read from a barcode or typed on the key...

Page 87: ...Addr Cradle Addr delimiter Time Stamp Time Stamp Delimiter S Header Code ID C len CODE S Term C Term C Header Scanner Addr Scanner Addr delimiter Cradle Addr Cradle Addr delimiter Time Stamp Time Stam...

Page 88: ...the cradle directly connected to the serial line The Scanner can only receive messages if two way mode is enabled Messages cannot start with because they would be interpreted as a configuration comma...

Page 89: ...Product Reference Guide 85 Appendix 9 Hex Numeric Table 0 1 2 3 4 5 6...

Page 90: ...Hex Numeric Table 86 PowerScan PD9330 PBT9300 PM9300 7 8 9 A B C D E F...

Page 91: ...14 15 16 17 18 19 1A 1B 1C 1D 1E 1F SP 0 1 2 3 4 5 6 7 8 9 20 21 22 23 24 25 26 27 28 29 2A 2B 2C 2D 2E 2F 30 31 32 33 34 35 36 37 38 39 3A 3B 3C 3D 3E 3F A B C D E F G H I J K L M N O P Q R S T U V...

Page 92: ...41 683 5700 Fax 541 345 7140 2013 2017 Datalogic S p A and or its affiliates All rights reserved Datalogic and the Datalogic logo are registered trademarks of Datalogic S p A in many countries includi...

Reviews: