


Adjustments and Maintenance
2-13
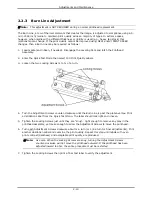
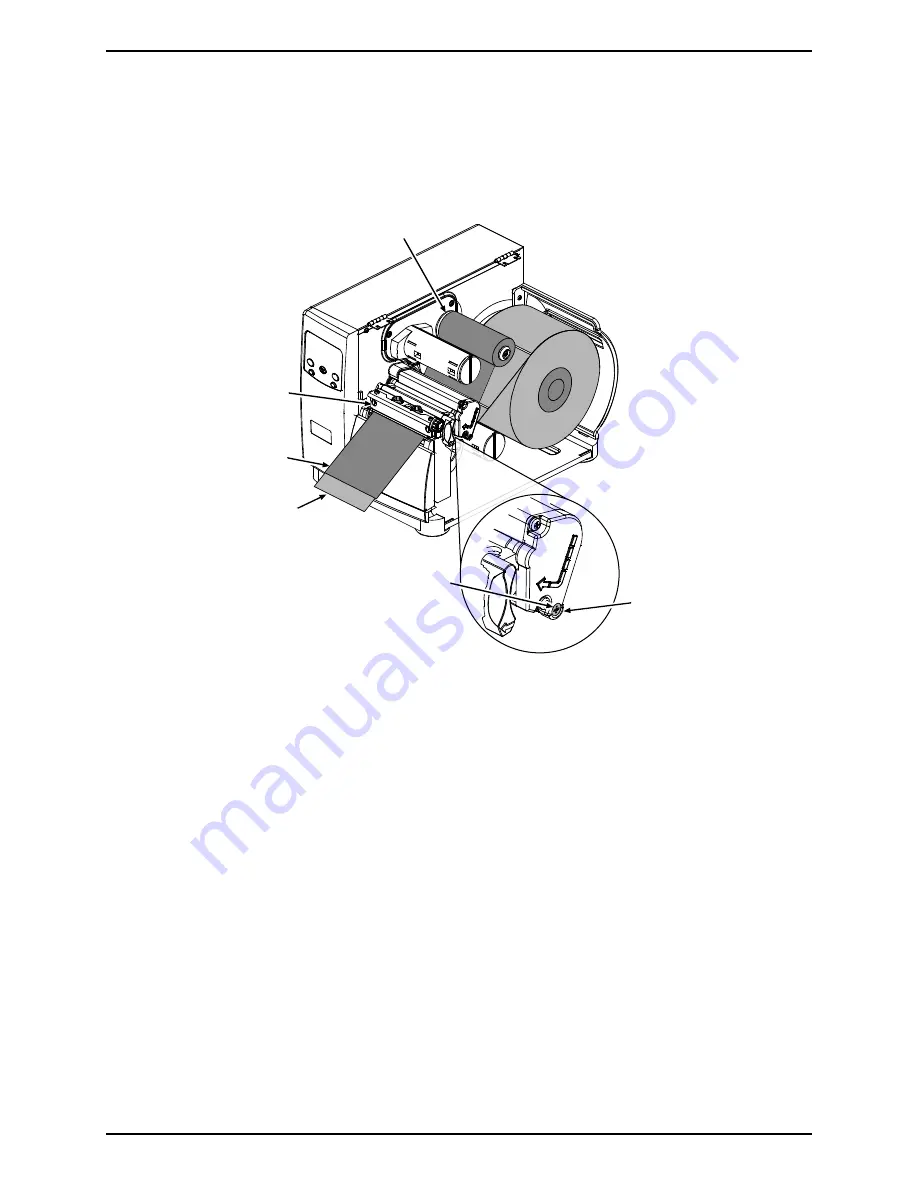
1. Load 4 inch (102mm) or wider Media.
2. Load a matching Ribbon and allow it to feed with the Media from the printer.
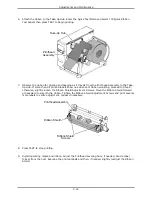
Printhead
Assembly
Ribbon
Supply Hub
Media
Ribbon
Idler Cam
Idler Screw
3. Disengage the Leveling Cam; see Section 2.2.1.
4. Plug in and turn ON the printer. Press FEED several times to normalize ribbon and label tracking.
(If lateral movement is excessive, this must be corrected before proceeding-- typical causes
include an unlatched printhead, uneven printhead pressure, a worn platen or worn platen
bearings.)
5. Observe the ribbon for rippling and bagging as it travels from the Ribbon Supply Hub to the
Printhead Assembly. If smooth, proceed to Step 6; otherwise, loosen the Idler Screw then, while
repeatedly pressing FEED, rotate the Idler Cam until the ribbon is smoothly dispensed. Tighten the
Idler Screw and feed several more labels to verify adjustment; repeat if necessary.
Summary of Contents for I-Class
Page 1: ...I Maintenance Manual...
Page 4: ...ii...
Page 5: ...i 1 Overview 1 0 Introduction 1 1 1 About the Printer 2...
Page 6: ...ii...
Page 38: ...ii...
Page 56: ...ii 4 11 Main Logic PCB 27 4 12 Backplane PCB 29...


