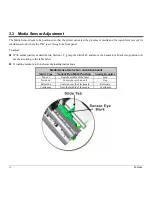
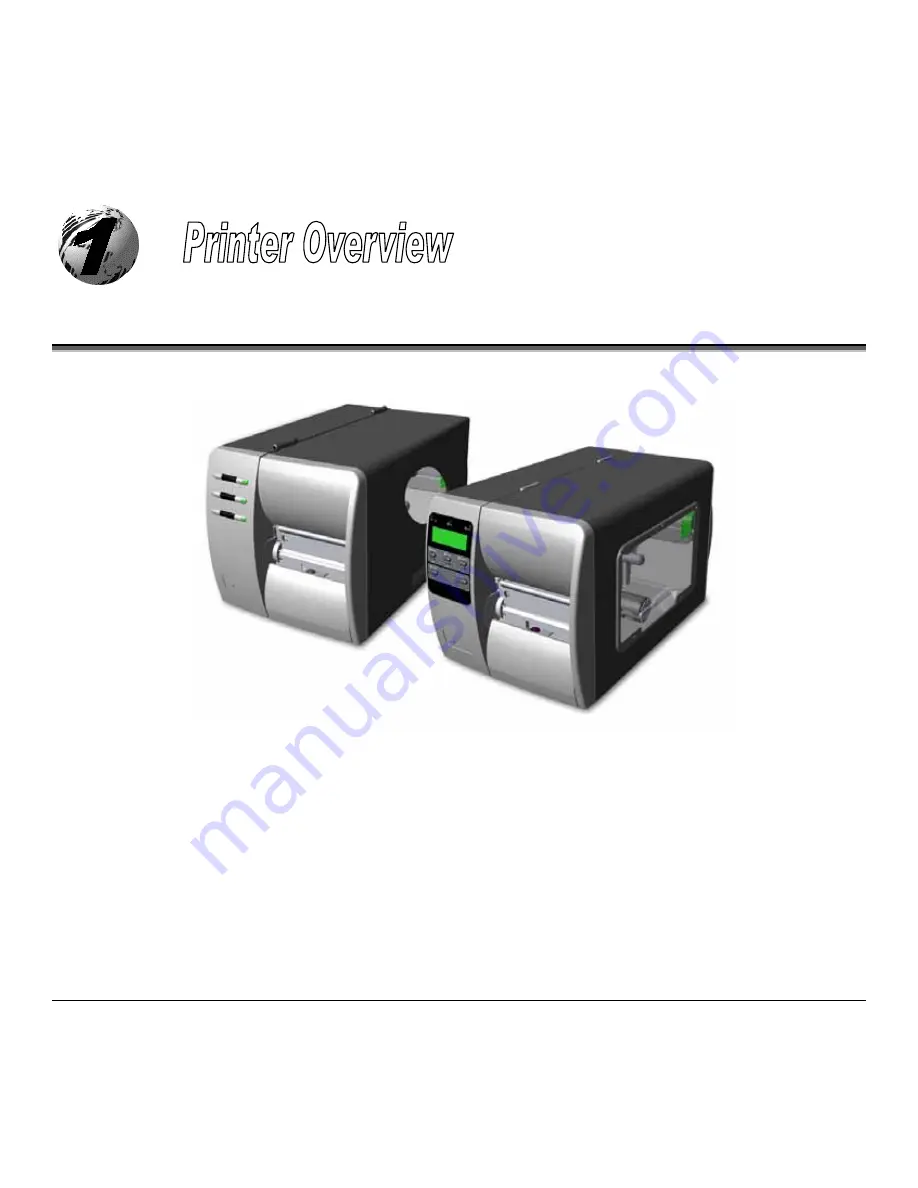
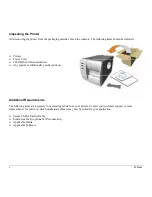
background image

M-Class 


1.0 Introduction 


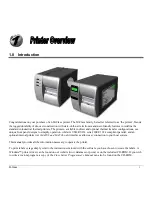
Congratulations on your purchase of an M-Class printer. The M-Class family, hereafter referred to as ‘the printer’, blends 
the rugged durability of die-cast construction with state-of-the-art electronics and user-friendly features to redefine the 
standard in industrial thermal printers. The printers, available in direct and optional thermal transfer configurations, use 
unique front panel designs to simplify operation, while its USB, RS232 serial, IEEE 1284 compliant parallel, and an 
optional internal printserver (

M-4208 and M-4306 only

) interfaces allow easy connection to your host system. 


This manual provides all the information necessary to operate the printer.  
 
To print labels or tags simply refer to the instructions included with the software you have chosen to create the labels.  A 
Windows

 printer driver can be found on our website (www.datamaxcorp.com) or on the included CD-ROM. If you wish 

to write a custom program, a copy of the 

Class Series Programmer’s Manual 

can also be found on the CD-ROM. 

Summary of Contents for M-Class

Page 1: ...M Class Operator s Manual ...

Page 2: ...information contained in the non volatile or programmable memory The firmware Software is protected by applicable copyright laws and Licensor retains all rights not expressly granted In no event will Licensor or its suppliers be liable for any damages or loss including direct incidental economic special or consequential damages arising out of the use or inability to use the Firmware Software Infor...

Page 3: ...ares under sole responsibility that this product conforms to the following standards or other normative documents EMC EN 55022 1993 Class B EN 50024 1998 Safety This product complies with the requirements of EN 60950 A11 1997 Gost R FCC This device complies with FCC CFR 47 Part 15 Class A Note This equipment has been tested and found to comply with the limits for a Class A digital device pursuant ...

Page 4: ... surface To protect your printer from overheating make sure all openings on the printer are not blocked Do not place the printer on or near a heat source Do not use your printer near water or spill liquid into it Be certain that your power source matches the rating listed on your printer If you are unsure check with your dealer or with your local power company Do not place the power cord where it ...

Page 5: ...Loading Ribbon 13 3 4 1 Ribbon Routing 15 Using the Front Panel non display printers 4 0 Introduction 17 4 01 DMXConfig 17 4 1 Lights 18 4 2 Buttons 18 4 3 Normal Mode Button Functions 19 4 4 Express Setup Mode Button Functions 20 4 5 Printer Setup Mode Button Functions 21 4 5 1 Printer Setup Menu List 22 4 5 2 Menu Items and Values 23 4 5 3 Step by Step Modification of the Printer Setup 26 4 6 La...

Page 6: ... 0 5 LCD 42 5 1 The Menu System 43 5 1 1 Entrance and Exit Prompts 43 5 1 2 Media Settings 44 5 1 3 Print Control 46 5 1 4 Printer Options 47 5 1 5 System Settings 49 5 1 6 Communications 56 5 1 7 Diagnostics 59 5 1 8 MCL Options 60 5 2 Display Messages 61 5 2 1 User Prompts and Condition Messages 61 5 3 Quick Test Mode 63 5 3 1 Print Quality Label 64 5 3 2 Configuration Label 65 5 3 3 Quick Ribbo...

Page 7: ...d Pressure Adjustment 83 6 5 Printhead Replacement 84 6 6 Darkness Adjustment 85 6 7 Resetting the Printer 85 6 8 Downloading Firmware and Fonts 87 Troubleshooting 7 0 Problem Resolution 89 7 1 Fault and Warning Messages 92 7 2 Hex Dump Mode 96 Specifications 95 Appendix A ASCII Control Code Chart 101 Appendix B Embedded Fonts and Barcodes 103 Appendix C Optional Internal Ethernet Printer Server 1...

Page 8: ...iv Appendix D Menu System Multi Language Support 141 Appendix E Saving a Configuration File 147 Appendix F GPIO Port Description 149 Appendix G Warranty Information 153 Glossary 155 ...

Page 9: ... designs to simplify operation while its USB RS232 serial IEEE 1284 compliant parallel and an optional internal printserver M 4208 and M 4306 only interfaces allow easy connection to your host system This manual provides all the information necessary to operate the printer To print labels or tags simply refer to the instructions included with the software you have chosen to create the labels A Win...

Page 10: ...tamp AGFA Scalable Font Engine 2 Resident Scaleable fonts CG Triumvirate regular and bold condensed M 4208 and M 4306 only Memory 2 MB FLASH Memory 256K available to user designated Module B 4 MB DRAM Memory M 4206 8 MB DRAM Memory M 4208 and M 4306 Interfaces USB interface DB 9 RS 232 serial interface IEEE 1284 Centronics parallel interface Operational Simple Media Loading Media Tearbar Fan fold ...

Page 11: ...inches 38 mm Designed for ease of operation the Peel and Present Mechanism is automatically detected configured and enabled when installed on the printer Internal Rewind An internal mechanism to wind four inch outer diameter rolls of printed labels or the label backing material when using the Peel and Present option Present Sensor An output control device that allows subsequent printing to occur o...

Page 12: ...rom a Web browser or other FTP client LPR LPD over TCP IP for UNIX platforms and Microsoft s Windows Raw sockets support over selectable TCP IP port with filters for selected UNIX environment IP SNMP support of MIB 2 proprietary NIC MIB and public and proprietary private Printer MIB SNMP traps to alert administrators of printer errors paper ribbon out head up etc DHCP BootP and RARP services suppo...

Page 13: ...e packaging materials i e tape and foam that were placed in the printer for shipment Complete the following steps prior to connecting power or attempting to load media Ensure that the arrow on the box is pointing up and then open the box Remove the top piece of packing foam Lift the printer from the box Remove the printer from the plastic bag Remove any tape or additional packing foam from the ins...

Page 14: ...on Any special or additionally purchased items Additional Requirements The following items are necessary for generating labels from your printer Contact your customer support or sales representative for advice on which media and software may best be suited for your application Serial USB or Parallel cable Ethernet cable for optional LAN connectivity Applicable Media Applicable Software ...

Page 15: ...e printer ensure the Power On Off Switch is in the Off position 1 Place the printer on a firm level surface 2 Ensure that the Power Switch on the Printer is in the Off position 3 Connect the AC Power Cord to the receptacle on the back of the Printer and then plug the AC Power Cord into a properly grounded outlet The power supply automatically detects and then adjusts to the applied line voltage se...

Page 16: ...e Default is uni directional for printers with front display see Chapter 5 Serial Connection The serial interface supports RS 232C communications via a DB 9 connector The following list of serial port settings is menu selectable and must match the host computer s serial port settings see Chapter 4 for non display printers or Chapter 5 for display printers Baud Rate Default 9600 bps Word Length Def...

Page 17: ...M Class 9 3 2 Loading Media Load media into the printer as follows 1 Open the media cover and lower the Media Hub Guide and Media Guide 2 Press in on the Printhead Latch and raise the Printhead Assembly ...

Page 18: ...the Media Hub Guide The Media Hub Guide should be pushed inward so that it is just touching the Roll Media 4 Route the Media through the printer as shown Raise the Media Guide The Media Guide should be pushed inward so that it is just touching the edge of the Media ...

Page 19: ...he ERROR light it may be necessary to Printers without front display Perform the Auto Media Sensor Calibration see section 4 7 1 Printers with front display Press and hold the FEED button until at least one label gap or mark is advanced then release For additional calibration procedures see section 5 4 Note The printer is factory set to use 4 inch media and ribbon if thermal transfer equipped When...

Page 20: ... described in Section 3 2 grasp the Slide Tab and move the Sensor Eye Mark into position over media according to the table below If loading media return to the media loading instructions Media Sensor Selection and Adjustment Media Type Sensor Eye Mark Position Sensing Required Die cut Near the middle of the label Gap Notched Centered over the notch Gap Reflective Centered over the black mark Refle...

Page 21: ...out To load Note Using a ribbon that is slightly wider than your media and liner if any will help protect against printhead wear 1 Open the media cover Press in on the Printhead Latch and raise the printhead assembly 2 Slide the Ribbon Roll onto the Ribbon Supply Hub until it rests against the hub s flange Ensure the ribbon unwinds in the correct direction see 3 4 1 for examples Illustrations depi...

Page 22: ...l times in a clockwise direction to secure it in place 6 Close the cover and press the FEED button several times to position the ribbon and ensure proper tracking 7 The Media Type setting within the printer s setup must be set to Thermal Transfer to print using a ribbon Printers without front display See section 4 5 2 Printers with front display See section 5 1 2 ...

Page 23: ...he correct ribbon route Ribbon types are available with the ink coating layer wound in or out These types are NOT interchangeable for use with the printer Note Ensure the inked side of the ribbon faces the media and NOT the printhead Ribbon Routing Diagrams Coating Side In Ribbon Supply Hub Coating Side Out Ribbon Supply Hub ...

Page 24: ...16 M Class ...

Page 25: ...plication allows the user to make changes to the existing printer setup without using the front panel buttons Visit our website at www datamaxcorp com software m class for the latest releases DMXConfig Features Simplify Printer Setup Process Allows Real Time Control Query of Printer Configuration Define and Save Optimal Configurations for Applications i e Ribbon Label Stock Combinations Saved Conf...

Page 26: ...P Lights will be on during power up initialization and a warm reset 4 2 Buttons The three buttons PAUSE FEED and CANCEL perform different functions based on the printer s operational mode The printer operates in one of the following modes Normal Normal printer functions See Section 4 3 Express Setup Allows quick access to the most common printer settings Sensor Type Media Type and Option Control S...

Page 27: ...nditions Cancels the current batch of labels Press the Pause button to print the next batch of labels in the printer s buffer Normal Mode Normal power up CANCEL PAUSE FEED Press and Hold to perform Label Alignment see section 4 6 Button Combinations push buttons simultaneously PAUSE FEED Prints the Test Label see Section 4 8 2 PAUSE CANCEL Performs a warm reset and returns to the Normal Mode of op...

Page 28: ...at allows users quick access to the most commonly used printer settings The selected setting is represent by a specific combination of the printer s indicator lights for each of the three items Sensor Type Media Type and Option Control To enter the Express Setup Turn the printer OFF to save settings ...

Page 29: ...us values simply turn off power to the printer If you wish to restore Factory Defaults see Section 6 7 To change Printer Setup Printer Setup Procedure Printer Setup Mode Prints the Printer Setup Menu List see section 4 5 1 Prints the Test Label for test Current Item and Value is printed Increments item s value Decrements item s value Accepts the current values for test PAUSE PAUSE Press and hold d...

Page 30: ...lease or for the TOF GAIN item hold FEED for 12 flashes etc Menu Items Values 1 DIRECT MEDIA TYPE 2 EDGE SENSOR TYPE 3 NO PRESENT SENSOR 4 NO CUTTER EQUIPPED 5 127 SOP ADJUST 0 005 in 6 127 PRESENT ADJUST 0 005 in 7 9600 BAUD RATE bps 8 8 DATA BITS 9 STD CONTROL CODES 10 100 CONT FORM LENGTH 0 01 in 11 3 OOS MAXVOLT 0 1 Volts 12 12 TOF GAIN 13 10 TOF DELTA 0 1 Volts 14 0 TOF LOW 0 1 Volts 15 426 L...

Page 31: ...n relative to the top of form Possible Values Range 0 255 nominal 128 0 close to edge 255 farthest from edge 6 PRESENT ADJUST Specifies an additional amount to feed the label after printing Possible Values Range 0 255 nominal 128 0 close to edge 255 farthest from edge 7 BAUD RATE Sets the serial port baud rate Must match the host setting Possible Values 600 to 38 4k default 9600 BPS 8 DATA BITS Se...

Page 32: ...its 4K Bytes 18 LABEL ALIGNMENT Sets the label alignment method see Section 4 6 Possible Values YES user manually determines ALIGN LENGTH AUTO printer determines ALIGN LENGTH NO no Label Alignment used 19 ALIGN LENGTH Leading edge distance of two successive labels Must be entered if LABEL ALIGNMENT is set to Yes see Section 4 6 Possible Values 0 999 default 100 Units 01 inch 20 OPTION CONTROL Sets...

Page 33: ...tware programs Possible Values Range 0 30 default 10 24 EXACT TIME Instructs the printer to wait until the system is idle before the next label s data and time fields are formatted to eliminate any discrepancy between the buffered and printed times Possible Values YES or NO default NO 25 GPIO Sets the printer s option port to function for GPIO applications see Appendix F for more information Possi...

Page 34: ...ue to hold the button until the STOP light turns off then release it 2 Press and hold the FEED button and count 7 flashes of the ERROR light then release it The following printout should be produced 3 Press the PAUSE button one time to increment to the 19200 bps value The following printout should be produced 4 At this point you will accept the current values for test and exit the Printer Setup Pr...

Page 35: ...___________ 0 RIBN______________ 237 TEMP______________ 64 VOLT______________ 218 PRESENT SENSOR____ 0 COUNTER INFORMATION ABSOLUTE VALUES 7 16 2003 LENGTH____ 773 INCHES TIME______ 20 HOURS RESETTABLE VALUES 7 16 2003 LENGTH____ 969 INCHES TIME______ 56 HOURS MEMORY CONFIGURATION INTERNAL MODULE A______ 128 SCALABLE FONTS_________ 64 LABEL SIZE 0426 10912 IN CONFIGURATION SERIAL PORT SELECTED 19 ...

Page 36: ... AUTO and NO are detailed in the following sections 4 6 1 Label Alignment YES In this mode the operator must supply an ALIGN LENGTH value This value must be physically measured from leading edge to leading edge of two successive labels as shown The measurement must be as accurate as possible For very short labels errors as small as 0 01 can result in noticeable print variations on the labels betwe...

Page 37: ...reater the waste Auto Alignment with the Present Sensor enabled If the printer is equipped with the Present Sensor option and that feature is enabled while the label length is calculated the printer will pause and illuminate the STOP light after each movement The operator must press the PAUSE button for the alignment to continue This allows the operator to remove any labels as required however lab...

Page 38: ...Alignment length measurement OR Re measure Label Alignment Length use Menu Setup to set new length ensure desired length has been set Obtain a slightly different label Alignment Length measurement Using the Label Alignment AUTO mode hold the FEED button to force an alignment and label measurement Ensuring slack in the label stock may result in a slightly different measurement The Alignment Length ...

Page 39: ... present position is not far enough forward Another present position has been determined Enabling the Present Sensor causes the label stop position present position to be approximately 0 1 behind the peel bar OR The Present Adjust value is not correct Disable the Present Sensor OR Ensure the host computer is not providing a Present Distance shorter than is required for the Tear Bar Use the Setup M...

Page 40: ... time you wish to discard your changes and revert back to the previous calibration simply turn off power to the printer Also Factory Defaults can be restored see Section 6 7 To perform Calibration Auto Media Calibration See section 4 7 1 Until Paused light turns off See section 4 7 2 Calibration Mode Analyze for Paper Analyze for Backing or Mark Analyze Out of Media condition Prints the Test Label...

Page 41: ...ntil the STOP light turns off then release it 2 Next press the PAUSE button The printer will feed approximately ten inches of media to calculate the TOF Delta and Low values to be used 3 Upon completion one of the following lights will flash five times to denote the result of the auto calibration attempt STOP light Successful calibration Proceed to Step 4 ERROR light Unsuccessful calibration try a...

Page 42: ...alyzes the no media condition 3 Position the backing material or the black reflective mark in the media sensor close the Printhead Carrier Assembly and then press the FEED button The printer will flash the ERROR light as it analyzes the top of form mark 4 Place the media with the backing attached if any in the media sensor close the Printhead Carrier Assembly and then press the PAUSE button The pr...

Page 43: ... CURRENT STOP LOC__TEAR EXPRESS SETUP MEDIA SENSOR______EDGE PRINT METHOD______TRANSFER OPTION CONTROL____AUTO INPUT VALUES PAPER_____________ 207 POT_______________ 33 TRAN______________ 157 REFL______________ 0 RIBN______________ 237 TEMP______________ 64 VOLT______________ 218 PRESENT SENSOR____ 0 COUNTER INFORMATION ABSOLUTE VALUES 7 16 2003 LENGTH____ 773 INCHES TIME______ 20 HOURS RESETTABLE...

Page 44: ...l is used to test the condition of the printhead as shown below Good Print Quality Label Even pattern consistency indicates correct printhead operation Faulty Print Quality Label Streaks indicate a dirty or faulty printhead See Section 6 1 for cleaning instructions ...

Page 45: ...ate the current printer setup for print quality label tracking and print positioning To print the Test Label With the printer loaded with media at least 4 inches wide and ribbon if printing with thermal transfer media simultaneously press the PAUSE FEED buttons ...

Page 46: ...38 M Class ...

Page 47: ...rast press and hold the MENU key for 10 to 20 seconds to modify the LCD contrast level 5 0 1 Ready Mode Normal Operation Ready Light On The PAUSE Key temporarily suspends printing Pressing it again will return the printer to normal operation The FEED Key advances one label and clears any corrected faults Pressing and holding causes the printer to perform a Quick Media Calibration see Section 5 4 1...

Page 48: ... It also increments numerical values in most menu selections The ENTER Key selects the function item or displayed value It also moves between selections within multiple parameter fields The ESCAPE Key moves to the previous menu level and finally back to the Ready Mode When a print job is in progress pressing the TEST Key will terminate the job The printer will prompt you for confirmation if Yes th...

Page 49: ...e the selected test label quantity of 2 100 1000 or 9999 except the Configuration Label quantity of one Holding down the key scrolls quantities The ESCAPE Key will exit the Quick Test Mode without printing The TEST Key will print the selected test label at the selected quantity During test label printing this key also functions as a cancel key the printer will prompt you for confirmation before ca...

Page 50: ...lashing indicates a Fault See Section 7 1 for a listing of associated messages 5 0 5 LCD Liquid Crystal Display The display provides several types of information Following a brief power up sequence initialization the Ready message The time and date if the printer has received it from one of the following the host the front panel setting or the Time and Date option A label counter during a batch pr...

Page 51: ...changed through the menu system all other selections can be overridden by host software commands Consult the Class Series Programmer s Manual for specific information 5 1 1 Entrance and Exit Prompts With Ready displayed on the LCD press the MENU Key to enter Menu Mode Note While in Menu Mode the printer will stop processing new DPL or bitmapped data MENU MODE Depending upon the configuration of th...

Page 52: ...ed a top of form fault is declared PAPER OUT DISTANCE 00 25in 0 99 99 Sets the length of travel before an out of stock condition is declared LABEL WIDTH 203DPI 04 26in 75 4 26 300DPI 04 16in 75 4 16 Sets the maximum limit for the printable width Objects extending beyond this limit will be clipped off and not printed RIBBON LOW DIAMETER 1 38 in 1 00 2 00 Sets the threshold for a low ribbon indicati...

Page 53: ...es this function Also the number specified is multiplied by one thousand CLEAN HEAD COUNTER 0 in Indicates the number of inches or centimeters since printhead cleaning was last initiated RESET COUNTER Allows the clean head counter to be set to zero CLEAN HEAD NOW Initiates printhead cleaning and resets the Clean Head Counter Notes Remove ribbon if installed Enter Menu Mode Media Settings Media Typ...

Page 54: ...E 0 00in 0 4 00 Sets the label stop position past the start of print When the next label format is received the printer will automatically backfeed to the start position If the present distance is set to zero the printer will operate without reversing CUSTOM ADJUSTMENTS These factory adjustments independently change the listed parameters to finely tune the printer and compensate for slight mechani...

Page 55: ... dispensing where a printed label blocking the sensor will inhibit further printing until removed The physical presence of the Present Sensor must be detected to show the ENABLE DISABLE selections else NOT INSTALLED will be displayed momentarily MODE Sets Present Sensor to desired mode of operation AUTO Enables the present sensor when option is installed present sensor or peel and present mechanis...

Page 56: ...rols the Start of Print SOP process ACTIVE HIGH SOP signal must go high for at least 50 milliseconds to initiate printing ACTIVE LOW SOP signal must go low for at least 50 milliseconds to initiate printing END OF PRINT Programmable signal output that signifies the End of Print EOP process LOW PULSE Outputs a low pulse approximately 30 milliseconds long following printing HIGH PULSE Outputs a high ...

Page 57: ...5120 Sets the number of 1K blocks allocated for the internal RAM D module DEFAULT MODULE D Sets the default module used to store files when no other module is specified Available choices are G FLASH memory or D RAM memory SCALEABLE FONT CACHE 0312 KB 100 5120 Sets the number of 1K blocks allocated for the scaleable font engine Available memory dependent upon model SINGLE BYTE SYMBOLS Selects the c...

Page 58: ...layed here it is also printed on a configuration label Each printer has a unique Key number in the following form vvvv cwxx yyyyyy zzz Where vvvv represents the model number of the application loaded cwxx represents the hardware software feature level where c represents the printer class w represents hardware feature level of the main board xx represents the software feature level 10 Standard DPL ...

Page 59: ...and bar codes will not be printed An odd number of overlapping objects will print LABEL ROTATION Instructs the printer to rotate the label format 180 degrees before printing ENABLED Label formats are flipped top to bottom DISABLED Label formats are printed normally IMAGING MODE Instructs the printer whether to pre image the label format Note This selection can affect the accuracy of time stamped l...

Page 60: ... is granted SECURE MENU The Menu area will require a password before access is granted DISABLED All menu items are accessible without protection MODIFY PASSWORD Modify the numeric password required to access the menu system when security is enabled UNITS OF MEASURE Selects the measurement system in which the system s settings are represented in the menu system and on configuration labels IMPERIAL ...

Page 61: ... G M and N print a fixed font size Lines and boxes Rotations 2 and 4 are affected by the vertical multi plication factor defined in the DPL Dxx command Column positions greater than the printhead width are adjusted back to the printable area and printed Barcodes rotation 3 upside down right to left with row position less than barcode height result in row position equal to barcode height that is ba...

Page 62: ...p the label after the applicator issued start of print signal is received for faster throughput DISABLED The printer will not initiate repositioning until the next label is ready to print May help prevent the curling of the label edge FONT EMULATION The selected font is substituted for all Datamax internal fonts This function provides the printer to define a new default font without changing the h...

Page 63: ...l in process is reprinted or If the CANCEL Key is pressed the operator now has the option of canceling the reprint To allow the reprint press the ESCAPE Key or to cancel the reprint press the ENTER Key the operator now has the option of canceling the entire label batch by pressing the ENTER Key again Note VOID will not be printed when insufficient space exists for the height of the text see VOID D...

Page 64: ...method BOTH Uses both handshaking methods SOFTWARE XON XOFF HARDWARE CTS DTR NONE No flow control is used PARITY Sets Word parity NONE No parity ODD Odd parity EVEN Even parity DATA BITS Sets Word length 7 Seven bit Word length 8 Eight bit Word length STOP BITS Sets the number of stop bits 1 One stop bit 2 Two stop bits PARALLEL PORT A Controls the communications settings for Parallel Port A PORT ...

Page 65: ... the NIC Adapter DISABLED Disables IP Discovery Note Select this option to ensure that any stored static IP is used by the NIC Adapter SET FACTORY DEFAULTS Resets all of the network parameters to factory default settings Including some parameters that are not accessible through the printer s menu HOST SETTINGS Settings which affect all communications with a host HOST TIMEOUT 10 SEC 1 60 The number...

Page 66: ... Feed Slew and Reverse ENABLED Normal printer operating mode DISABLED DPL speed commands are ignored The speeds are controlled via the menu setting see Section 5 1 3 TOF SENSING COMMANDS Allows the user to disable the DPL Top of Form commands Gap Continuous and Reflective ENABLED Normal printer operating mode DISABLED DPL TOF commands are ignored The TOF is controlled via the menu setting see Sect...

Page 67: ...times 1 10 or 100 with the results displayed following each attempt PRINT TEST RATE min 000 0 120 The number of minutes to delay between the printing of batches of Quick Test Labels SENSOR READINGS Analog Sensor readings are displayed THR TRAN RIBM 24V PS HD RANK 255 255 255 255 255 255 255 Live sensor values are displayed Maximum values are shown in this example where THR thermistor sensor TRAN t...

Page 68: ...n can request and send data to locally resident lookup files or remote databases ENABLED After power to the printer is turned Off and On MCL will be started The printer is now ready to accept input data from peripheral devices such as barcode scanners weigh scales and keyboards without the need of a host computer DISABLED Normal printer functions START MCL MCL with be started after exiting from th...

Page 69: ...es Displayed Message Description Condition s DMFBSJOH GBVMUT The printer is trying to clear a fault condition Occurs when the FEED Key is pressed after the correction of a fault DBMJCSBUJOH A media calibration is being performed The FEED Key was pressed and held DBODFM SFQSJOU FOUFS LFZ ZFT The CANCEL or TEST Key was pressed during the fault handling process The faulted label will be cancelled if ...

Page 70: ...nsor Remove the label to continue printing TZTUFN JOJUJBMJ JOH Normal power up and soft reset condition Follows the SYSTEM RESET IN PROGRESS message after a reset or power up TZTUFN SFTFU JO QSPHSFTT Normal power up and soft reset condition Occurs when the user resets the printer via the host or Front Panel VODBMJCSBUFE The media calibration is not set Perform calibration see Section 5 4 YYYY PG Y...

Page 71: ...Label all Quick Test labels require 4 inch 102mm wide media to print the entire format If using narrower media change the Label Width setting Section 5 1 2 to match your media s width to avoid printing on the platen 2 During any Quick Test press the Key or the Key to stop printing 3 Using the Print Test Rate feature Section 5 1 7 a time delay can be set for printing labels in Quick Test Mode ...

Page 72: ...ic fill patterns These can be used to ensure conformance as well as aesthetics To print a Print Quality Label Press the Key Use the FWD Key to scroll to Print Quality Label Use the Key to select a quantity see Section 5 0 3 Press the Key to start printing Good Print Quality Label Even pattern consistency indicates correct printhead operation Faulty Print Quality Label Streaks indicate a dirty or f...

Page 73: ...ODES DATA ENABLED STX V SW SETTINGS ENABLED CONFIGURATION FRI 09 38PM 21NOV2003 PRINTER KEY 4208 MD10 030915 198 APPLICATION VERSION 83 2407 08B 8 01 1 14 2004 MCL Version 1 03 BOOT LOADER 83 2406 08B 08 01 01 14 2004 SYSTEM INFORMATION PRINT BUFFER SIZE 117 in FLASH SIZE 2 MB RAM TEST PASS OPTIONAL LANGUAGES NONE CONFIGURATION FILE NONE MEDIA SETTINGS MEDIA TYPE RIBBON TRANSFER SENSOR TYPE GAP LA...

Page 74: ...compliant picket fence bar code that can be used to verify thermal transfer and print quality functions To print a Quick Ribbon Test Label Press the Key Use the FWD Key to scroll to Ribbon Test Label Use the Key to select a quantity see Section 5 0 3 Press the Key to start printing ...

Page 75: ...from the host or one recalled from memory Note If a job was cancelled prior to its completion or if power has been removed since the last print job and the request for this label this selection will print a VOID message 5 3 6 User Defined Label The User Defined Label reprints from a list of previously printed label formats Use the FWD Key to scroll through the listing then use the Key to select an...

Page 76: ...e Section 3 2 that the Media Sensor is adjusted see Section 3 3 and that the printer is idle Press and hold the Key The printer will begin advancing media allow at least one label gap or mark to advance under the sensor before releasing the button Upon successful completion the Calibration Completed message will flash the printer will feed to the next label TOF and Ready will be displayed A Warnin...

Page 77: ...omment 1 Media should be loaded and the appropriate Sensor Type selected Turn On the printer VODBMJCSBUFE Wait until the printer initializes about six seconds 2 Press the MENU Key Raise the printhead assembly NFOV NPEF NFEJB TFUUJOHT You are entering Menu Mode 3 Press the Key to enter the Media Settings menu NFEJB TFUUJOHT NFEJB UZQF See Section 5 1 2 for menu layout 4 Press the FWD Key and scroll...

Page 78: ... reflective media TDBO NBSL QSFTT FTD LFZ zzz This sets the parameter for the gap or mark value Where yyy is a numerical value representing the current sensor reading useful in locating the best sensor position Note Never position the sensor over a perforation when recording a sensor reading Note Do NOT move the position of the Media Sensor after it has been adjusted 8 Position the label and backi...

Page 79: ...cessful calibration Back out of the menu tree by repeatedly pressing the Key If using gap or reflective media press and hold the Key The printer will begin advancing media allow at least one label gap or mark to advance under the sensor UIV 22 42B 36NBS3115 SFBEZ The printer is now ready to begin printing If this calibration was unsuccessful go to Section 5 4 3 Note A Warning Low Backing message i...

Page 80: ...led To perform an Advanced Entry Calibration Step Operator Action Displayed Message Comment 1 Media should be loaded and the appropriate Sensor Type selected Turn On the printer VODBMJCSBUFE Wait until the printer initializes about six seconds 2 Press the MENU Key Raise the printhead assembly NFOV NPEF NFEJB TFUUJOHT You are entering Menu Mode 3 Press the Key to enter the Media Settings menu NFEJB...

Page 81: ...assembly HBJO USBO zzz 11 1 42 OR HBJO SFGM zzz 11 1 42 If using preprinted media ensure the label area under the sensor is free of preprinted text graphics or borders 10 Press the Key to select the setting denoted by an and then record the sensor reading the yyy value in a table similar to the one shown after Step 12 as a Label Value Next press the FWD Key to increment the Gain Number Repeat this...

Page 82: ...nter of the facedown black mark Press the Key to select the setting and then record the sensor reading in a table similar to the one shown after Step 12 as a TOF Value Next press the FWD Key to increment the Gain Number Repeat for each of the Gain Numbers 00 32 HBJO USBO zzz 11 1 42 Or for reflective media HBJO SFGM zzz 11 1 42 Where yyy is a numerical value representing the current sensor reading...

Page 83: ...st algorithm for your media HBJO USBO zzz 1 1 1 42 Or for reflective media HBJO SFGM zzz 1 1 1 42 Both sensor readings must be above 20 Gain Number Label Value TOF Value Difference Value 00 255 254 1 01 251 240 11 02 241 213 28 03 231 182 49 04 219 150 69 05 212 119 93 06 200 88 112 07 189 58 131 08 178 32 146 09 167 19 N A 10 156 17 N A 11 146 16 N A 12 136 15 N A 31 116 14 N A For example if you...

Page 84: ...in the Media Sensor Record the sensor reading and label it P paper Place the backing mark or notch in the Media Sensor Record the sensor reading and label it G or M Gap or Mark Remove all media Record the sensor reading and label it E Empty HBJO USBO zzz 1 9 1 42 Or for reflective media HBJO SFGM zzz 1 9 1 42 Where yyy is a numerical value representing the current sensor reading 15 Press the Key T...

Page 85: ...QUZ TFOTPS MFWFM Q 126 N 292 F 324 The selection will flash and the display heading will change to indicate the item for entry 17 After all entries have been made press the Key to back out of the menu and then press the Keyto save the settings and return to the Ready Mode TBWF DIBOHFT FOUFS LFZ ZFT From Ready press the FEED Key to advance to the next label TOF Note If the Advanced Entry Calibratio...

Page 86: ...78 M Class ...

Page 87: ...off Rotate the platen roller and clean it thoroughly with solvent and a cotton swab After every roll of media Peel Off Roller Rotate the peel off roller and clean it thoroughly with solvent and a cotton swab After every roll of media Media Path Solvent After every roll of media Peel Tear Bar Solvent As needed Media Sensor Air blow Monthly Exterior Mild detergent or desktop cleaner As needed Interi...

Page 88: ...close attention to the Burn Line Allow the printhead to dry 5 Replace the ribbon and media Lower the Printhead Assembly back to the locked position 6 Close the cover Plug in and turn On the printer Feed several labels to normalize tracking 6 1 1 Automated Printhead Cleaning printers with display only 1 Remove media and ribbon 2 Place a Datamax Cleaning Card part number 70 2013 01 under the printhe...

Page 89: ...it to the left most position see Example 1 below 3 Next move the Thumbscrew to the right until the printed labels contain a complete even image see Example 2 Tighten the Thumbscrew Example 1 Over adjustment Too much adjustment produces an image that fades across the label To correct this move the Thumbscrew to the right Example 2 Correct adjustment The proper adjustment produces a complete image w...

Page 90: ...se until the burn line is past the platen roller vertex Print a test label the label should look light and uneven Non display printers Simultaneously press the PAUSE FEED buttons Display printers See Section 5 3 1 4 Tighten the Locking Screws just until they are snug tight enough to remove any play in the printhead assembly yet loose enough to allow the Adjustment Screws to move the printhead 5 Tu...

Page 91: ...justment is set to its left most position see Section 6 2 3 Print a test label Non display printers Simultaneously press the PAUSE FEED buttons Display printers See Section 5 3 1 4 Turn the Printhead Pressure Adjustment Screws counterclockwise to increase the applied pressure or clockwise to decrease it Make equal adjustments to each screw to achieve even print contrast across the media Note When ...

Page 92: ...crew it will remain in the assembly 4 Unlatch the Printhead Assembly While holding the Printhead raise the assembly Disconnect the two cables and then remove the old Printhead 5 While carefully holding the new Printhead connect both cables 6 Position the Printhead onto the Locating Pins in the Printhead Assembly and secure in place with the Printhead Mounting Screw do not over tighten 7 Clean the ...

Page 93: ...ease the darkness of the printed labels try increasing the Heat value and or slow the Print Speed using your software program or via DPL commands 6 7 Resetting the Printer Non Display Printers With the printer power Off press and hold all three buttons while turning On the printer Continue to hold the buttons down until the STOP light turns off approximately 17 seconds The printer will now be set ...

Page 94: ...nu system See Section 5 1 for a listing of the factory default settings and Section 5 1 5 for information about the Factory Setting File Level Two Reset To return the printer to the factory default settings and clear all the calibration and adjustment parameters Turn Off the printer Press and hold the PAUSE FEED and CANCEL Keys while turning On the printer continue to depress the keys until the RE...

Page 95: ...h during the download 4 Following a successful download the STOP Light will illuminate then the printer will perform a cold reset The previous printer setup will not be affected unless substantial firmware data structure changes have occurred Print a Database Configuration Label to verify your new firmware version Following an unsuccessful download the ERROR Light will illuminate then the printer ...

Page 96: ...88 M Class ...

Page 97: ...er blade rotate and position itself properly However if the problem continues call for service The LCD is blank but the Ready Indicator is On The display contrast may set too low Press and hold the MENU Key for 10 seconds or until the display reappears Erratic feeding The printer may require Calibration Printers without front display Perform the Calibration Procedure see section 4 7 1 Printers wit...

Page 98: ...de at both the outlet and the printer also ensure the power switch is On Verify that the AC outlet is functioning or try moving the printer to another AC circuit The AC cord may be damaged replace it The line fuse may be blown call for service Nothing is printing labels advance normally but no image is printed Examine the used ribbon for an image If there is an image on the used ribbon Verify that...

Page 99: ...ombination may not be compatible contact a Media Representative The Printhead Leveling Cam may be incorrectly adjusted see Section 6 2 The Platen Roller may be dirty or worn clean or call for service The Printhead Burn Line may need adjusting see Section 6 3 Skips labels when printing Media Calibration may be needed non display printers see Section 4 7 display printers see Section 5 4 The Media Se...

Page 100: ...er Off and On If the fault does not clear call for service DVUUFS GBVMU The printer has detected a cutter mechanism fault WARNING Use extreme care Turn Off and unplug the printer before proceeding Examine the cutter for obstructions and ensure that the cutter cable is properly installed Plug in and turn On the printer Press the FEED Key If the fault does not clear call for service ENB GBVMU The pr...

Page 101: ...as detected a problem within the print logic Try cycling the printer power Off and On If the fault does not clear call for service SBN GBVMU The system has detected a RAM failure Try cycling the printer power Off and On If the fault does not clear call for service SFGMFDUJWF NPEF DBOOPU DBMJCSBUF Consistently low sensor readings were detected Press any key to continue Ensure that the reflective ma...

Page 102: ...sive printhead temperature UPQ PG GPSN GBVMU The printer could not find the TOF mark within the maximum label length setting or it found a TOF in an unexpected place Note When the printer is set for reflective media this fault is given for an out of stock condition If media is moving 1 Press the FEED Key It may be necessary to re calibrate the printer see Section 5 4 2 The Media Sensor may be out ...

Page 103: ...T QFOEJOH The host has pending configuration changes that will not take effect until a host reset command is issued To save changes send a host reset command in DPL or to discard changes perform a Soft Reset see Section 6 7 MPX WPMUBHF The printer has detected a low operating voltage Possible low or fluctuating line voltage level Try moving the printer to another outlet When more than 50 black is ...

Page 104: ... the FEED button until the STOP light turns off Now all data received by the printer will be output in hexadecimal code along with the printable ASCII equivalents as shown below To exit Hex Dump Mode simply turn the printer off and then back on Display printers To print the Hex Dump Label To begin go to the Diagnostics menu and enable Hex Dump Mode see Section 5 1 7 Exit the menu and save the chan...

Page 105: ...n condensing AC Input Voltage 90 132 or 180 264 VAC 47 63 Hz auto ranging Printing Print Method Direct Thermal Thermal Transfer optional Print Speed 2 6 IPS 50 152 mm s M 4206 and M 4306 2 8 IPS 50 203 mm s M 4208 Resolution 203 dpi 8 dots mm M 4206 and M 4208 300 dpi 11 8 dots mm M 4306 Tear Bar Tear Down DRAM Memory 4MB M 4206 8MB M 4208 and M 4306 FLASH Memory 2MB ...

Page 106: ...er Communications Interface USB RS 232 DB 9 and IEEE 1284 Compliant Centronics Parallel Baud Speed 600 to 38 400 bits per second BPS Handshaking Xon Xoff CTS DTR Parity Even Odd or None Stop Bits 1 or 2 Data Bits 7 or 8 Fonts Non display printers Display Printers 9 Bit Map Fonts rotated 0 90 180 270 degrees 10 smooth bitmap fonts 6pt 48pt 9 Bit Map Fonts rotated 0 90 180 270 degrees 10 smooth bitm...

Page 107: ... Designator Description Maximum 1 Minimum 1 A label width 4 65 1 00 B liner width 4 65 1 00 C gap or notch between labels 3 25 100 D label length 3 250 E media thickness 0100 0025 F notch opening width 500 200 G distance from the media s edge to the media sensor aperture left justified 2 250 200 H reflective black mark width 2 4 65 500 I distance between reflective marks 3 500 J reflective mark le...

Page 108: ...100 M Class ...

Page 109: ...2C L 76 4C l 108 6C Ctrl M CR 13 0D 45 2D M 77 4D m 109 6D Ctrl N SO 14 0E 46 2E N 78 4E n 110 6E Ctrl O SI 15 0F 47 2F O 79 4F o 111 6F Ctrl P DLE 16 10 0 48 30 P 80 50 p 112 70 Ctrl Q DC1 17 11 1 49 31 Q 81 51 q 113 71 Ctrl R DC2 18 12 2 50 32 R 82 52 r 114 72 Ctrl S DC3 19 13 3 51 33 S 83 53 s 115 73 Ctrl T DC4 20 14 4 52 34 T 84 54 t 116 74 Ctrl U NAK 21 15 5 53 35 U 85 55 u 117 75 Ctrl V SYN ...

Page 110: ...143 8F 175 AF 207 CF 239 EF É 144 90 176 B0 Ò 208 D0 240 F0 Æ 145 91 177 B1 D 209 D1 241 F1 Æ 146 92 2 178 B2 Ê 210 D2 242 F2 ô 147 93 3 179 B3 Ë 211 D3 3 4 243 F3 ö 148 94 180 B4 È 212 D4 244 F4 ò 149 95 Á 181 B5 213 D5 245 F5 û 150 96 Â 182 B6 Í 214 D6 246 F6 ù 151 97 À 183 B7 Î 215 D7 247 F7 ÿ 152 98 184 B8 Ï 216 D8 248 F8 Ö 153 99 1 185 B9 217 D9 249 F9 Ü 154 9A 186 BA 218 DA 250 FA Ø 155 9B 1...

Page 111: ... proportional font each character will take up a different amount of space when printed Font Valid ASCII Characters decimal Use with Record Structure Type 0 32 127 255 1 32 168 171 172 225 255 2 32 168 171 172 225 255 3 32 35 38 40 58 65 90 128 142 144 146 153 154 156 157 165 168 225 255 4 32 35 38 40 58 65 90 128 142 144 146 153 154 156 157 165 168 225 255 5 32 35 38 40 58 65 90 128 142 144 146 1...

Page 112: ... 2 Font 2 18 10 2 Font 3 27 14 2 Font 4 36 18 3 Font 5 52 18 3 Font 6 64 32 4 Font 7 32 15 5 Font 8 28 15 5 Font 0 96 character alphanumeric upper and lower case Font 1 145 character upper and lower case alphanumeric w descenders and ascenders Font 2 138 character alphanumeric upper and lower case Font 3 62 character alphanumeric uppercase ...

Page 113: ...M Class 105 Font 4 62 character alphanumeric uppercase Font 5 62 character alphanumeric uppercase Font 6 62 character alphanumeric uppercase ...

Page 114: ...e font Point sizes are selected by the number in the barcode height Larger point sizes can be obtained by increasing the height and width multipliers 48pt and 72pt fonts are generated by doubling the 24pt and 36pt fonts respectively see the Programmer s Manual for more information ...

Page 115: ...checksum L l ITF SCC 14 I 2 of 5 Shipping Container Code 13 M 10 48 57 Numeric only M m 2 digit UPC addendum 2 Yes 48 57 Numeric only N n 5 digit UPC addendum 5 Yes 48 57 Numeric only O o Code 93 Varies No 35 38 42 58 65 90 97 122 p Postnet Varies Yes 48 57 Numeric only Q q SSCC 18 Serial Shipping Container Code 19 Yes 48 57 Numeric only R r UCC EAN Code 128 K Mart NON EDI bar code 18 Yes 48 57 Nu...

Page 116: ...mbology RSS RSS 14 Truncated Stacked Stacked Omni directional and Limited 13 Yes 0 through 9 W1k RSS Expanded Varies Yes Subset of ISO646 including Alphanumeric W1T TCIF Linked Barcode 3 of 9 TLC39 Varies No Alphanumeric W1z MicroPDF417 Varies Yes All 8 bit values W1Z MicroPDF417 with Byte Count Specified Yes All 8 bit values Not available on non display printers ...

Page 117: ...rcode A Code 39 Barcode B UPC A regular Barcode C UPC E zero suppression Barcode D Interleaved 2 of 5 Barcode E Code 128 Barcode F EAN 13 Barcode G EAN 8 Barcode H Health Industry Bar Code Code 39 Mod and 43 checksum ...

Page 118: ...dabar Barcode J Interleaved 2 of 5 w module 10 checksum Barcode K Plessey Barcode L ITF SCC 14 I 2 of 5 Shipping Container Code Barcode M 2 Digit UPC addendum Barcode N 5 Digit UPC addendum Barcode O Code 93 Barcode p Postnet ...

Page 119: ...M Class 111 Barcode Q SSCC 18 Serial Shipping Container Code Barcode R UCC EAN Code 128 KMART NON EDI Barcode S UCC EAN 128 Random Weight Barcode T Telepen Barcode u UPS MaxiCode ...

Page 120: ...Barcode v FIM Barcode z PDF417 Bar Code W1c DataMatrix Bar Code W1d QR Code Bar Code W1f Aztec Bar Code W1g USD 8 Code 11 Bar Code WI EAN128 Code 128 with Auto Subset Switching between B C Bar Code WJ Code 128 Auto ...

Page 121: ...M Class 113 Bar Code W1k RSS Reduced Space Symbology Bar Code W1z MicroPDF417 Bar Code W1T TCIF Linked Barcode 3 of 9 TLC39 ...

Page 122: ...114 M Class ...

Page 123: ... TX M Class Ethernet Print Server 10 Meg Ethernet Connection Indicator 100 Meg Ethernet Connection Indicator Data Transmit Indicator Data Received Indicator 10M 100M Ethernet Connector RJ 45 Connector Setup and Configuration The Internal Ethernet Print Server can be configured in one of two ways Using IP Discovery DHCP or Using a static IP set using the printer s front panel Note The factory defau...

Page 124: ...PRINT CONFIGURATION and press the button again to print COMMUNICATIONS SERIAL PORT A BAUD RATE 9600 PROTOCOL BOTH PARITY NONE DATA BITS 8 STOP BITS 1 SERIAL PORT B NOT INSTALLED PARALLEL PORT A PORT DIRECTION UNI DIRECTIONAL USB PORT INSTALLED NIC ADAPTER MAC 00 0d 70 00 00 09 IP ADDRESS 168 24 12 192 SUBNET MASK 255 255 255 255 GATEWAY 168 24 254 254 SNMPTRAP DESTINATION 000 000 000 000 IP DISCOV...

Page 125: ...F NFEJB TFUUJOHT 3 Using the FWD button scroll to COMMUNICATIONS and press the button NFOV NPEF DPNNVOJDBUJPOT 4 Using the FWD button scroll to NIC ADAPTER and press the button DPNNVOJDBUJPOT OJD BEBQUFS 5 Using the FWD button scroll to IP DISCOVERY and press the button OJD BEBQUFS JQ EJTDPWFSZ 6 Using the FWD button scroll to DISABLED and press the button JQ EJTDPWFSZ EJTBCMFE 7 Press the button ...

Page 126: ... Note When the menu item IP DISCOVERY is set to enabled you will not be able to change the values for the IP ADDRESS SUBNET MASK or GATEWAY menu items The values displayed are for reference only and will become active once IP DISCOVERY set to disabled 9 Once you have the proper addresses set press the button repeatily until you have exited the printer s menu Turn OFF the printer and then back ON X...

Page 127: ...an access the printer via HTML pages using any Web browser 1 In your Web browser choose File Open 2 Enter the IP address of the Print Server and press Enter The default IP Address is 192 0 0 192 Note Consult with your system administrator for all necessary address printer and protocol information To change these settings you will be asked for an authentication password Type sysadm and click Apply ...

Page 128: ...120 M Class Network Status ...

Page 129: ...M Class 121 TCP IP Configuration ...

Page 130: ...r s internal menu settings can be controlled from the following next six screens This allows the user to adjust many of the printer s settings remotely without using the printer s front panel For more information on the function of these settings see the M Class Operator s Manual ...

Page 131: ...M Class 123 System Settings Media Settings and Print Control continued Printer Options Communications and Diagnostics ...

Page 132: ...124 M Class Printer Options Communications and Diagnostics continued ...

Page 133: ...M Class 125 Network Print Options Reset Network Parameters ...

Page 134: ...126 M Class Change Password ...

Page 135: ...t automatically if it does not Click Start and then select Run from the window s menu Then type d datamax exe where d is the location of the CD ROM 1 At the main screen click on your printer model 2 Now click Install Windows Driver 3 The following screen should appear click Next 4 Make sure that Local Printer is selected and then click Next 5 Click on Have Disk 6 Click Browse ...

Page 136: ...es from the CD ROM 11 When prompted to choose a port select FILE for now and click Next You will set up the network port from the printer properties later 12 Name your printer in the Printer name field Next select whether or not to set this printer as your default printer Then Click Finish 13 From the Windows desktop click Start Settings Printers 14 Once the Printers window opens right click on th...

Page 137: ...c Port and then click OK 17 In the Name or IP Address field enter the IP address of your printer The Port Number and Port Name fields do not need to be changed When finished click OK 18 Click Apply and then click OK The driver and port installation is now complete The printer can be selected through any window s application ...

Page 138: ... ROM should start automatically if it does not Click Start and then select Run from the window s menu Then type d datamax exe where d is the location of the CD ROM 1 At the main screen click on your printer model 2 Now click Install Windows Driver 3 Make sure that My Computer is selected and then click Next 4 Click Add Port ...

Page 139: ...ass 131 5 Double click LPR Port 6 In the top field enter the IP address of your printer In the bottom field enter PORT1 When finished click OK 7 Click Close 8 Click Next 9 Click on Have Disk 10 Click Browse ...

Page 140: ...e your printer in the Printer name field Next select whether or not to set this printer as your default printer Then Click Next 15 Select whether or not to share this printer on your network Then Click Next 16 Select No then Click Finish 17 Your computer will now copy the necessary files from the CD ROM The driver and port installation is now complete The printer can be selected through any window...

Page 141: ...automatically if it does not Click Start and then select Run from the window s menu Then type d datamax exe where d is the location of the CD ROM 1 At the main screen click on your printer model 2 Now click Install Windows Driver 3 The following screen should appear click Next 4 Make sure that Local Printer is selected and then click Next ...

Page 142: ...enu Click Next 6 Click Next 7 In the Printer Name or IP Address field enter the IP address of your printer The Port Name field does not need to be changed When finished click Next 8 Make sure Standard is selected and then click Next 9 Confirm your settings and then click Finish 10 Click on Have Disk ...

Page 143: ...nd xp inf is selected and click OK 13 Click OK 14 Select the M 4208 printer from the list and then click Next 15 Name your printer in the Printer name field Next select whether or not to set this printer as your default printer Then Click Next 16 Select whether or not to share this printer on your network Then Click Next ...

Page 144: ...ck Finish 19 If prompted with the Digital Signature Not Found window click Yes to continue installation 20 Your computer will now copy the necessary files from the CD ROM The driver and port installation is now complete The printer can be selected through any window s application ...

Page 145: ...utomatically if it does not Click Start and then select Run from the window s menu Then type d datamax exe where d is the location of the CD ROM 1 At the main screen click on your printer model 2 Now click Install Windows Driver 3 The following screen should appear click Next 4 Make sure that Local Printer is selected and then click Next ...

Page 146: ...enu Click Next 6 Click Next 7 In the Printer Name or IP Address field enter the IP address of your printer The Port Name field does not need to be changed When finished click Next 8 Make sure Standard is selected and then click Next 9 Confirm your settings and then click Finish 10 Click on Have Disk ...

Page 147: ...nd xp inf is selected and click OK 13 Click OK 14 Select the M 4208 printer from the list and then click Next 15 Name your printer in the Printer name field Next select whether or not to set this printer as your default printer Then Click Next 16 Select whether or not to share this printer on your network Then Click Next ...

Page 148: ...ck Finish 19 If prompted with the Digital Signature Not Found window click Yes to continue installation 20 Your computer will now copy the necessary files from the CD ROM The driver and port installation is now complete The printer can be selected through any window s application ...

Page 149: ...fferent display languages including EFIGS The EFIGS languages and any additional languages are stored on Module Y a 64KB Flash Module located on the Main PCB It is okay to download menu files generated for a lesser firmware revision to new firmware any messages that are not defined are displayed in English For the procedures below the printer will accept the menu downloads from any available port ...

Page 150: ...142 M Class Creating a Menu Language Invoke Excel and open the gemmsglst xls file Excel opens the file and the following screen appears Click the Enable Macro box and the following appears ...

Page 151: ... cutting and pasting fields could defeat this warning system B Two Line Messages Some of the message are displayed as two lines These are indicated in the comment fields C Comments This field can be modified with no effect When editing has been completed highlight all of the columns you desire to create more than one language may be selected by pressing the letter above the column Press the Genera...

Page 152: ...nu system displays the new language selection but all displayed messages remain in English an error has occurred Re check the process Contact Datamax Technical Support if problems continue be prepared to provide the Gemmsglst xls and the DPL download file that you have created Other possible error messages are as follows Menu Language Error Message Description Please select the entire column s or ...

Page 153: ...ory generated EFIGS image download the file 832296 08A to the printer This file is located on the Datamax FTP site The letter at the end of the file name e g A specifies the revision The latest revision will be available on the FTP site Downloading the same language twice will automatically delete the first occurrence but will not free the memory space Use the Pack Module feature see Section 5 1 4...

Page 154: ...146 M Class ...

Page 155: ...meters previously accessible only from the front panel consult the Class Series Programmers Manual for details Regular host settings can not be saved using the front panel menu Note Configuration files will typically correspond to a particular printer and media application If a file will be shared among printers do NOT include unique parameters such as calibrations and adjustments because those se...

Page 156: ...SFTUPSF BT DVSSFOU Press the FWD Key to scroll to Save Setting As The REV Key can also be used 6 DPOGJHVSBUJPO GJMF TBWF TFUUJOH BT Press the Key Press the Key to exit this selection Enter a file name using the REV Key to scroll through the characters The FWD Key can also be used 7 TBWF TFUUJOH BT Note To change an accepted character select the delete function solid flashing block and press the EN...

Page 157: ...ctive When a label is ready to print and the printer is waiting for the Start of Print signal the printer will display WAITING FOR SIGNAL GPIO Port Configuration The connection to the GPIO signals is accessed via the option port connector on the front of the printer or the J6 connector on the Main PCB Requires firmware version 5 07 or greater The option port connector is an 8 pin Molex Microfit 3 ...

Page 158: ...R Option to YES 2 Note If a label is ready to print the printer will blink the STOP LED signifying WAITING FOR SIGNAL until it receives the applicator s Start of Print signal 5 End of Print EOP Low Level Output Goes low when printed label reaches the presented position Minimum signal time 20msecs To activate set GPIO Option to YES 2 6 Signal Ground Ground N A N A 7 24V 1 6 Amp Fused MPCB Output N ...

Page 159: ...ne shown here for additional interfacing data see the table below 1 4 SOP 8 Gnd 1K Vcc GPIO Port Specifications Vin max 5 5 VDC maximum input into any pin VIH 3 8 VDC minimum high level input voltage VIL 1 65 VDC maximum low level input voltage IOH 8 mA typical 25 mA maximum high level output current IOL 8 mA typical 25 mA maximum low level output current VOH IOH 8 mA minimum 3 8 VDC VOL IOL 8 mA ...

Page 160: ...152 M Class ...

Page 161: ...those for which they were manufactured This warranty also does not cover loss damages resulting from accident or damages resulting from unauthorized service Thermal Printhead This warranty is limited to a period of one year 365 days or 1 000 000 linear inches of use whichever comes first for the M Class thermal printhead This one year 365 days warranty is valid only if a Datamax approved thermal l...

Page 162: ...n capability capacity or suitability of any of its hardware supplies or software Software is licensed on an as is basis without warranty Except and to the extent expressly provided in this warranty and in lieu of all other warranties there are no warranties expressed or implied including but not limited to any warranties of merchantability or fitness for a particular purpose Purchaser shall be sol...

Page 163: ...symbols contained in a given font checksum An alphanumeric error detection method used in many bar code symbologies for informational security continuous media An uninterrupted roll or box of label or tag media that contains no gap notch or mark to separate individual labels or tags core diameter The inside diameter measurement of the cardboard core at the center of a ribbon or media roll cutter A...

Page 164: ...c characters that share a particular typeface gap A space between die cut or notched labels used to sense the top of form IPS inches per second Imperial measurement of printer speeds label A paper or synthetic printing material typically with a pressure sensitive adhesive backing label length The distance from the top of the label to the bottom of the label as it exits the printer label repeat The...

Page 165: ...g tear off peel and present and cutting operations for positioning the label at the start of print position ribbon An extruded polyester tape with several layers of material one of which is ink like used to produce an image on the label Also referred to as foil ribbon wrinkle An undesirable overlapping of the ribbon during the printing process that leads to voids on the printed label typically cau...

Page 166: ...158 M Class ...

Reviews: