DI-194RS User’s Manual
Calibrating the Instrument
6
8.
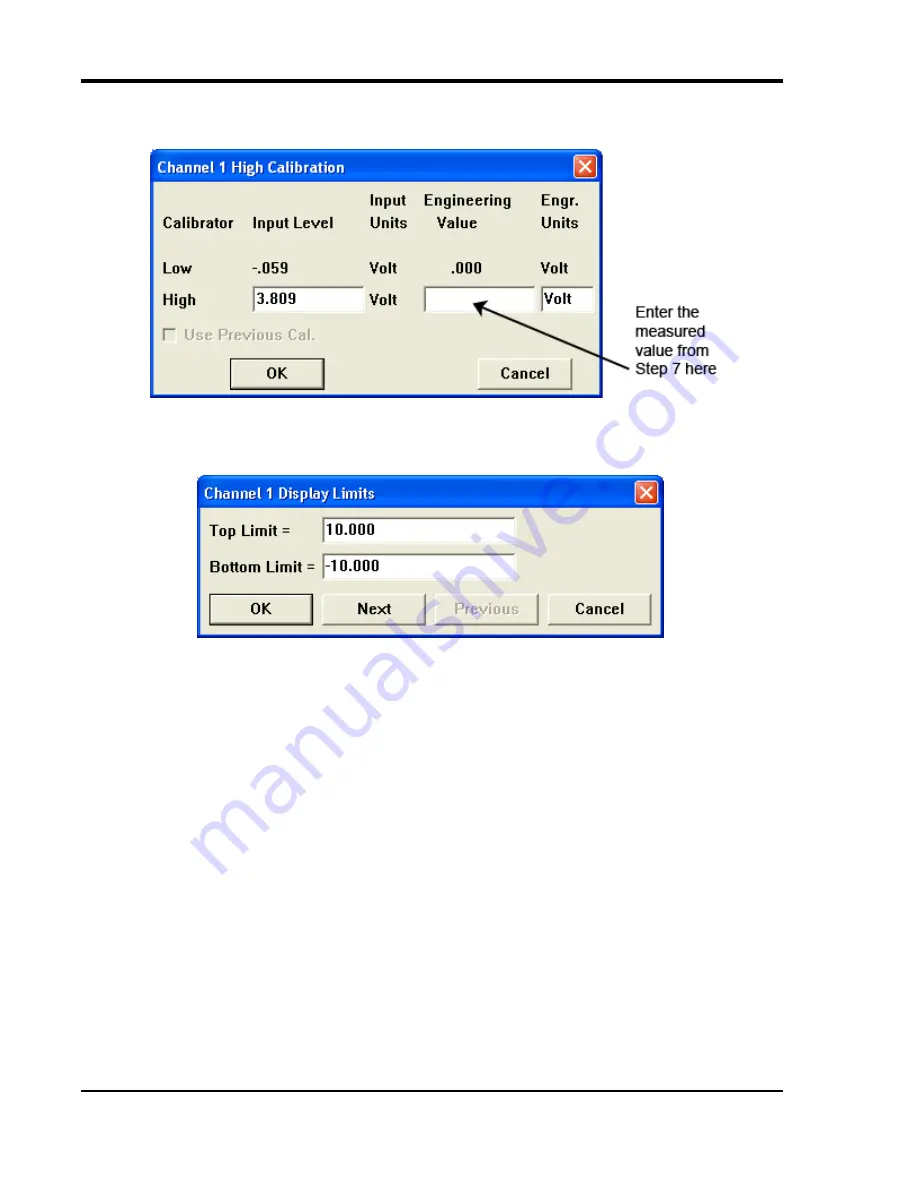
With channel 1 selected (step 2), click on High Calibration… in the Edit menu. This displays the High Calibra-
tion dialog box. The values entered for the Low Calibration will appear here.
9.
Enter the value measured in step 7 in the High Cal Value text box and click OK.
10. Click on Limits… in the Scaling menu. This displays the Channel 1 Display Limits dialog box:
11. Enter 10 in the Top Limit text box and -10 in the Bottom Limit text box and click OK.
12. Repeat steps 6 through 11 for channels 2, 3, and 4.
13. From the File menu, select Save Default Setup. This saves the calibration constants you just entered and makes
them available for all subsequent recording sessions.
Note:
If connecting a sensor with a known relationship between volts and engineering units select the Use Previous
Cal. checkbox before entering sensor Input Levels and Calibration Values. Select Edit > Preferences > Allow Rela-
tive Calibration in the WinDaq program menu to enable the Use Previous Cal. checkbox.


