50
Getting Started with DT800
dataTaker
UM-0071-A0
8-2
D
ISPLAY
R
ETURNED
D
ATA
IN
A
M
ETER
➲
Create a meter panel and assign the
potentiometer channel to it.
To do this…
a) Locate the minimized meter window
Mimic1.dlm
and click its Restore button.
b) Make sure that the mimic window is in Edit Mode.
c) In the Mimic menu (seventh from the left), choose
Needle Meters…
.
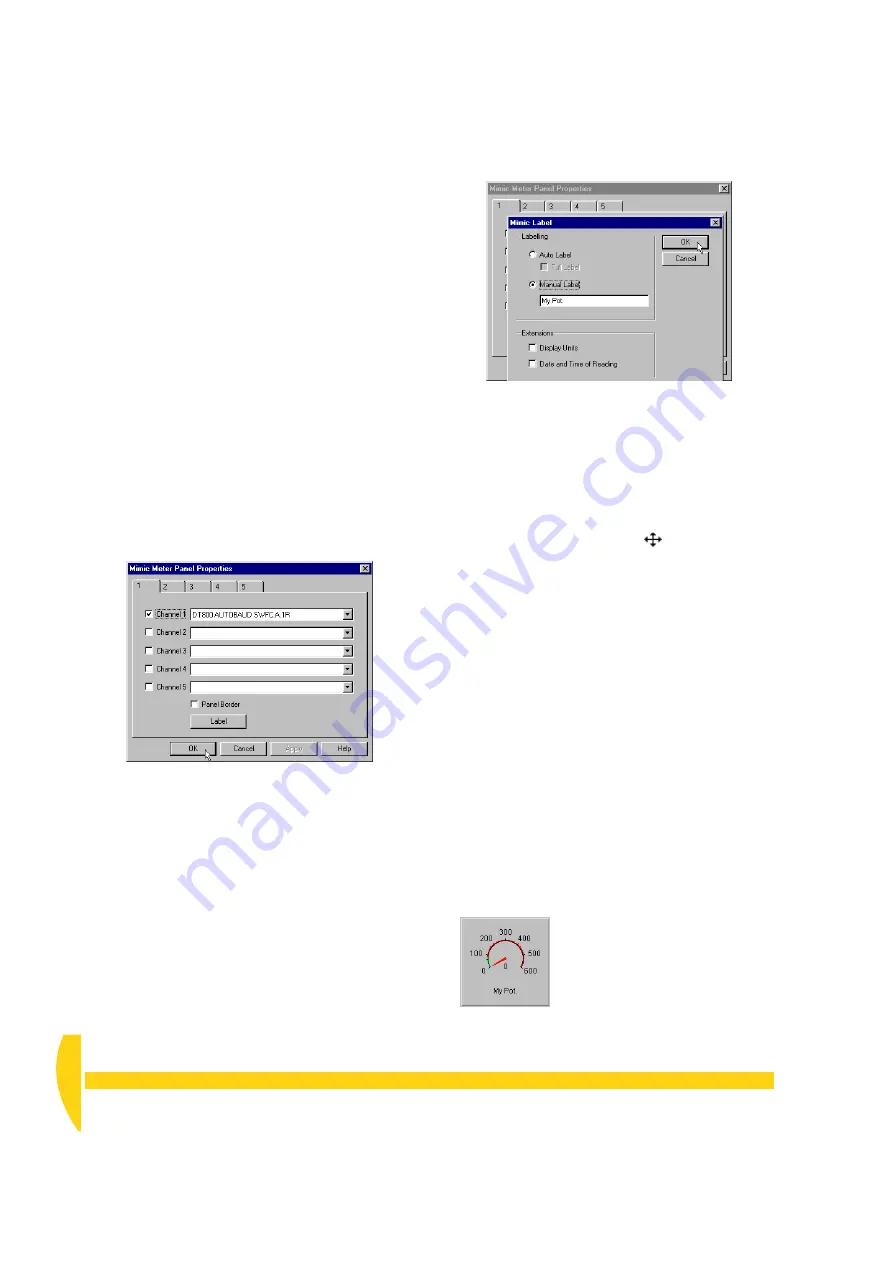
The Mimic Meter Panel Properties dialog box
opens.
d) On tab 1:
i. Open the first drop-down list box and choose
the potentiometer channel.
ii. Tick
Panel Border
iii. Click the
Label
iv. In the Mimic Label dialog box that opens
Manual Label
and type
My
Pot.
(or any text you want to appear beneath
the meter), then click
OK
.
v. Click
OK
again to close the Mimic Meter Panel
Properties dialog box.
The new meter panel appears in the top left-hand
corner of the mimic window.
e)
Single
-click anywhere within the meter panel.
A striped border appears around the panel to show
that it’s selected.
f) Drag the anchor point in lower right-hand corner
down and to the right to enlarge the panel to
approximately double its original size.
The mouse pointer changes to a double-ended
diagonal arrow when you’re over the anchor point.
g) Hold the mouse pointer anywhere within the panel.
When the pointer changes to
, drag the panel
into the centre of the mimic window.
h) Click outside the panel to de-select it.
➲
Change the range of the meter to suit your
potentiometer.
To do this…
a)
Double
-click the meter (in the centre of the meter, not
the surrounding panel).
b) In the Meter Parameters dialog box that opens:
i. Type
600
in the
To
field of the
Range
area.
This suits your potentiometer, which has a
maximum resistance of approximately 550
ohms.
ii. Type
100
in the
Step
field of the
Ticks
area.
The tick marks will appear 100 ohms apart
around the meter.
iii. Click
OK
.
Your meter should now look like Figure 52.
F
IGURE
50
Assigning a channel to a meter’s
needle
F
IGURE
51
Creating a meter label
F
IGURE
52
The meter before changing its alarm
bands
Summary of Contents for DT800
Page 1: ...UM 0071 A0 ...
Page 2: ...UM 0071 A0 ...
Page 73: ...UM 0071 A0 ...
Page 74: ...UM 0071 A0 ...


