1
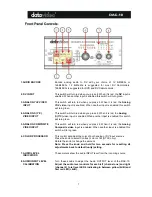
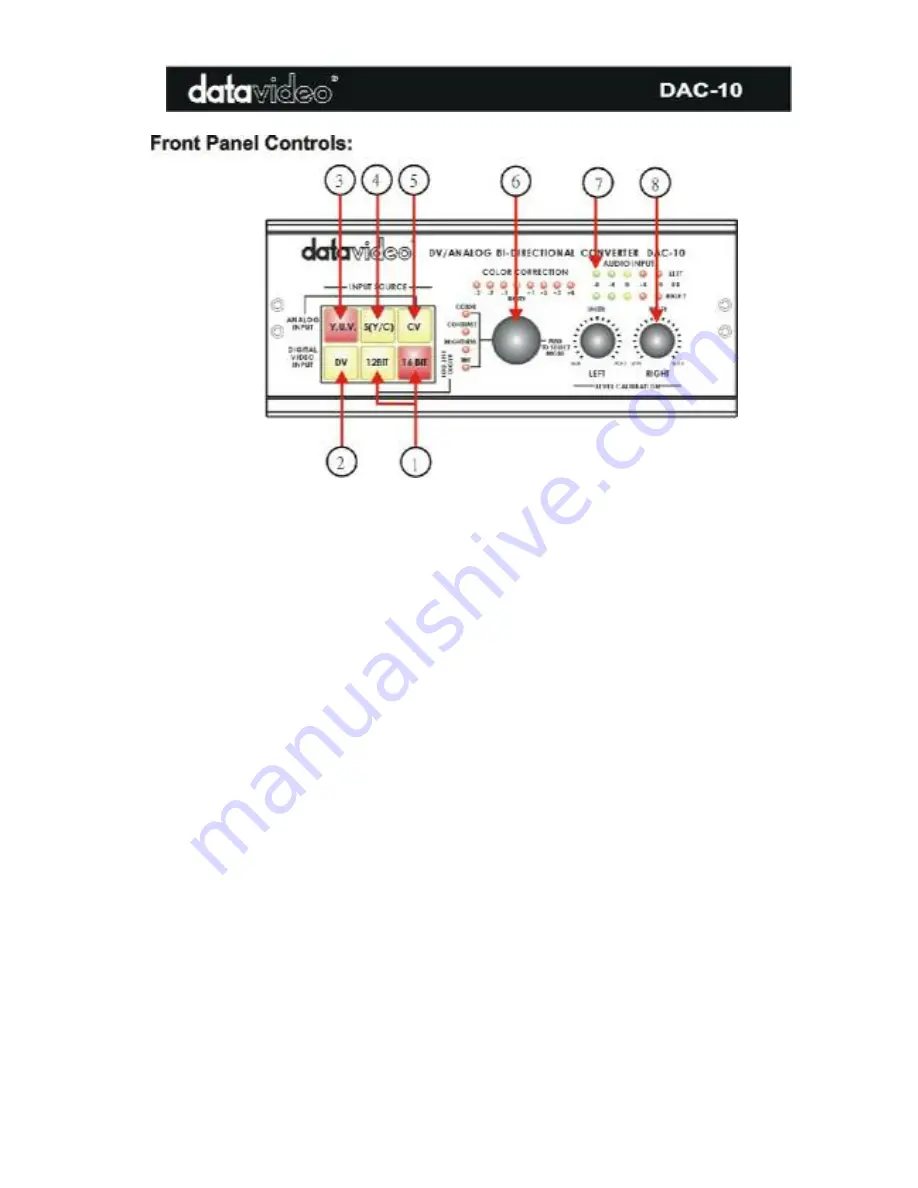
1.AUDIO ENCODE
Encode analog audio to DV with your choice of 12 bit/32Khz or
16bit/48Khz. 12 Bit/32khz is suggested for most DV Camcorders.
16bit/48Khz is suggested for DVD and DV Capture cards.
2. DV INPUT
This switch will turn red when you press it. When it is red, the
DV
input is
enabled. When another input is enabled this switch will turn green.
3. ANALOG YUV VIDEO
INPUT
This switch will turn red when you press it. When it is red, the
Analog
YUV video
input is enabled. When another input is enabled this switch
will turn green.
4. ANALOG S (Y/C)
VIDEO INPUT
This switch will turn red when you press it. When it is red, the
Analog
S (Y/C)
video input is enabled When another input is enabled this switch
will turn green.
5. ANALOG COMPOSITE
VIDEO INPUT
This switch will turn red when you press it. When it is red, the
Analog
Composite video
input is enabled When another input is enabled this
switch will turn green.
6. COLOR PROCESSOR
This control will adjust the color of both analog or DV input sources.
Press the knob to select Contrast, color or tint (NTSC only).
Rotate the knob to change the amount.
Note: Press the knob and hold for two seconds for resetting all
adjustments back to default (unity) setting
7. AUDIO LEVEL
INDICATORS
These meters show the audio INPUT level from the incoming source
8. AUDIO INPUT LEVEL
CALIBRATION
Turn these knobs to adjust the Audio OUTPUT level of the DAC-10.
Adjust the audio level controls for each left (channel one) and right
(channel 2) to let level LED’s indicating in between yellow (0dB) and
first red LED (+4dB).

