PROMPTER KIT FOR DSLR CAMERAS TP-500
7
6.
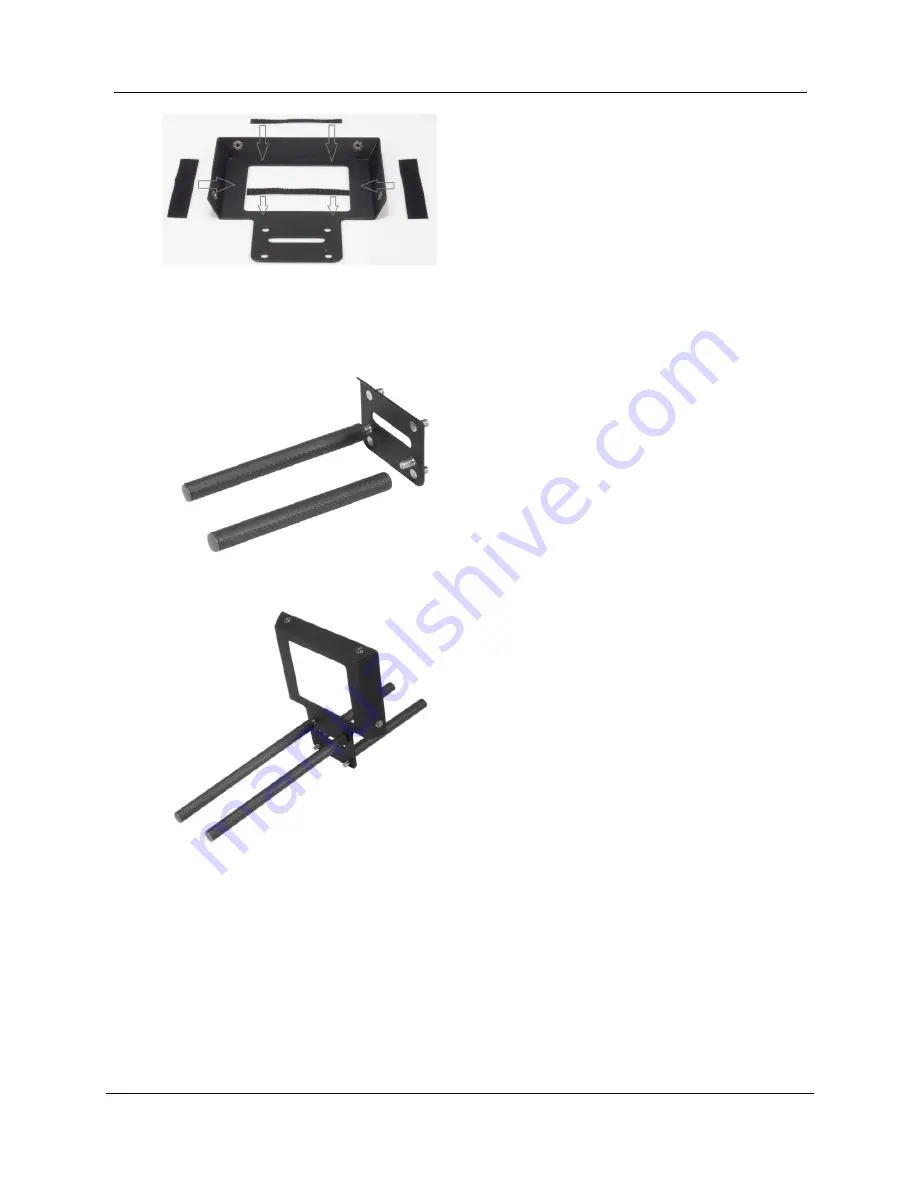
There are four adhesive Velcro straps
packed inside the kit. Peel off the white
paper backing before applying these straps
to the Hood Frame,
item C
.
Apply the two long Velcro strips to the
Inside edges on the Left side and Right
side of the hole for the lens. Then apply the
two smaller Velcro strips to the top and
bottom sides of the lens hole.
7.
Screw
rod items E
to
plate item D
. Rod
Items E screw to the front side of the plate
D, this side only has two screw threads.
The bent edge of plate item D is the top
edge.
The rear side of plate item D has four screw
threads.
8.
Marry
item C
, the Hood frame, to plate
item D
using the four holes in item C and
the four screw threads on item D.
9.
Secure item C to D
by screwing
rod items
B
on to the upper two screw threads for a
normal DSLR configuration.
NB:
If the DSLR camera is fitted with a
battery pack under it, then rod items B are
screwed to the lower two threads instead.


