64
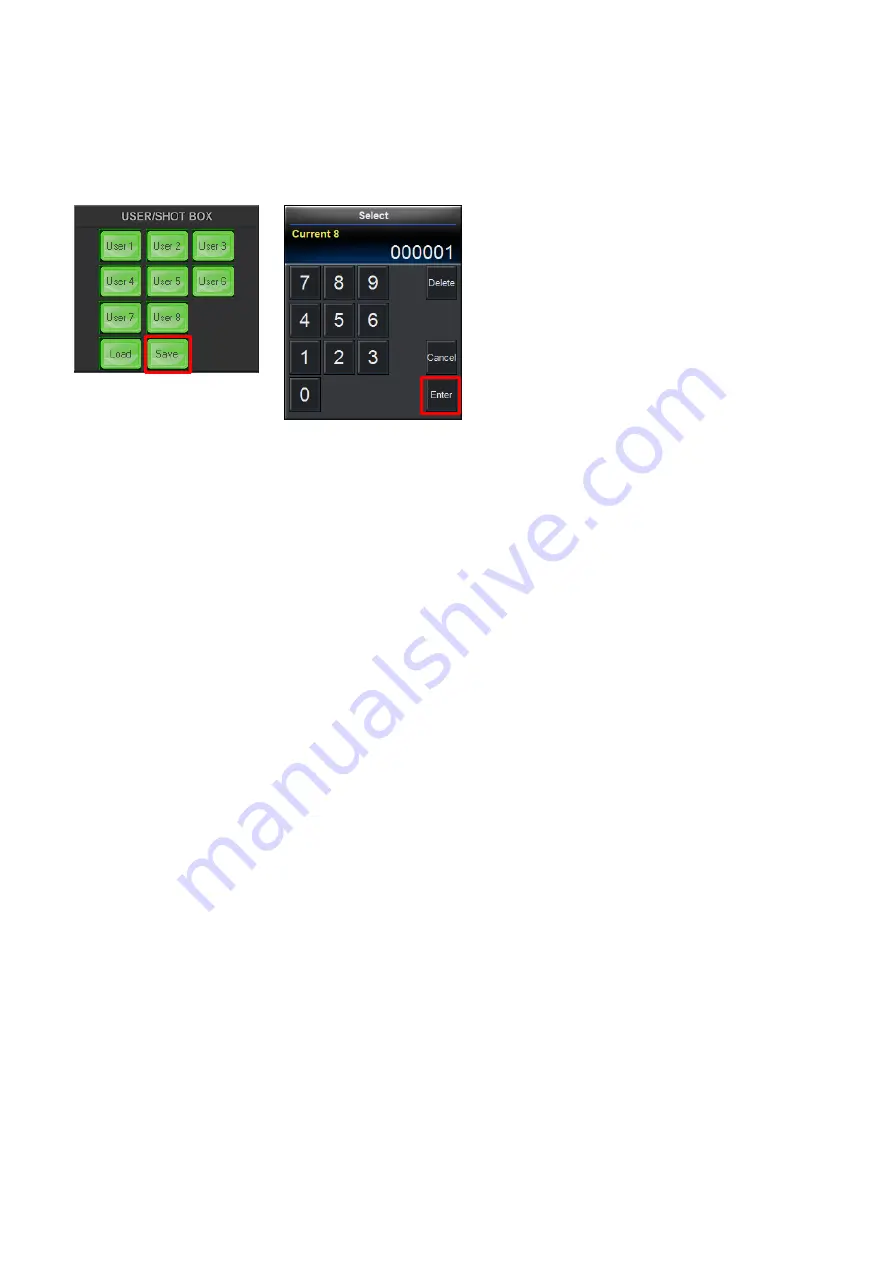
Step 10. Please tap the “Save” button from the USER/SHOTBOX keyboard and then there is a pop-up
numeric keypad that will be shown for users to enter their desired User default number. After that,
please press the “Enter” button and then the current setting can be saved successfully. If users want
to apply the “User 5” settings, please press the “User 5” button directly for applying the User 5
settings. (Teacher’s Half-Body Shot + Powerpoint Slide + Virtual Background).
Summary of Contents for VGB-2000
Page 1: ...VGB 2000 Instruction Manual...
Page 7: ...7 1 2 System Diagram 2 Channel Pro Presentation System VGB 2000...
Page 26: ...26 LBK 1 Look Back Kit Exploded View...
Page 27: ...27 LBK1 1 1 Main Support Exploded View...
Page 28: ...28 LBK1 1 2 22 Monitor and LCD Display Mount...
Page 29: ...29 LBK1 1 3 22 Glass Frame Module and Hood Support Wire...
Page 30: ...30 LBK1 2 Exploded View of Main Support Glass Frame LCD Display and Tripod...
Page 31: ...31 LBK1 3 Look Back Kit Assembly...
Page 71: ...71 Close Up with Chromakey Slides Close Up Interactive Pen Mark...
Page 72: ...72 Wide Shot Interactive Pen Mark Logo Interactive Pen Mark Logo...
Page 73: ...73 Dual Camera Effects Interactive Pen Mark Close Up Interactive Pen Mark...
Page 74: ...74 Wide Angle with Chromakey Interactive Pen Mark Wide Shot Interactive Pen Mark Logo...
Page 75: ...75 Interactive Pen Mark Logo Close Up with Chromakey...
Page 76: ...76 Wide Angle with Chromakey...
Page 79: ...79 14 Dimensions...
Page 80: ...80 Unit mm...
Page 83: ...83 Note...


