39
6. Quick Calibration Steps for the IEPEN
Before using the VGB-2000 system, please calibrate your VGB-2000 2-Channel Pro Presentation
System by following steps in advance.
1. Please plug a power cable from the AC power socket on the rear panel of the VGB-2000 to a power
outlet on the wall.
2. Please press the power switch of the PD-2A which is located at the bottom left side of the VGB-
2000 rear panel.
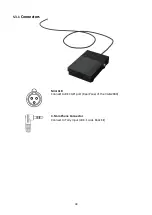
3. Please plug the FS-220 Foot Switch to the GPI external recording control port which is located on
the rear panel of the VGB-2000.
4. Please turn on the power of your laptop and then connect an HDMI cable from the HDMI port of
your laptop to the HDMI port of the VP-840.
5. The range of the screen which is shot by the camera must be corresponding to the projection size of
the green mat.
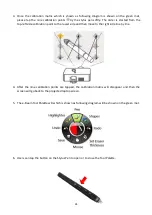
6. The eBeam receiver can be fixed on the top side of the green mat and then it can be connected to
the laptop which is shown as following diagram.
Summary of Contents for VGB-2000
Page 1: ...VGB 2000 Instruction Manual...
Page 7: ...7 1 2 System Diagram 2 Channel Pro Presentation System VGB 2000...
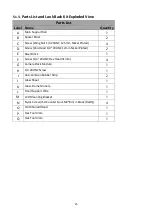
Page 26: ...26 LBK 1 Look Back Kit Exploded View...
Page 27: ...27 LBK1 1 1 Main Support Exploded View...
Page 28: ...28 LBK1 1 2 22 Monitor and LCD Display Mount...
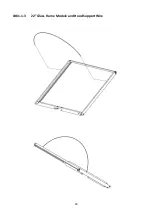
Page 29: ...29 LBK1 1 3 22 Glass Frame Module and Hood Support Wire...
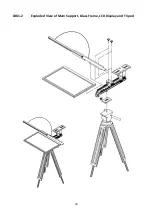
Page 30: ...30 LBK1 2 Exploded View of Main Support Glass Frame LCD Display and Tripod...
Page 31: ...31 LBK1 3 Look Back Kit Assembly...
Page 71: ...71 Close Up with Chromakey Slides Close Up Interactive Pen Mark...
Page 72: ...72 Wide Shot Interactive Pen Mark Logo Interactive Pen Mark Logo...
Page 73: ...73 Dual Camera Effects Interactive Pen Mark Close Up Interactive Pen Mark...
Page 74: ...74 Wide Angle with Chromakey Interactive Pen Mark Wide Shot Interactive Pen Mark Logo...
Page 75: ...75 Interactive Pen Mark Logo Close Up with Chromakey...
Page 76: ...76 Wide Angle with Chromakey...
Page 79: ...79 14 Dimensions...
Page 80: ...80 Unit mm...
Page 83: ...83 Note...

