16
Step 3.
Press the “
▲
” button twice so that the
mem
submenu is selected (
figure 3.6
).
Step 4.
Push the “
” button and the memory submenu is shown (
figure 3.8
).
Figure 3.8. Display from the mem submenu.
Step 5.
Select the
sto
(store) function by pressing the “
T
” button once (
figure 3.9
).
Figure 3.9. Selecting the store function in the mem submenu.
Step 6.
Press the “
” button to enter the store preset
menu (
figure 3.10
).
Figure 3.10. The store preset display.
Step 7.
Proceed with selecting the preset number (in
figure 3.9
indicated with the
underlined
1
) by using the “
T
” or “
▲
” buttons. Up to six preset frequencies can
be stored.
Step 8.
Use the “
” button to confirm your selection of the preset number. The old
preset value will be overwritten and the display from
figure 3.11
will be shown
for two seconds before returning to the main menu of
figure 3.2
.
Figure 3.11. Message after confirming a preset store command.
Step 9.
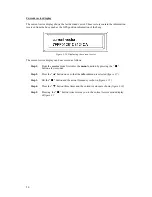
Go back to the normal display of
figure 3.1
by pressing the “
” button in order
to save the stored preset(s) into non volatile memory.


