Technical Manual
72
2.
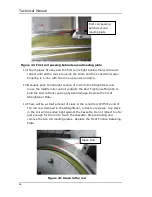
Using the main system controls, or the manual inverter, push the
rod out, observing the travel of the end of the rod to ensure it does
not come in contact with anything. At the same time slowly tighten
the roller a further ¼ turn during the first 0.5m of push.
3.
When the cone-rod is out by 1-1.5m, stop the push.
4.
Observe the angle that the cone-rod has left the base. If the rod is
still curving under the thruster, then there is not enough
straightening action taking place. If it is now curving away from the
under the thruster, there is too much straightening action.
5.
If the cone-rod is not being straightened enough, retract the rod
until the cone-rod coupling is back in the cone-up sensor, while
tightening the middle roller a further 1/8 of a turn.
Remember that
using the manual inverter requires close observation to stop
the cone in the correct position.
Perform another push without
adjusting the roller, and return to operation 4 (observing the angle).
6.
If the cone-rod is being bent away from under the thruster, retract
the rod until the cone is back in the cone-up sensor, while loosening
the middle roller by 1/8 of a turn.
Remember that using the
manual inverter requires close observation to stop the cone in
the correct position.
Perform another push without adjusting the
roller, and return to operation 4 (observing the angle)
7.
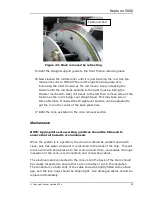
With the straightener finally set up satisfactorily, tighten the lock nut
on the adjuster bolt to lock it in position, ensuring that this action
does not further move the bolts.
8.
One final push should be performed to be sure that the bolt has not
been moved, and that the cone-rod is now straight.
Maintenance
The straightener should be inspected regularly to ensure that there is no
distortion in any of the parts, and that all the fastenings are present and tight.
It should also be washed down with clean water regularly to remove any
debris from the rollers and scraper block. It is good practice to spray the
rollers with a thin oil to maintain lubrication. It is preferable to get this oil
onto the shafts through the centre of the roller as opposed to on the
circumference, as this can result in the roller ceasing to rotate, and the rod
slipping in the grooved edge.
Summary of Contents for Neptune 5000
Page 1: ...Neptune 5000 Copyright Datem Limited 2014 1 Neptune 5000 Technical Manual ...
Page 14: ...Technical Manual 14 Figure 3 Topside Control Box Wiring Schematic ...
Page 15: ...Neptune 5000 Copyright Datem Limited 2014 15 Figure 4 Topside Control Box Wiring Layout ...
Page 30: ...Technical Manual 30 ...
Page 32: ...Technical Manual 32 Figure 14 Transformer Pod General Arrangement ...
Page 36: ...Technical Manual 36 Figure 15 Transformer Pod Schematic ...
Page 39: ...Neptune 5000 Copyright Datem Limited 2014 39 Figure 16 Electronics Pod General Arrangement ...
Page 44: ...Technical Manual 44 Figure 19 Neptune 5000 Electronics Pod Wiring Schematic ...
Page 51: ...Neptune 5000 Copyright Datem Limited 2014 51 Figure 23 Inverter Pod General Arrangement ...
Page 52: ...Technical Manual 52 Figure 24 Inverter Pod Assembly ...
Page 55: ...Neptune 5000 Copyright Datem Limited 2014 55 Figure 25 Inverter Pod Wiring Schematic ...
Page 57: ...Neptune 5000 Copyright Datem Limited 2014 57 Figure 26 Inverter Function Settings ...
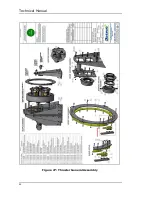
Page 62: ...Technical Manual 62 Figure 27 Thruster General Assembly ...
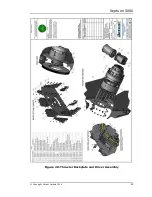
Page 63: ...Neptune 5000 Copyright Datem Limited 2014 63 Figure 28 Thruster Backplate and Driver Assembly ...
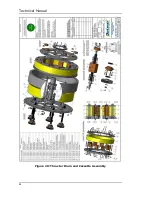
Page 64: ...Technical Manual 64 Figure 29 Thruster Drum and Cassette Assembly ...
Page 68: ...Technical Manual 68 ...
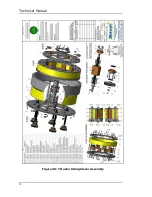
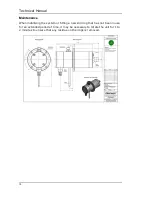
Page 70: ...Technical Manual 70 Figure 30 Thruster Straightener Assembly ...
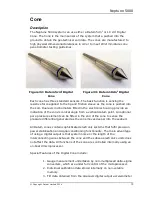
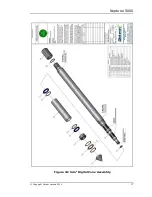
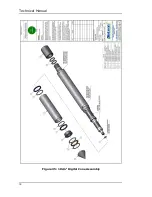
Page 77: ...Neptune 5000 Copyright Datem Limited 2014 77 Figure 34 5cm2 Digital Cone Assembly ...
Page 78: ...Technical Manual 78 Figure 35 10cm2 Digital Cone Assembly ...
Page 90: ...Technical Manual 90 ...
Page 91: ...Neptune 5000 Copyright Datem Limited 2014 91 Figure 45 Encoder Parts Drawing ...
Page 95: ...Neptune 5000 Copyright Datem Limited 2014 95 ...
Page 102: ...Technical Manual 102 ...
Page 104: ...Technical Manual 104 ...
Page 105: ...Neptune 5000 Copyright Datem Limited 2014 105 ...
Page 106: ...Technical Manual 106 ...
Page 107: ...Neptune 5000 Copyright Datem Limited 2014 107 ...
Page 108: ...Technical Manual 108 ...
Page 110: ...Technical Manual 110 ...
Page 111: ...Neptune 5000 Copyright Datem Limited 2014 111 ...
Page 112: ...Technical Manual 112 ...
Page 113: ...Neptune 5000 Copyright Datem Limited 2014 113 ...
Page 115: ...Neptune 5000 Copyright Datem Limited 2014 115 ...
Page 116: ...Technical Manual 116 ...
Page 117: ...Neptune 5000 Copyright Datem Limited 2014 117 ...

