background image

USER’S MANUAL

10

Chapter 3 SAFETY

lifts are not suitable for:
-Washing spray work;
-Creating raised platforms for personnel or lifting personnel;
-Use as a press for crushing purposes;
-Use as elevator;

-use as a lift jack for lifting vehicle bodies or changing wheels.
The manufacturer is not liable for any injury to persons or damage to vehicles and
other property caused by the incorrect and unauthorized use of the lifts.
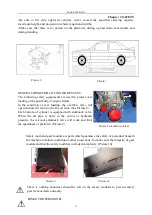
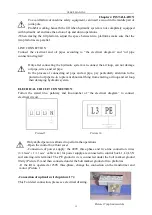
During lifting and descent, the operator must remain in the control station as the

diagrams illustrated.
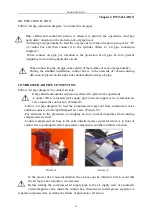
As the diagrams illustrated, the presence of persons inside the danger zone indicated is strictly
prohibited. During operations persons are admitted to the area beneath the vehicle only when
the vehicle is already in the elevated position, when the platforms are stationary, and when the
mechanical safety devices are firmly engaged (e.g.: the safety gear is completely locked).

DO NOT USE THE LIFT WITHOUT PROTECION DEVICES OR WITH THE
PROTECTION DEVICES INHIBITED.

FAILURE TO COMPLY WITH THIS REGULATION CAN CAUSE SERIOUS INJURY TO

PERSONS, AND IRREPEARABLE DAMAGE TO THE LIFT AND THE VEHICLE BEIN LIFED.

GENERAL PRECAUTIONS

The operator and the maintenance fitter are required to observe the prescriptions of
safety regulation in force in the country of installation of the lift.
Furthermore, the operator and maintenance fitter must:

-Always work in the stations specified and illustrated in this manual;
-Never remove or deactivate the guards and mechanical, electrical, or other types of safety
devices;
-Read the safety notices placed on the machine and the safety information in this manual.

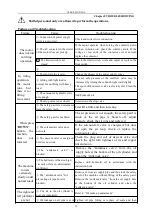
In the manual all safety notices are shown as follows:

WARNING:

indicates following operations that are unsafe and can cause minor

injury to persons and damage the lift, the vehicle or other property.

CAUTION:

indicates possible danger that can result in serious injury to people and

damage property.

RISK OF ELECTRIC SHOCK:

a specific safety notice placed on the lift in

areas where the risk of electric shock is particularly high.

RISK AND PROTECTION DEVICES
We shall now examine the risks that operators or maintenance fitters may be exposed to when
the vehicle is standing on the platforms in the raised position, together with the various safety
and protection devices adopted by the manufacturer to reduce all such hazards to the
minimum:

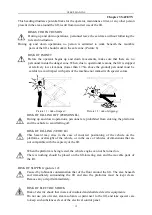
For optimal personal safety and safety of vehicles, observe the following regulations:

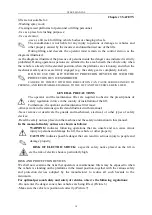
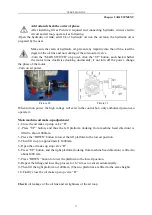
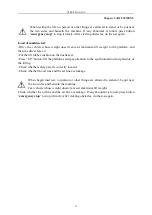
-Do not enter the danger zone when vehicles are being lifted. (Picture 6)
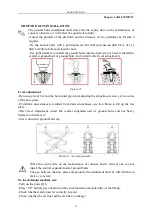
-Make sure the vehicle is positioned correctly. (Picture 7)

Summary of Contents for LJS7035

Page 1: ...USER S MANUAL 1 Small scissor Lift LJS7035 USER USER S S MANUAL MANUAL Operation Manual Instruction ...

Page 2: ...USER S MANUAL 2 Model Serial No Year of Manufacture Manufacturer Name Address Tel Fax http E mail AUTHORIZED SERVICE CENTRE Day Month Year ...

Page 3: ...tents Contents Manufacture and service Packing transport and storage Introduction Description of the machine Technical specifications Safety Installation Adjustment Operation Maintenance and care Troubleshooting Accessory ...

Page 4: ...d examine damaged cartons according to Packing List to verify the condition of damaged goods and missing parts also the person in charge or the carrier must be immediately informed The machine is heavy goods Don t take manpower load and unload and transporting way into consideration the safety of working is important Furthermore during loading and unloading operation goods must be handled as shown...

Page 5: ...erformed by specialized personnel from the licensed dealer authorized by the manufacturer The manufacturer declines all responsibility for injury to persons or damage to vehicles or objects when any of the above mentioned operations has been performed by unauthorized personnel or when the rack has been subject to improper use This manual indicates the operative and safety aspects that may prove us...

Page 6: ... equipment for hydraulic failure and over loading So when the oil pipe bursts the machine will not fall quickly Use high quality hydraulic or electric element parts made in Italy Germany Japan and so on Own manual lowering operation when the power is cut Equipment Machine basement The position and space of equipment installation Machine frame The main structure of lift and insurance institution Co...

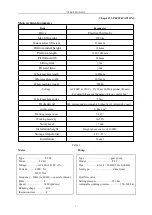
Page 7: ...Whole machine power 2 2kw 2 2kw Hydraulic oil 18L corresponds to wearable hydraulic oil provide by user provide for oneself Air pressure 6 8kg cm2 6 8kg cm2 Working temperature 5 40 5 40 Working humidity 30 95 30 95 Noisy level 76db 76db Installation height Height above sea level 1000M 海拨 1000M Storage temperature 25 55 25 55 Installation Indoor Table 1 Motor Pump Type Y90L Power 2 2kw Voltage AC ...

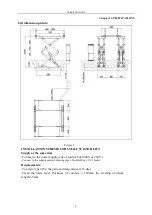
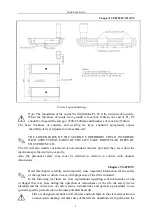
Page 8: ...upply at the same time Connect to the power supply jack of control box 400V or 230V Connect to the compressed air entering pipe of control box ф8 6mm Requirements Concrete type 425 the period of desiccation is 15 days Clean the basic layer thickness of concrete 150mm the leveling of whole length 5mm Picture 3 ...

Page 9: ...maximum specified carrying capacity Also the personnel safety zone must be defined in relation to vehicle with unusual dimensions Chapter 3 SAFETY Read this chapter carefully and completely since important information for the safety of the operator or others in case of improper use of the lift is included In the following text there are clear explanations regarding certain situations of risk or da...

Page 10: ...ter are required to observe the prescriptions of safety regulation in force in the country of installation of the lift Furthermore the operator and maintenance fitter must Always work in the stations specified and illustrated in this manual Never remove or deactivate the guards and mechanical electrical or other types of safety devices Read the safety notices placed on the machine and the safety i...

Page 11: ...y return oil to the oil tank See Picture 8 Each bottom of cylinder is equipped with antiknock valve When the oil pipe is burst in the circuit of hydraulic pressure the relevant antiknock valve will work and limit the speediness of platform Picture 9 Safety tooth and gear module are parts which guarantee the safety of personnel beneath the machine in failure condition of other protections So make s...

Page 12: ...d down operations personnel are prohibited from entering the platforms and the vehicle to avoid falling off RISK OF FALLING VEHICLE This hazard may arise in the case of incorrect positioning of the vehicle on the platforms overweight of the vehicle or in the case of vehicles of dimensions that are not compatible with the capacity of the lift When the platform is being tested the vehicle engine can...

Page 13: ...operations the operator should continually observe the lift and can operate it only in the position of operator When lifting and lowering the vehicle the cushion needs being put in the bottom of chassis The handling of safety devices is strictly forbidden Never exceed the maximum carrying capacity of the lift make sure the vehicles to be lifted have no load It is therefore essential to adhere scru...

Page 14: ...and pneumatic feed of the car lift The room must be 4000 mm in height at least The car lift can be placed on any floor as long as it is perfectly level and sufficiently resistant 250kg cm the thickness of concrete 150mm All parts of the machine must be uniformly lit with sufficient light to make sure that the adjustment and maintenance operations can be performed safely and without reflected light...

Page 15: ...tion of pipe tie in to prevent abnormal thing from entering oil loop and air loop then damaging hydraulic system ELECRICAL CIRCUIT CONNECTION Follow the stated line pathway and line number of the electrical diagram to connect electrical circuit Only skilled person is allowed to perform the operations Open the control box front cover Connection of power supply the 400V three phase and five line con...

Page 16: ...diagram to connect air loop Only skilled and authorized person is allowed to perform the operations Connect Φ8 6 compressed air supply pipe to the air supply jaws of solenoid air valve inside the control box Picture18 Follow air pipe diagram to lead the compressed air pipe out from solenoid air valve and then connect it to the uplifted pawl air valve Picture 19 Pay attention to the protection of w...

Page 17: ...voltage will exist in the control box only authorized person can operate it Main machine oil make up adjustment 1 Close the oil make up stop valve H 2 Press UP button and thus the left platform looking from machine head direction is lifted to about 1000mm 3 Press the DOWN button to lower the left platform to the lowest position 4 Then lift it up to approximately 1400mm 5 Open the oil make up stop ...

Page 18: ...el bar and the horizontal pipe and adjusting the adjustment screws at two sides of the base plate If platform unevenness is resulted from basic unevenness use iron block to fill up the low place After level adjustment insert the central expanded nail of ground bolts and use heavy hammer to hammer it Screw down the ground bolts cap When the expiry date on the maintenance of concrete hasn t arrived ...

Page 19: ... Put the lift rubber cushion on the nucha seat Press UP button lift the platforms and pay attention to the synchronization and placidity of the lifting Check whether safety pawl is correctly located Check whether the oil line and the air line are leakage When begin load test no person or other things are allowed to stand or be put near the two sides and beneath the machine Test vehicle whose weigh...

Page 20: ...ng When the equipment is not used for a long time or over night the machine should be lowered to the lowest position on ground and remove vehicle and cut off power supply Instructions on electric operation see the operation panel LIFTING Press UP button the oil pump will work immediately and pump hydraulic oil to cylinder and the platform is being lifted and the safety pawl is also lifted because ...

Page 21: ...atforms must not be loaded Adjustment process Open the oil make up stop valve H Press UP button the two platforms of the main machine is lifted to the same height Then close the oil make up stop valve H EMERGENCY MANUAL OPERATION FOR LOWERING POWER FAILURE When lowering through manual operation should observe the condition of platform at any time because there are vehicles on the platform If there...

Page 22: ...upper and lower sliding blocks and other movable parts must be lubricated once o month The hydraulic oil must be replaced one time each year The oil level should always be kept at upper limit position The machine should be lower to the lowest position when replace hydraulic oil then let the old oil out and should be filtering the hydraulic oil Each team checks the agility and reliability of pneuma...

Page 23: ... are not released form the safety teeth First lift a little and then lowering The safety pawl is not lifted The air pressure is not enough the safety pawl is stuck or the air pipe is broken off adjust pressure check the air pipe and replace it The solenoid air valve does not work If the solenoid air valve is energized but does not open the air loop check or replace the solenoid air valve The desce...

Page 24: ...y and almost make up oil and adjust every day Replace stop valve and then have make up adjustment again Noisy lifting and lowering Lubrication is not enough Lubricate all hinges and motion parts including piston rod with machine oil The base or the machine is twisted Adjust again the levelness of the machine and fill or pad the base Table 3 ...

Page 25: ...25 APPENDIX Hydraulic schematic diagram 1 master cylinder 2 slave cylinder 3 antiknock valve 5 stop valve 6 check valve 7 overflow valve 8 descent valve 9 throttling valve 10 gear pump 11 motor 12 filter 13 oil tank ...

Page 26: ...USER S MANUAL 26 Oil pipe connection diagram ...

Page 27: ...USER S MANUAL 27 Explosion diagram ...

Page 28: ...USER S MANUAL 28 CYLINDER CONTROL BOX ...

Page 29: ...USER S MANUAL 29 Appendix Circuit diagram 380V ...

Page 30: ...USER S MANUAL 30 Appendix Circuit diagram 220V ...

Page 31: ... 90L4 1 4 PS Switching mode power supply 220V 24V 2A 1 5 HL power lamp AD16 22D S 1 6 IC Programmable controller 20MR 1 7 YV solenoid valve for descent 1 8 SB0 emergency switch XB2 BS542 1 9 SB1 up switch XB2 BA25 1 10 SB2 down switch XB2 BA25 1 11 DQ solenoid air valve for main platform IVBS 2200 3EINC 1 12 SQ limit switch for main platform TZ 8108 1 ...

Reviews: