6.2 Replacing the seat and the ball
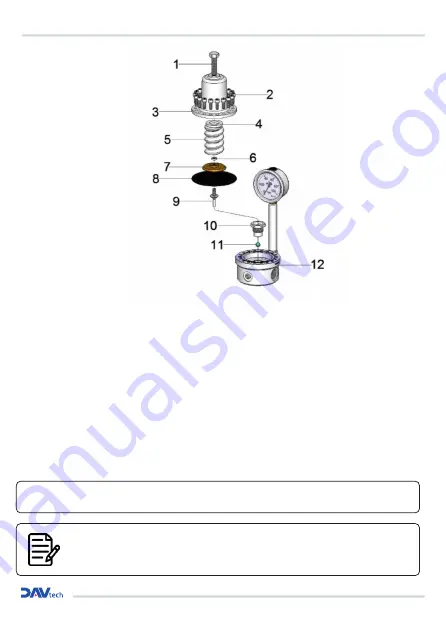
1. Depressurise all connections and shut off the material supply by disconnecting the lines!
2. Unscrew the adjusting rod (1) until you no longer feel any tension on the compression spring.
3. Undo the Allen screws (2) and unscrew them.
4. Remove the lock housing (3).
5. Remove the compression spring (5) and spring counter bearing (4).
6. Loosen the nut (6) and remove the diaphragm counter bearing (7) and diaphragm (8).
7. Pull the valve tappet (9) out of its sealing seat.
8. Unscrew the O-ring (10) and remove the ball (11). The ball spring located below must remain in its position in
the main body (12).
9. Place the new ball on the conical spring and screw in the new seat.
10. Reassemble the device by repeating the same steps in reverse order.
11. Carry out a function test of the device after replacing the seat and the ball!
Fig. 6.2/1
IMPORTANT!
Always replace the seat (10) and the ball (11) together.
!
NOTE! When installing seal seats and balls that have already been used, these must first be
cleaned of all deposits and material residues. Material residues in the sealing seat can cause
leaks in the system, while balls with hardened material residues can damage the sealing seat.
Installation and maintenance guide


