background image

10/31/2016

DAVID ­ DAVID 5 Manual

http://www.david­3d.com/en/support/david5/print­version

27/37


 | 

Scanning


Projector Control

With 

Projector Brightness

 you can reduce the maximum projector brightness digitally. The default value is

the maximum value, 255.

Depending on the used projector, drastic decreases of projector brightness (e.g. from 255 to 20) can
have a significant impact on scan quality. Not only noise will increase, but in some cases you will also
notice waves in your scans.


 | 

Shape Fusion

Introduction
Installation
Setup
Calibration
Scanning
Shape Fusion

Project
List of Scans
Cleaning

Summary of Contents for 5

Page 1: ... 37 Introduction Installation Setup Connections Camera Positioning Camera Setup Projector Setup Calibration Scanning SL Scanning Scan Result Pattern Parameters Camera Control Projector Control Shape Fusion Project List of Scans Cleaning Alignment Fusion A B Distances Comparison 3D Viewer ...

Page 2: ...DAVID 3D Scanner 5 documentation DAVID 5 is a complete solution for generating a watertight 3D surface model of a real world object Videos Tutorial videos for DAVID 5 are not available yet Please feel free to watch our older DAVID 4 tutorial videos the basic principle is similar 1 SLS 2 Tutorial 1 Installation 2 SLS 2 Tutorial 2 Setup 3 SLS 2 Tutorial 3 Calibration 4 SLS 2 Tutorial 4 Scanning Text...

Page 3: ...wer Before you connect any DAVID device to the PC please install the DAVID software and drivers 1 Connect the USB flash drive to your PC then select Browse or Explorer My Computer 2 Start DAVID_Setup_xxx exe administrator rights required 3 Choose Full installation as profile 4 Follow the instructions on the screen You can download a trial current version under Downloads Setup ...

Page 4: ...ctor Setup Calibration Scanning Shape Fusion 3D Viewer After successfully connecting all devices you typically walk through the following steps 1 Setup Type Select DAVID SLS X as Setup Type 2 Projector Setup Here you can select on which display device the stripe pattern is shown Select your projector from the list it will then project the setup pattern 3 Working distance ...

Page 5: ... 4 Projector focus Adjust the focus of the projector with the focus lever so that the stripes are perfectly focused on the object surface 5 Selection of camera s Under Camera Setup select your camera s e g DAVID CAM 3 1 M The live image from the camera s is displayed If you have two cameras you can click on one of the preview images at the right hand side that camera s image will then be shown at ...

Page 6: ...he Exposure should be set to the same value as the frame rate of the projector usually 1 60s otherwise the camera image will flicker pulsate when looking at the projection In this case adjust the exposure time 8 Camera focus Adjusting rings A aperture and B focus C fixing screws Adjust the aperture of the camera dial A so that you will get a rather bright picture Look at the camera image and watch...

Page 7: ...lors Set it so that it shows red areas on the object as little as possible Are more technical view is shows as red curves overlaying the center camera image Consider only those areas in the camera image which show the regular sine waves The displayed intensity curves red must be sinusoidal and may neither be undersaturated nor oversaturated i e the red sine curve see figures should not be cropped ...

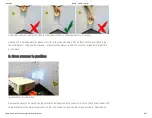
Page 8: ... reaching the blue borders Right Too bright sine is cut off overdriven close the aperture somewhat 10 Fasten screws Fasten all screws projector camera s and camera slide s so that nothing can be displaced from now on The camera lens dials can be fixed with their locking screws C The scanner is now optimized for your object size of the scanning area working distance brightness of the object and mus...

Page 9: ...om en support david5 print version 9 37 Connection diagram If you want to change the video source e g HDMI to VGA follow these instructions 1 Press Source key key on projector 2 Select desired video source using and keys 3 Press key to confirm selection ...

Page 10: ...can area Position of the camera seen from rear up to 110 mm to the left of the projector 110 to 350 mm optional better to the left from 350 mm to the right of the projector If necessary mount the camera slide to the corresponding side The exact position of the slide distance from the projector is set later in operation The distance between the camera and projector optics will be similar to the siz...

Page 11: ...ll object short distances Right Large object greater distances Rotation of the camera Rotate the camera by about 22 such that it aims at the projection area To do this loosen the thumbscrew under the camera Set the rotation angle by means of the degree scale on the camera slide then fix the thumbscrew ...

Page 12: ...little but is only suitable for very flat objects Large camera angles are usually impractical and reduce the depth of the measurement range Using two cameras When using two cameras mount one camera on each side of the projector Both cameras have to see the projected patterns at the same time In most cases both cameras can be set to the same triangulation angle with respect to the projector With tw...

Page 13: ...idth the camera connection might become unstable In that case you can set a Frame Rate Limit that limits the maximum number of camera images per second Scanning will than take longer Setup Projector Setup Setting up the projector as Extended Desktop in Windows Works on most computers Press Win P on your keyboard and select Extended Otherwise Click the right mouse button on a blank area of your Win...

Page 14: ...reen The resolution of the projector must be set to its native value Furthermore you should make sure the projector is set to its native refresh rate Choose the Projector and click Advanced here you should set the refresh rate in the Monitor tab to 60 Hertz When these settings are correct your monitor and projector will show the same desktop wallpaper but otherwise different contents You can move ...

Page 15: ...ys onto the monitor Projector name Native resolution Native refresh rate DAVID SLS 1 Acer K11 800 x 600 60Hz DAVID SLS 2 Acer K132 1280 x 800 60Hz DAVID SLS 3 Acer K132 1280 x 800 60Hz Select Screen In DAVID choose the projector from the list of screens under Projector Setup so that the pattern is projected from the projector Calibration Introduction Installation Setup Calibration Scanning Shape F...

Page 16: ...as a reference object whose dimensions are precisely known 1 Setup calibration panel Setting up the glass calibration panels Set up the calibration corner You will need both 90 fixing brackets and the glass calibration panels Put one fixing bracket flat on the used surface e g a table Insert the glass calibration panels in the fixing bracket Finally attach the second fixing bracket on the glass ca...

Page 17: ... the scanned object The pattern should be slightly larger than the object region to be scanned For object sizes above ca 200 mm use the large 240 mm pattern on the back 3 Move scanner in position Typical setup for calibration Remove the object and set up the glass calibration panels and the scanner in front of each other about the same distance as the object previously so that the projection and c...

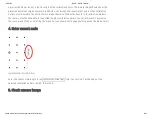
Page 18: ...e visible The entire camera image should be filled with about 15 to 70 calibration markers the camera should not be able to look aside the glass calibration panels You can achieve this by moving the scanner and tilting or adjusting the tripod but you should not change anything above the red base rail 4 Enter correct scale Typical setup for calibration Enter the correct scale length in the Calibrat...

Page 19: ...oftware first measures the position orientation focal length and distortion characteristics of the camera Then a pattern sequence is projected in order to measure the same optical characteristics of the projector If texturing is not turned off finally a white balance is performed After successful calibration a checkerboard pattern is projected the corners of which should fall exactly into the cali...

Page 20: ... entire calibration process must be repeated Scanning Introduction Installation Setup Calibration Scanning SL Scanning Scan Result Pattern Parameters Camera Control Projector Control Shape Fusion 3D Viewer The Scanning menu provides functions to setup scan parameters capture new scans including texture filtering exporting and sending them to Shape Fusion In the following the most basic workflow is...

Page 21: ... recommended or Speed This setting affects scan quality and scan time See also Pattern Parameters 3 Click Start With each click on Start a new scan is generated A sequence of patterns is successively projected and recorded This can take between settings 2 4 seconds or longer See also SL Scanning for scan options Using the mouse you can change the 3D view onto the object see 3D Viewer for details W...

Page 22: ...omatic Turntable mode The Automatic Turntable mode can be used for automatic scanning with the DAVID TT 1 After connecting the turntable select the desired total scan angle and desired number of scans Below the rotation between scans will be shown Click the Scan button to start a scan cycle All scans will be added to the List of Scans and aligned automatically Manual Scan Sequence mode In the Manu...

Page 23: ...und on the table and turn it around the axis perpendicular to the table surface You may not tilt the object during the sequence Manual Turntable You have the object standing on a manual turntable and may only turn the turntable between the scans You may not move or tilt the object on the turntable If you know the rotation angle check the Rotation Angle Known checkbox and enter the rotation angle i...

Page 24: ...ded View Smoothing With the smoothing filters under Scan Result you can smooth the 3D scan result manually However we recommend not to do this set filters to 0 If your scans are noisy or wavy you should rather optimize the scanning conditions brightness settings room conditions More smoothing options are available in the Shape Fusion menu later on Quality Check The filter Quality Check removes sca...

Page 25: ... the box and include a sign if you want to assign automatically incremented numbers in the name The sign will be replaced by the number in the box right of that field when a scan is added to the List of Scans In the Single Scan mode you can manually add the scan to the List of Scans by clicking on the Add to List button Scanning Pattern Parameters The amount and type of projected pattern influence...

Page 26: ...duces noise to the scans For many cameras and situations the lowest or 0 db gain value works best The Exposure should be set to the same value as the frame rate of the projector usually 1 60s otherwise the camera image will flicker pulsate when looking at the projection Increase exposure to multiples of projector frame rate e g to 1 30 1 20 1 15 etc only in cases when your object is too dark When ...

Page 27: ...ss digitally The default value is the maximum value 255 Depending on the used projector drastic decreases of projector brightness e g from 255 to 20 can have a significant impact on scan quality Not only noise will increase but in some cases you will also notice waves in your scans Shape Fusion Introduction Installation Setup Calibration Scanning Shape Fusion Project List of Scans Cleaning ...

Page 28: ...ject subsequently can be exported to various formats to be used e g for 3D printing Shape Fusion Project Use buttons Save Project As and Save Project under Project to save all relevant data like scans fusion result and measurements within a single project file Load Project discards the current project and loads an existing one into DAVID 5 Using projects should be the preferred method to save your...

Page 29: ...upported file formats for import export DAVIDMESH Proprietary DAVID file format All mesh data is saved Default for projects Import Export OBJ 3D object file format from Wavefront Technologies Some meta data is lost in export Import Export STL STereoLithography file format Only geometry is imported and exported Import Export PLY Polygon file format Only geometry is exported Export Right Mouse Butto...

Page 30: ...he surface with the Select Triangles tool 2 You can invert your selection by clicking on Invert Selection 3 A click on Delete Triangles will remove all selected triangles Be careful This can not be undone at the moment Shape Fusion Alignment Single scans prior to alignment arbitrarily arranged Using the buttons Arrange 1D and Arrange 2D under Alignment you can arrange all scans side by side to get...

Page 31: ...eady aligned scans Always choose pairs that have as much overlap common areas as possible In the above example the next step would be to align the yellow to the blue scan click on the yellow then the blue scan etc When all scans are aligned a run of Global Fine Registration is recommended Choose that mode instead of Free then click Align Scans All movements alignments can be individually undone by...

Page 32: ... or more scans in the List of Scans check the checkboxes of the respective scans click with the right mouse button and select Combine selected scans This allows you to group scans temporarily and use them as if they were a single scan In our example we could combine scans 1 and 4 just before the alignment of the 5th In this way the 5th scan will be aligned simultaneously to both which can lead to ...

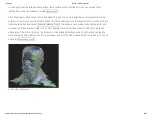
Page 33: ...to the 3D scan points default value is 1 Greater values will make noise more visible Negative values will smooth your fusion result Feel free to try it depending on the object Click on Fuse to start the fusion process This is a computationally intensive process and will take a few seconds to several minutes The visible scans are merged to form a closed triangle mesh holes are optionally closed sma...

Page 34: ...lose holes option Shape Fusion A B Distances A B Distances allows to measure distance values between two surface points 1 Click on Add Distance under A B Distances 2 Click with left mouse button on any surface within 3D window for point A 3 Click with left mouse button on any surface within 3D window for point B ...

Page 35: ... measure signed distances between two surfaces 1 Select a scan and set it as Test Object 2 Select a scan and set it as Reference Object 3 Enter the desired Tolerance mm 4 Click on Compare 5 Add data tips on the reference scan with Add Reference Marker 3D Viewer Introduction Installation Setup Calibration Scanning Shape Fusion 3D Viewer ...

Page 36: ...lick Right click on object surface point That point will be set as the new rotation center point A Auto adjust camera view to all objects or selected objects The rotation center point is set to the center of all scans Select Objects Click with Left Mouse Button on the object you want to select For multi selection hold Ctrl down To deselect all objects click on the background Move Selected Object S...
Page 37: ... the scan around view direction Keyboard Shortcuts Key Shortcut A Auto adjust camera view to all objects or selected objects C Show coordinate systems on off E Show triangle edges on off P Toggle polygon mode between Solid Lines or Points T Show textures on off N Show vertex normals on off These are the shortcuts for the 3D viewer only There are other function specific shortcuts which are displaye...

Reviews: